Jeep Parts Wiki | Ford Parts Wiki
Home | Search | Browse
|
Body Service Manual August 1964 |
|
Prev

 Next
Next
1331191
1331191
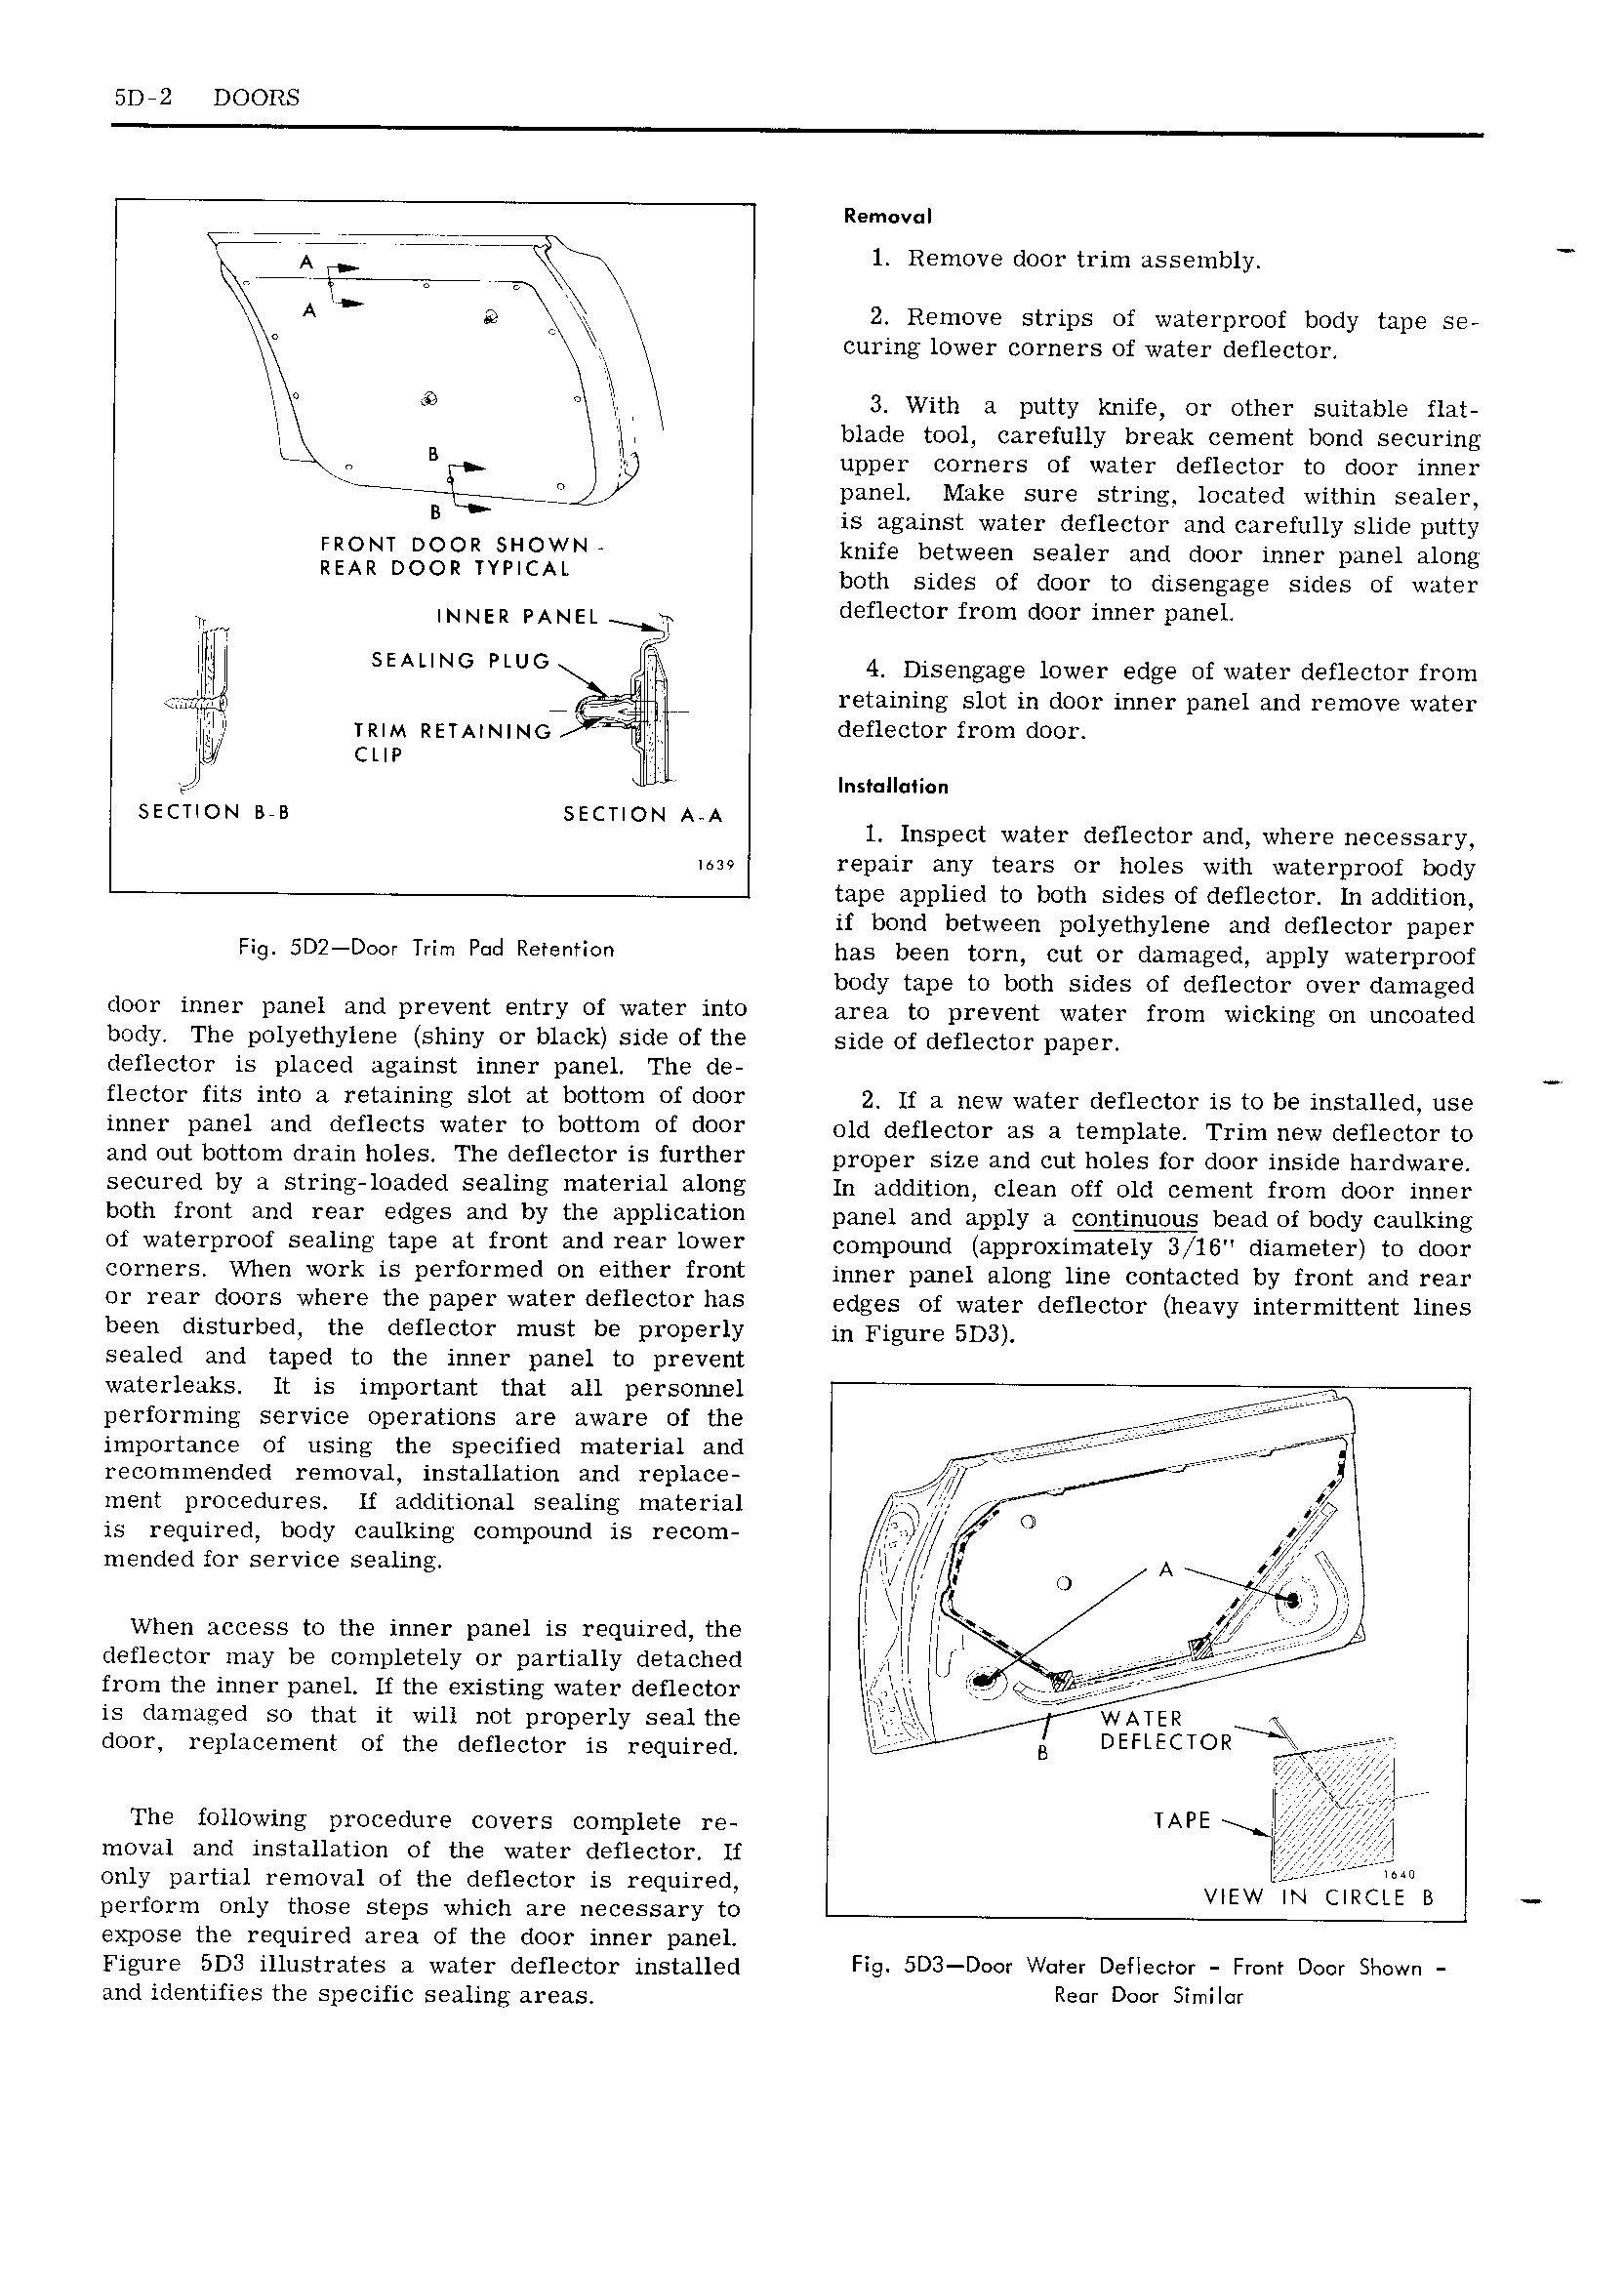
5D 2 DOORS Remevul I 7YQ 1 Remove door trim assembly hmmm 1 I A p 2 Remove strips of waterproof body tape se curing lower corners of water deflector il 3 With a putty knife or other suitable flat I blade tool carefully break cement bond securing B upper corners of water deflector to door inner IK i QA l panel Make sure string located within sealer B is against water deflector and carefully slide putty FRONT DOOR SHOWN A knife between sealer and door inner panel along REAR DOOR YYPICAL both sides of door to disengage sides of water W INNER PANEL T deflector from door inner panel SEAUNG PLUG 4 Disengage lower edge of water deflector from retaining slot in door inner panel and remove water I IlIi TRIM REIAINING I deflector from door It M ctw Q V ns 1 a EcTl0r 1 BYB SECTION A A l Inspect water deflector and where necessary ilu repair any tears or holes with waterproof body tape applied to both sides of deflector In addition if bond between polyethylene and deflector paper Fig 5D2 D r Trim P d Retention has been torn cut or damaged apply waterproof body tape to both sides of deflector over damaged door inner panel and prevent entry of water into area to prevent water from wicking on uncoated body The polyethylene shiny or black side of the side of deflector paper deflector is placed against inner panel The de flector fits into a retaining slot at bottom of door z If n now water deflector is to be installed use i 1 1331191 l diffl ffts WMSY to bottom of d00 old deflector as a template Trim new deflector to and out bottom drain holes The defleCtOI is fllI th 1 proper size and out holes for door inside hardware secured by a string loaded sealing material along In addition clean off old cement from door inner both front and rear edges and by the application panel and apply 3 continuous bond or body ooulking of waterproof sealing tape at front and rear lower compound approximately 3 l6 diameter to door corners When work is performed on either front inner pane along ling contacted by front and year GF 1 l1 d00FS Wh 1 the P3l 1 W t Y d fl Ct0 has edges of water deflector heavy intermittent lines been disturbed the deflector must be properly in Figure 593 sealed and taped to the inner panel to prevent waterleaks It is important that all personnel i i1 performing service operations are aware of the iii if importance of using the specified material and rzze eoi fig recommended removal installation and I pl3C ment procedures If additional sealing material I is required body caulking compound is recom i mended for service sealing I L I H 0 A I M t l it wl When access to the inner panel is 1 eqUi1 d th V tI I 7 rr deflector may be completely or partially Cl t21Cll d t Iil tt I from the inner panel If the existing water deflector I II I t n is damaged so that it will not properly seal the door replacement of the deflector is required t l B DEFLECTOR The following procedure covers complete re IAPE moval and installation of the water deflector If only partial removal of the deflector is required VIEW I EIRCI1 uB perform only those steps which are necessary to expose the required area of the door inner panel Figure 5DS illustrates a water deflector installed Fig 5D3 D r W t r D l t r Fr D r h and identifies the specific sealing areas Rem D r Ymll

 Next
Next