Jeep Parts Wiki | Ford Parts Wiki
Home | Search | Browse | Marketplace | Messages | FAQ | Guest
|
Body Service Manual August 1964 |
|
Prev

 Next
Next
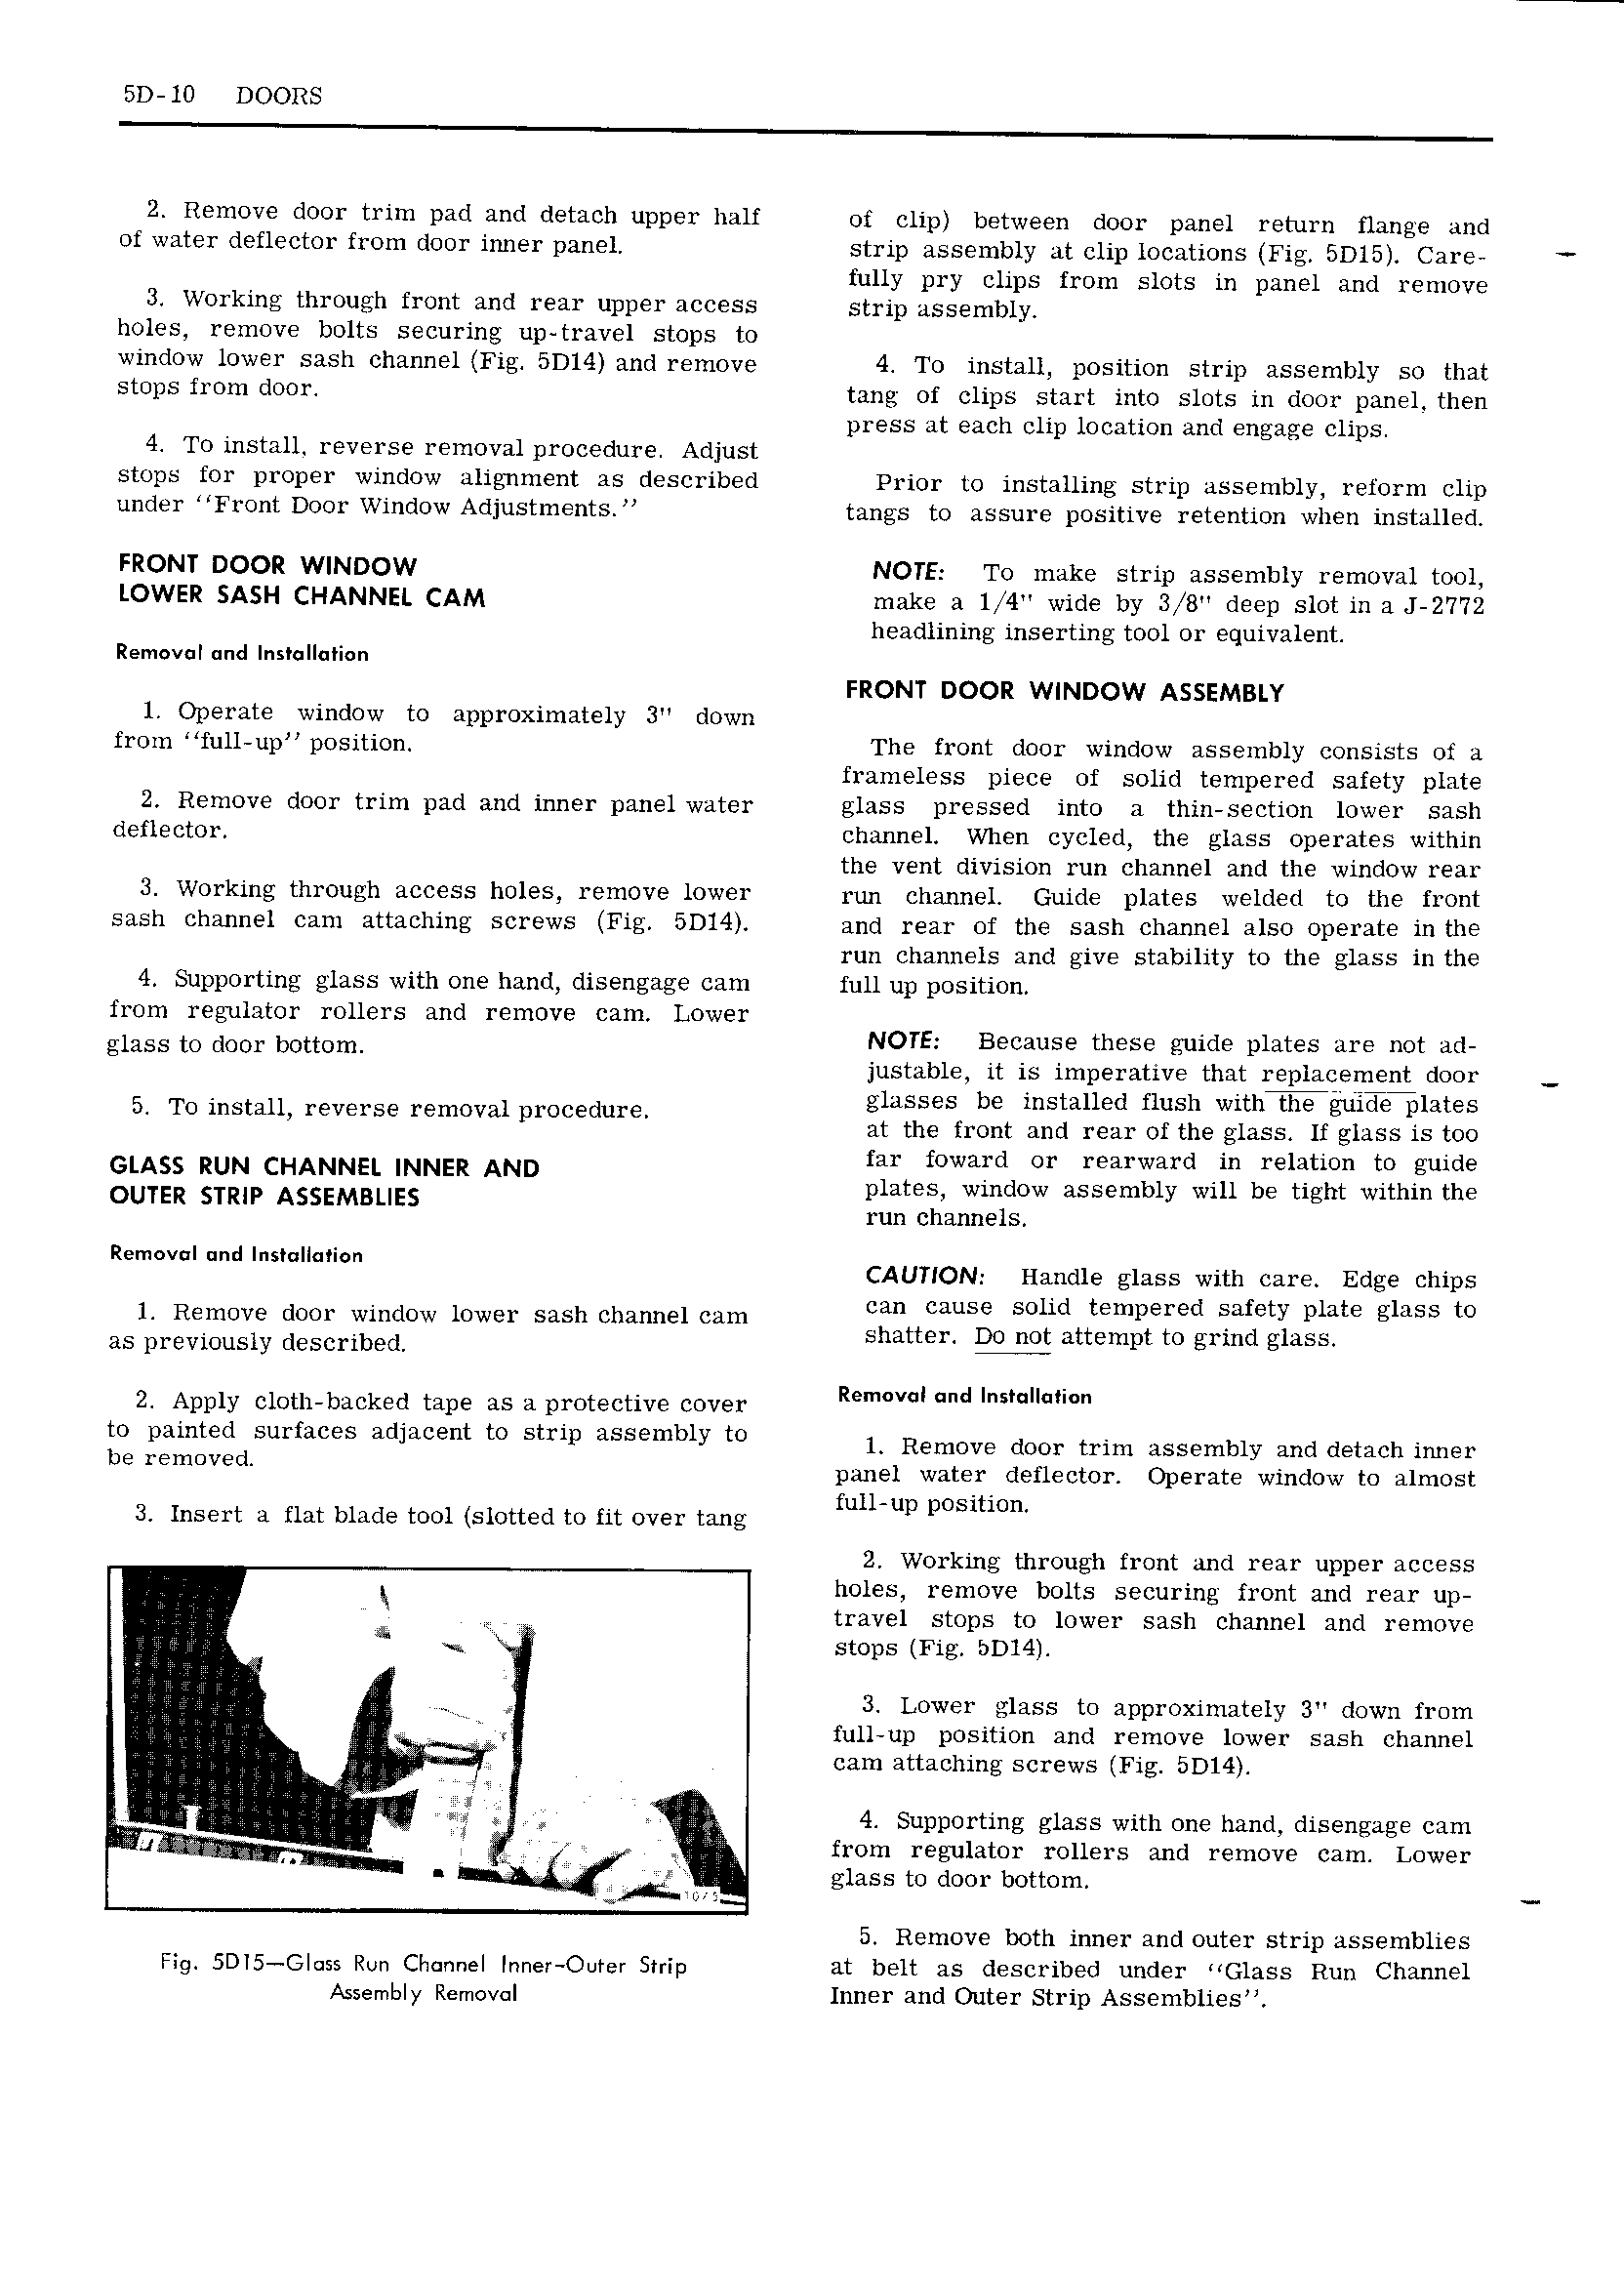
5D 10 DOORS 2 Remove door trim pad and detach upper half of clip between door panel return flange and of water deflector from door inner panel strip assembly at clip locations Fig 5Dl5 Care fully pry clips from slots in panel and remove 3 Working through front and rear upper access strip assembly holes remove bolts securing up travel stops to window lower sash channel Fig 4 5D14 and remove 44 To install position strip assembly so that stops from door4 tang of clips start into slots in door panel then press at each clip location and engage clips 44 To install reverse removal procedure Adjust stops for proper window alignment as described Prior to installing strip assembly reform clip under Front Door Window Adjustments tangs to assure positive retention when installed FRONT DOOR WINDOW NOTE To make strip assembly removal tool LOWER SASH CHANNEL CAM make a l Y4 wide by 3 8 deep slot in a J 2772 headlining inserting tool or equivalent Removal und Instollution FRONT DOOR WINDOW ASSEMBLY l Operate window to approximately 3 down from full up position The front door window assembly consists of a frameless piece of solid tempered safety plate 2 Remove door trim pad and inner panel water glass pressed into a thin section lower sash deflector channel When cycled the glass operates within the vent division run channel and the window rear 3 Working through access holes remove lower run channel Guide plates welded to the front sash channel cam attaching Screws Fig 5Dl4 and rear of the sash channel also operate inthe run channels and give stability to the glass in the 4 Supporting glass with one hand disengage cam full up position from regulator rollers and remove cam Lower glass to door bOttOm NOTE Recause these guide plates are not ad justable it is imperative that replacement door lasses be installed flush with the guidexlates 54 1 1 1 g 4 T0 lmtd l revel be Hmmm pmcecure at the front and rear of the glass If glass is too GLASS A e f3 t 2 2 L f e 1Z i iiT b E2 1i E2h i iE OUTER STRIP ASSEMBLIES run channels Remm I and InSI II n CAUTION Handle glass with care Edge chips 1 Remove door window lower sash channel cam gllttcausg S0 dttt n I e 8d Eaffti glam glass to as previously aesmbea S A L Emp g 5 he 24 Apply cloth backed tape as a protective cover R V I d I I II II to painted surfaces adjacent to strip assembly to 1 Removg dom trim ussemblv and detach mum be I m V I panel water deflector Operate window to almost f ll t 3 Insert a flat blade tool slotted to fit over tang u up PCSI mn 2 Working through front and rear upper access j holes remove bolts securing front and rear up travel stops to lower sash channel and remove X stops Fig bDl4 1 3 Lower glass to approximately 3 down from 4 full up position and remove lower sash channel M I cam attaching screws Fig 5D14 Q I t 4 Supporting glass with one hand disengage CHH1 ir K from regulator rollers and remove cam Lower n glass to door bottom 5 Remove both inner and outer strip assemblies Fig 5Dl5 GI ss Run Channel Inner Ourer Strip at belt as described under Glass Run Channel Assembly Removal Inner and Outer Strip Assemblies

 Next
Next