Jeep Parts Wiki | Ford Parts Wiki
Home | Search | Browse | Marketplace | Messages | FAQ | Guest
|
Body Service Manual August 1964 |
|
Prev

 Next
Next
511619
511619
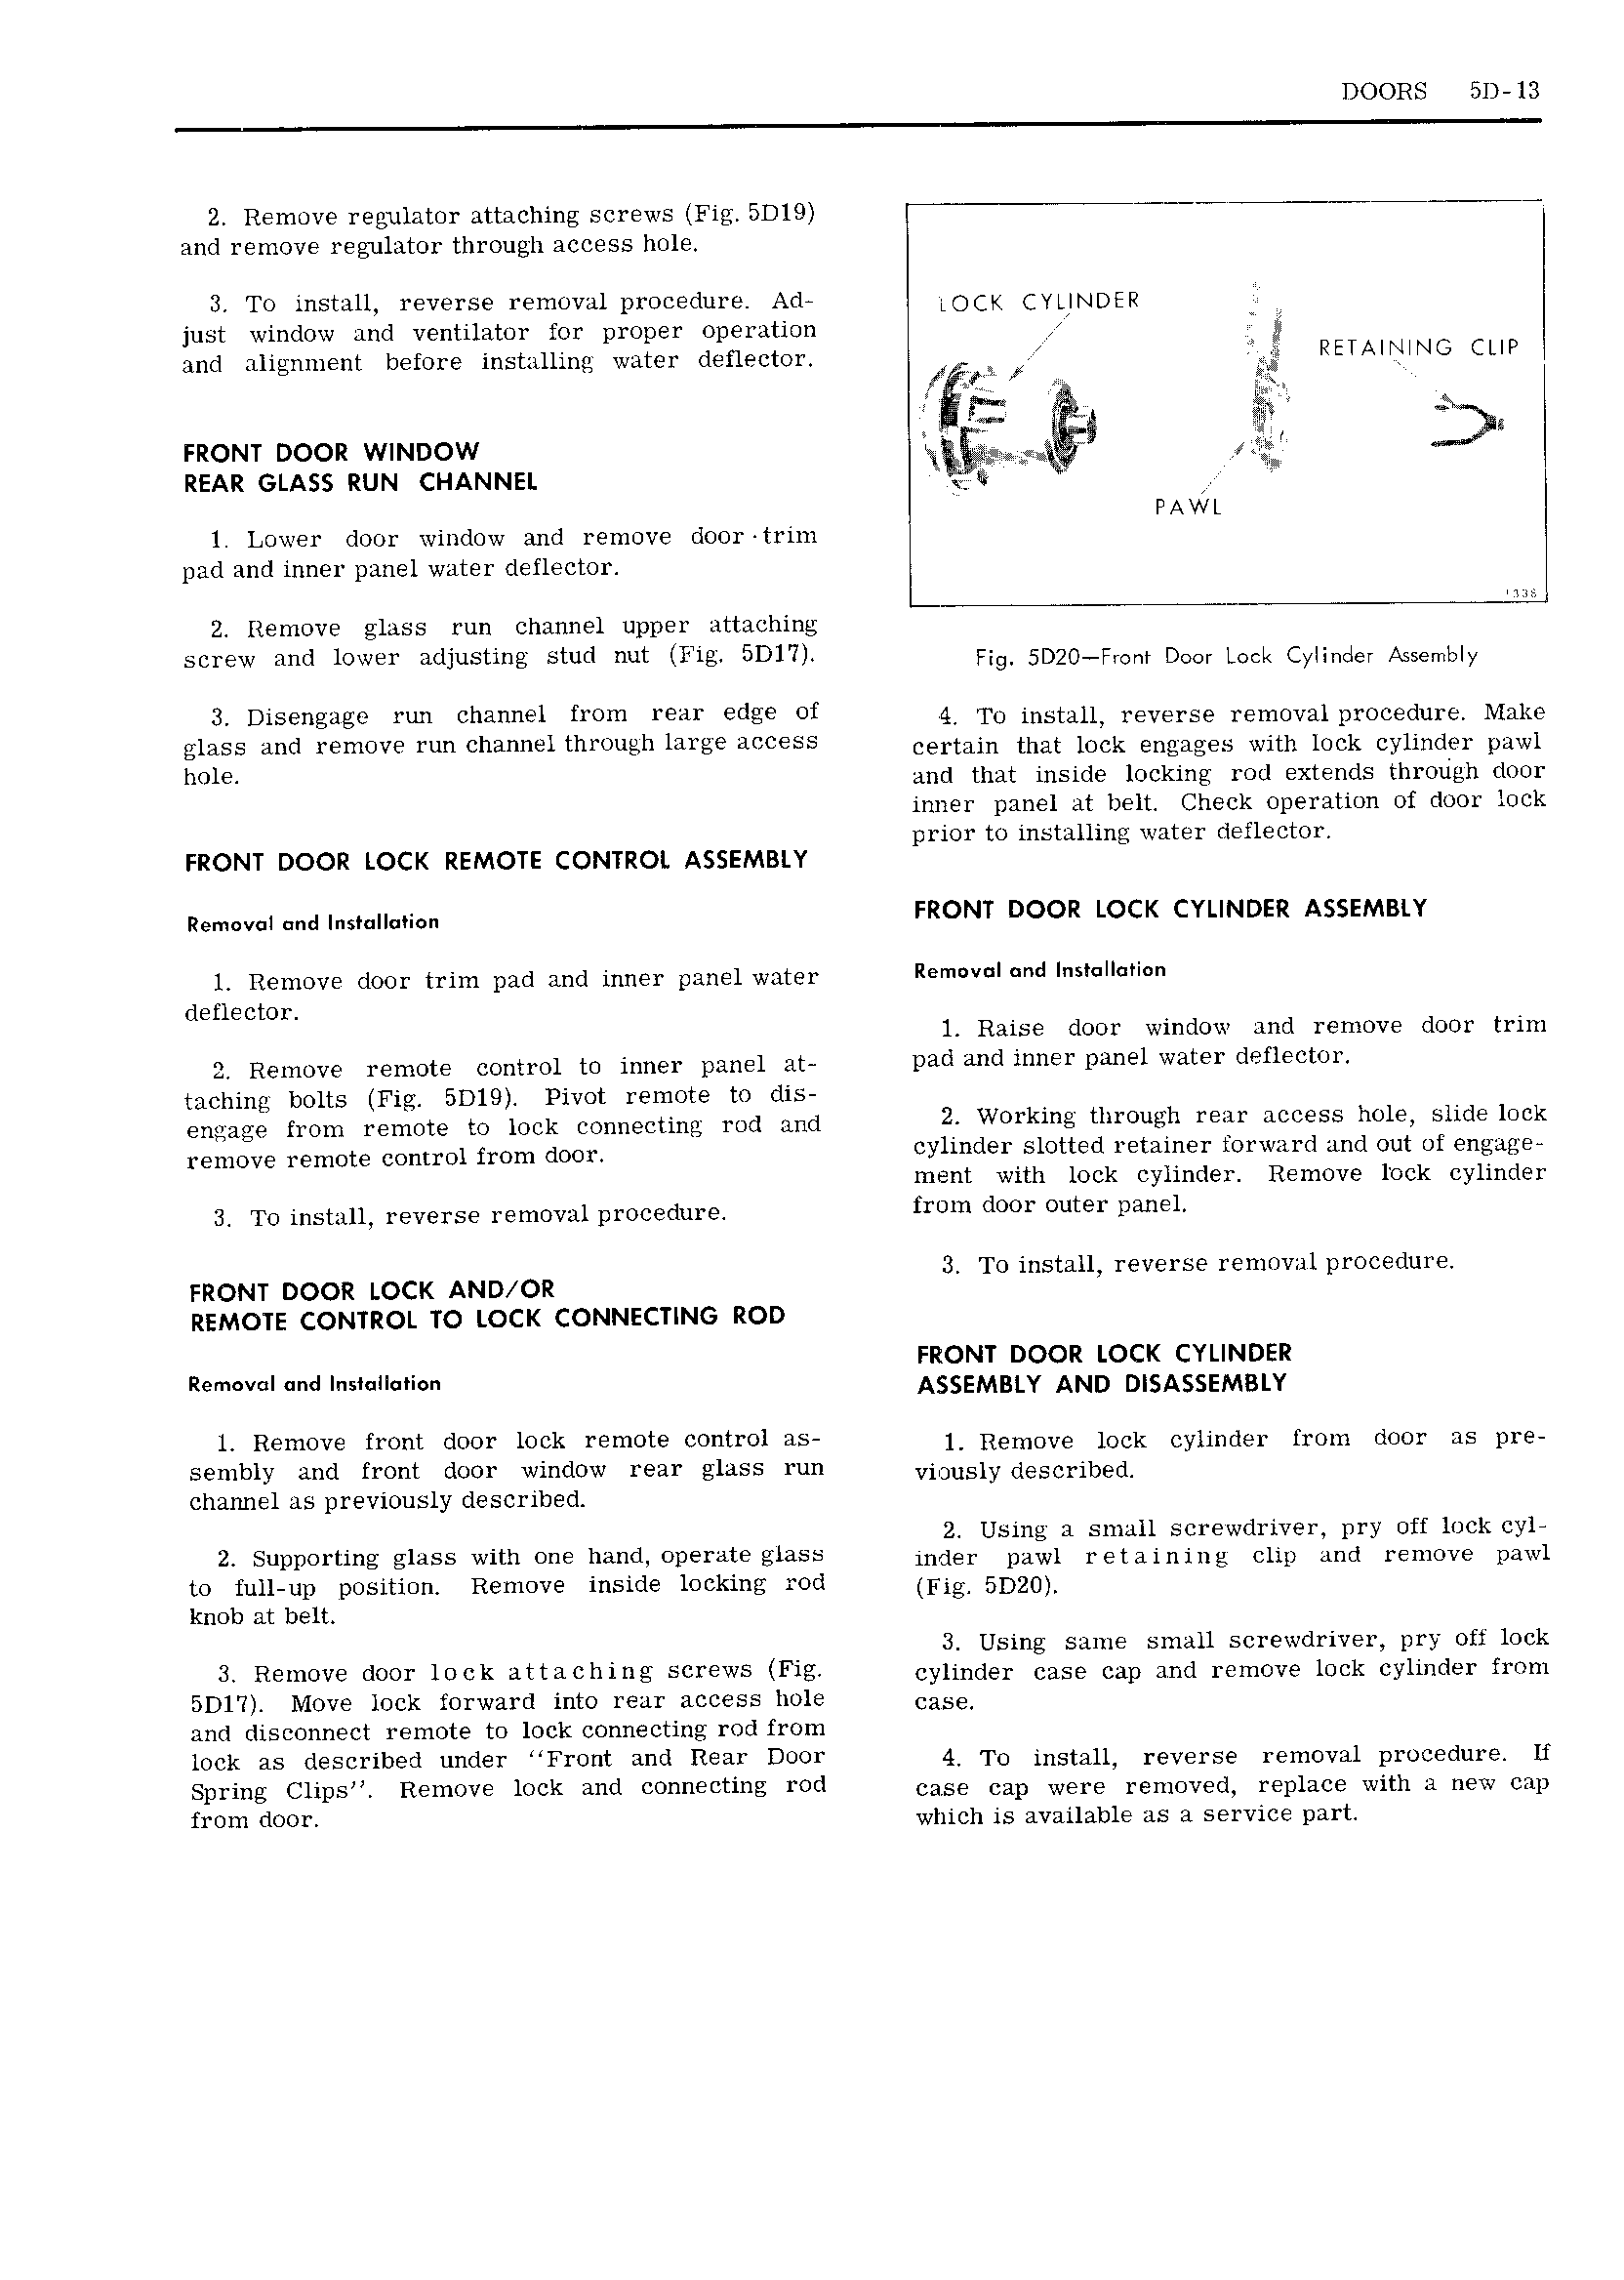
DOORS 5D 13 2 Remove regulator attaching screws Fig 5D19 Q 7 and remove regulator through access hole 3 To install reverse removal procedure Ad OCR CYUNDER just window and ventilator for proper operation and alignment before installing water deflector U g RElA f ilN i CUP R 9 get 2 I FRONT DOOR WINDOW fg rtw i REAR GLASS RUN CHANNEL rw PAWL 1 Lower door window and remove door trim pad and inner panel water deflector 2 Remove glass run channel upper attaching screw and lower adjusting stud nut Fig 5D17 Fig 5D20 Front Dom Lock Cylinder Assembly 3 DiS QL I 0 1 Im Channel YYOIH 1i1 edi Of 4 To install reverse removal procedure Make glass and remove run channel through large access cermm that mck engages with luck Cvlmdm puwl hO1 and that inside locking rod extends through door inner panel at belt Check operation of door lock prior to installing water deflector FRONT DOOR LOCK REMOTE CONTROL ASSEMBLY Removal and S FRONT DOOR LOCK CYLINDER ASSEMBLY 1 Remove door trim pad and inner panel water R m V Md deflector 1 Raise door window and remove door trim 2 Remove remote control to inner panel at l 3d di F D 1 W3 i 1 d f1 t0 taching bolts Fig 5D19 Pivot remote to dis I engage from remote to lock connecting rod and 2 Workmg thYOuEYh mil JGCQSS hole 511619 IUCK remove remote control from door cylinder slotted retainer forward and out of engage ment with lock cylinder Remove lock cylinder 3 To install reverse removal procedure from l00i Outer D3 1 3 To install reverse removal procedure FRONT DOOR LOCK AND OR REMOTE CONTROL TO LOCK CONNECTING ROD I FRONT DOOR LOCK CYLINDER Re V ASSEMBLY AND DISASSEMBLY 1 Remove front door lock remote control as Remmie lock Cyimdey mm door as pre sembly and front door window rear glass run vi 3uS yd scrib d channel as previously described f 2 Using a small screwdriver pry off lock cyl 2 Suiipvrline eliiss with we 1i i 1 1 riiie skies inner pawi retaining cnn and remove nnwi to full up position Remove inside locking rod Fig 5Dgg knob at belt 3 Using same small screwdriver pry off lock 3 Remove d r lock attaching Screws Fig cylinder ease cap and remove inck eyiinner from 5D1 Move lock forward into rear access hole case and disconnect remote to lock connecting rod from lock as described under Front and Rear Door 4 T0 msmip reverse removal p 0n dm g lj SPUUEQ CUPS RGUTOVE IOCK and COUHECUDS i I case cap were removed replace with a new cap from d00F which is available as a service part

 Next
Next