Jeep Parts Wiki | Ford Parts Wiki
Home | Search | Browse
|
Body Service Manual August 1964 |
|
Prev

 Next
Next
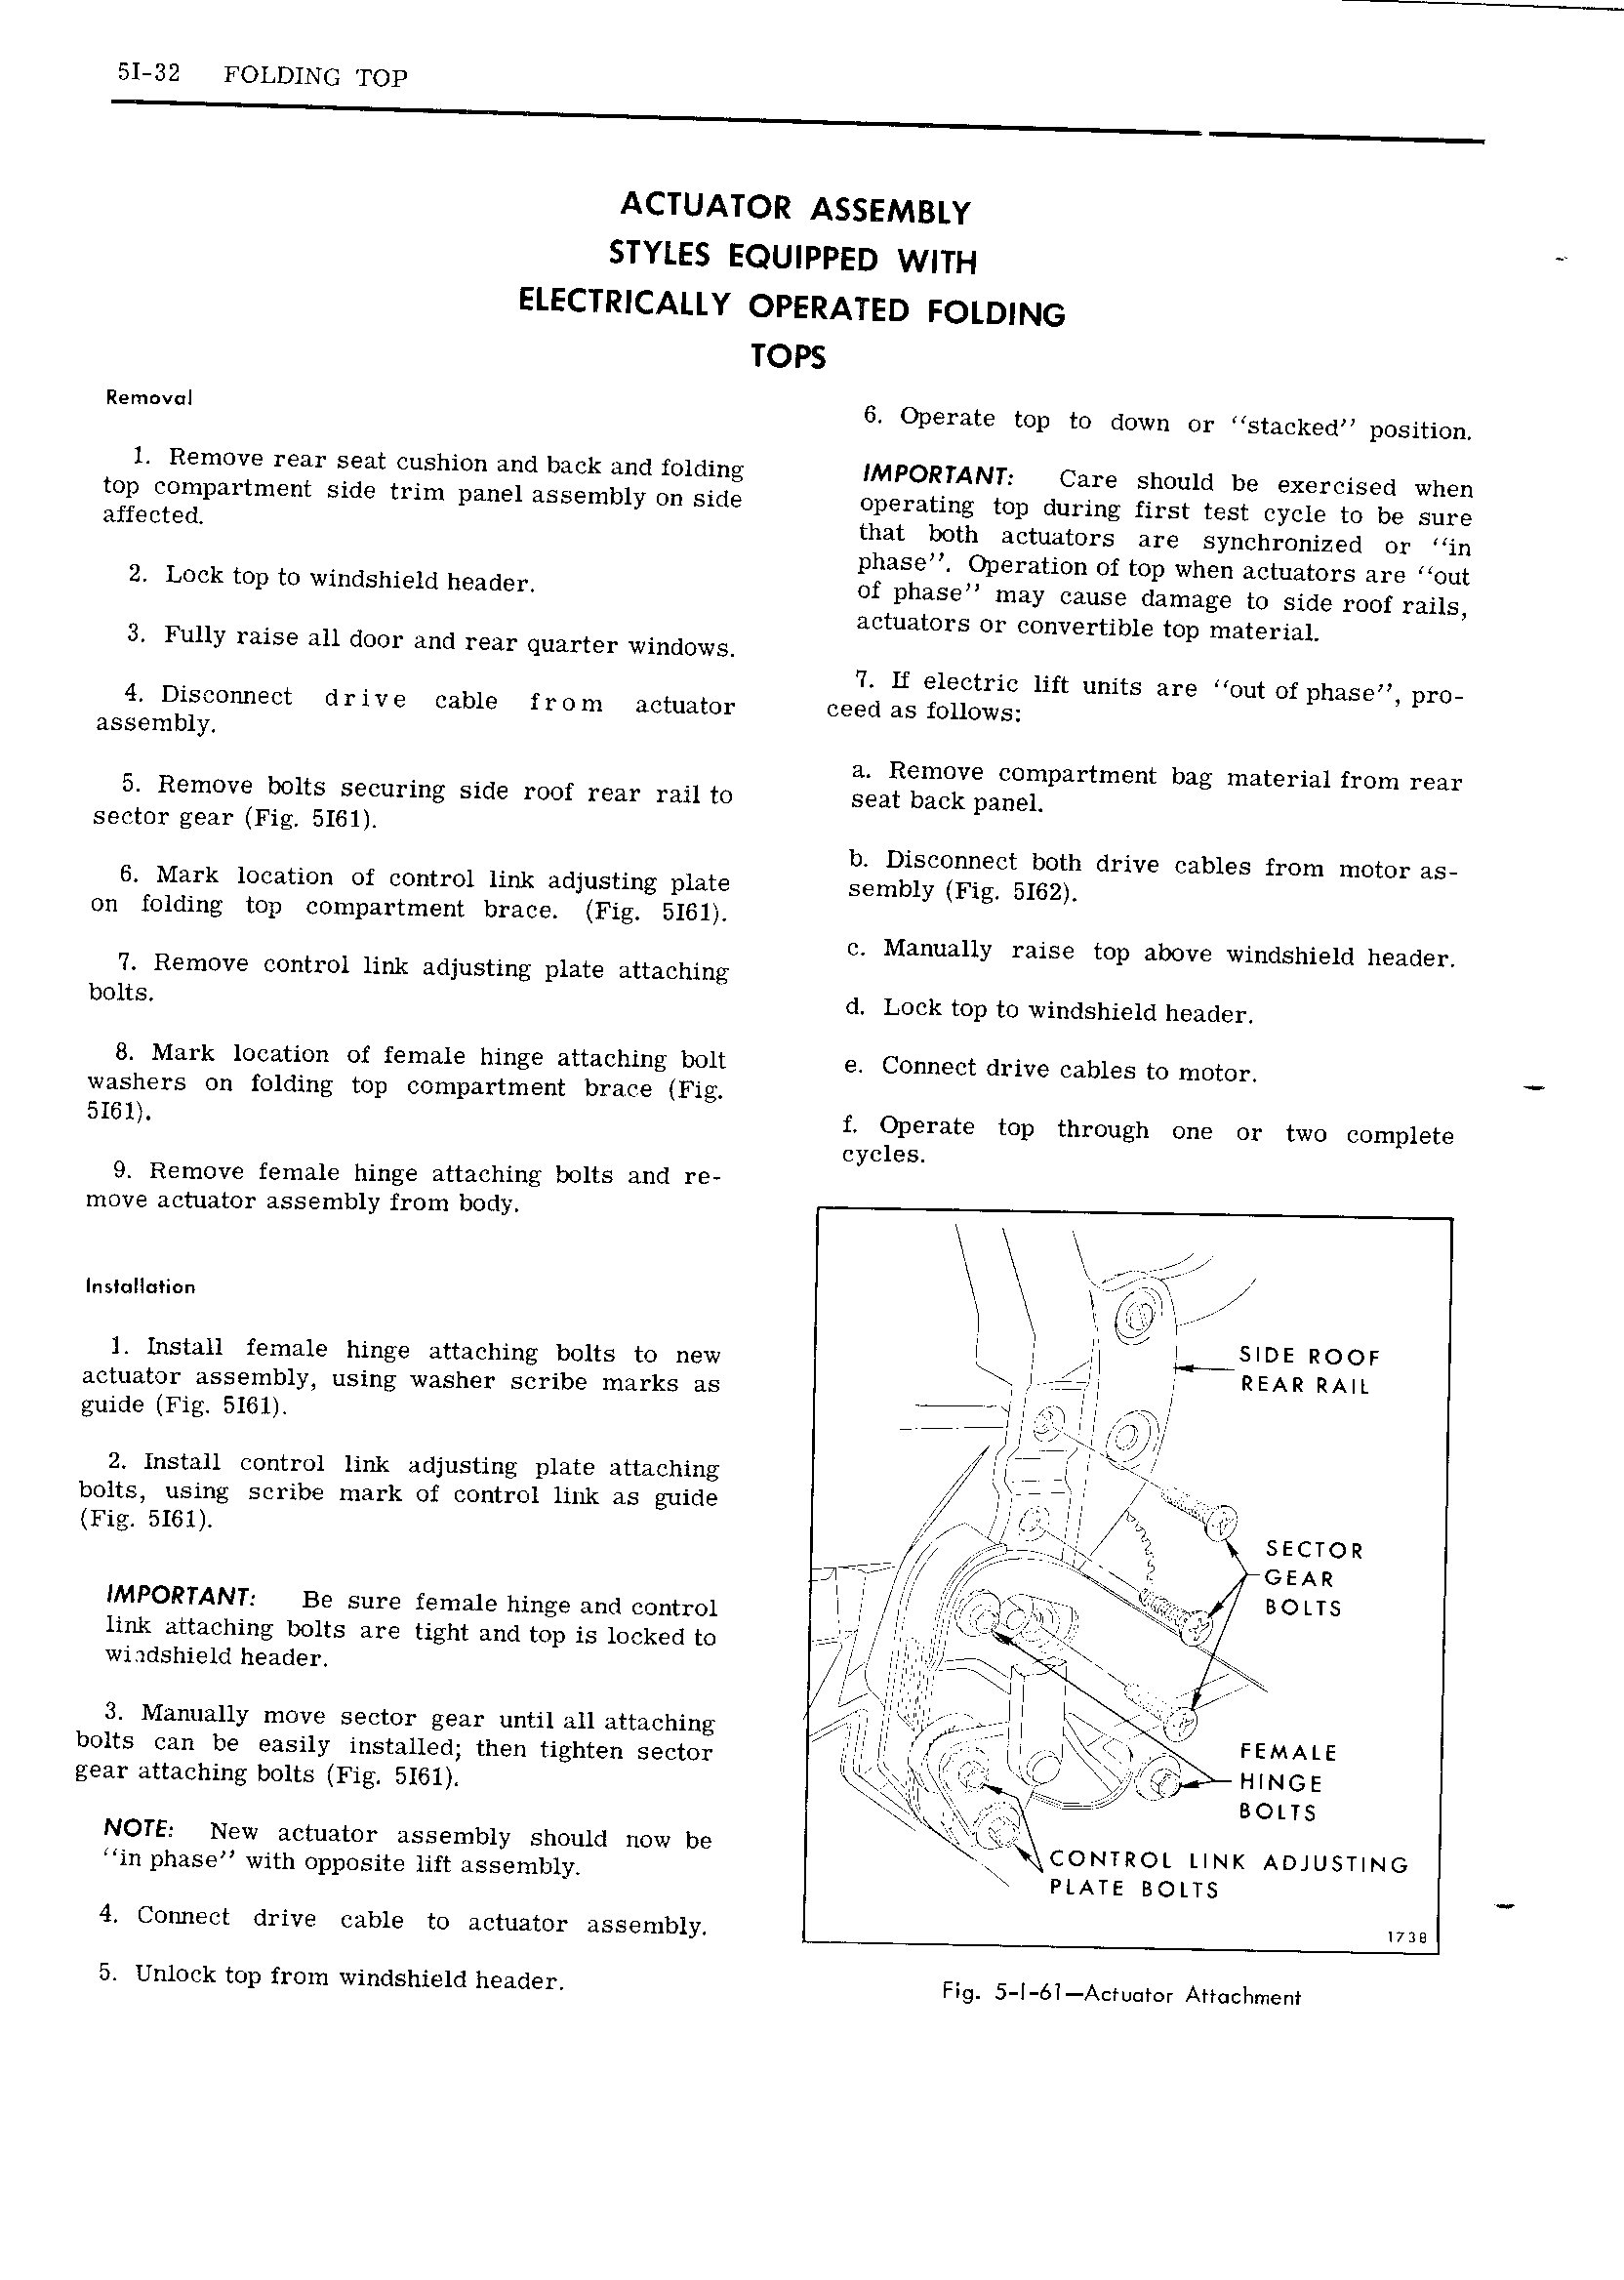
51 32 FOLDING TOP ACTUATOR ASSEMBLY STYLES EQUIPPED WITH ELECTRICALLY OPERATED FOLDING TOPS Removal 6 Operate top to down or stacked position 1 Remove rear seat cushion and back and folding IMPORTANT Care should be exercised when top compartment side trim panel assembly on side operating top during first test cycle to be sure affected that both actuators are synchronized or in phase Operation of top when actuators are out 2 Lock top to windshield header of phase may cause damage to side roof rails actuators or convertible top material 3 Fully raise all door and rear quarter windows 7 If electric lift units are out of phase pro 4 Disconnect drive cable from actuator ceed as follows assembly a Remove compartment bag material from rear 5 Remove bolts securing side roof rear rail to seat back panel sector gear Fig 5161 b Disconnect both drive cables from motor as 6 Mark location of control link adjusting plate sembly Fig 5162 on folding top compartment brace Fig 5161 c Manually raise top above windshield header 7 Remove control link adjusting plate attaching bolts d Lock top to windshield header 8 Mark location of female hinge attaching bolt e Connect drive cables to motor washers on folding top compartment brace Fig 5I6 f Operate top through one or two complete cycles 9 Remove female hinge attaching bolts and re move actuator assembly from body N Installation y j a 1 x M X I l Install female hinge attaching bolts to new Y L i El ERRRiiF actuator assembly using washer scribe marks as K j guide Fig 5161 7 QI I I I 7 WP 2 Install control link adjusting plate attaching Iii s I bolts using scribe mark of control link as guide Ii 55 yy Fig 5I61 Q It by secron I GEAR IMPORTANT J w j sous 1 Be sure female hinge and control I I I i yp I link attaching bolts are tight and top is locked to I gp rig Is windshield header I D v I 3 Manually move sector gear until all attaching QI j iiiII Q FEMAUE bolts can be easily installed then tighten sector M I y i y ji I it I HINGE gear attaching bolts Fig 5161 E i 5 VX BOLTS NOTE New actuator assembly should now be i iy CONTROL LINK ADJUSTING in phase with opposite lift assembly PLATE BOLTS 4 Connect drive cable to actuator assembly 5 Unlock top from windshield header Fig 5 I 6I A tn r r Attachment

 Next
Next