Jeep Parts Wiki | Ford Parts Wiki
Home | Search | Browse
Prev

 Next
Next
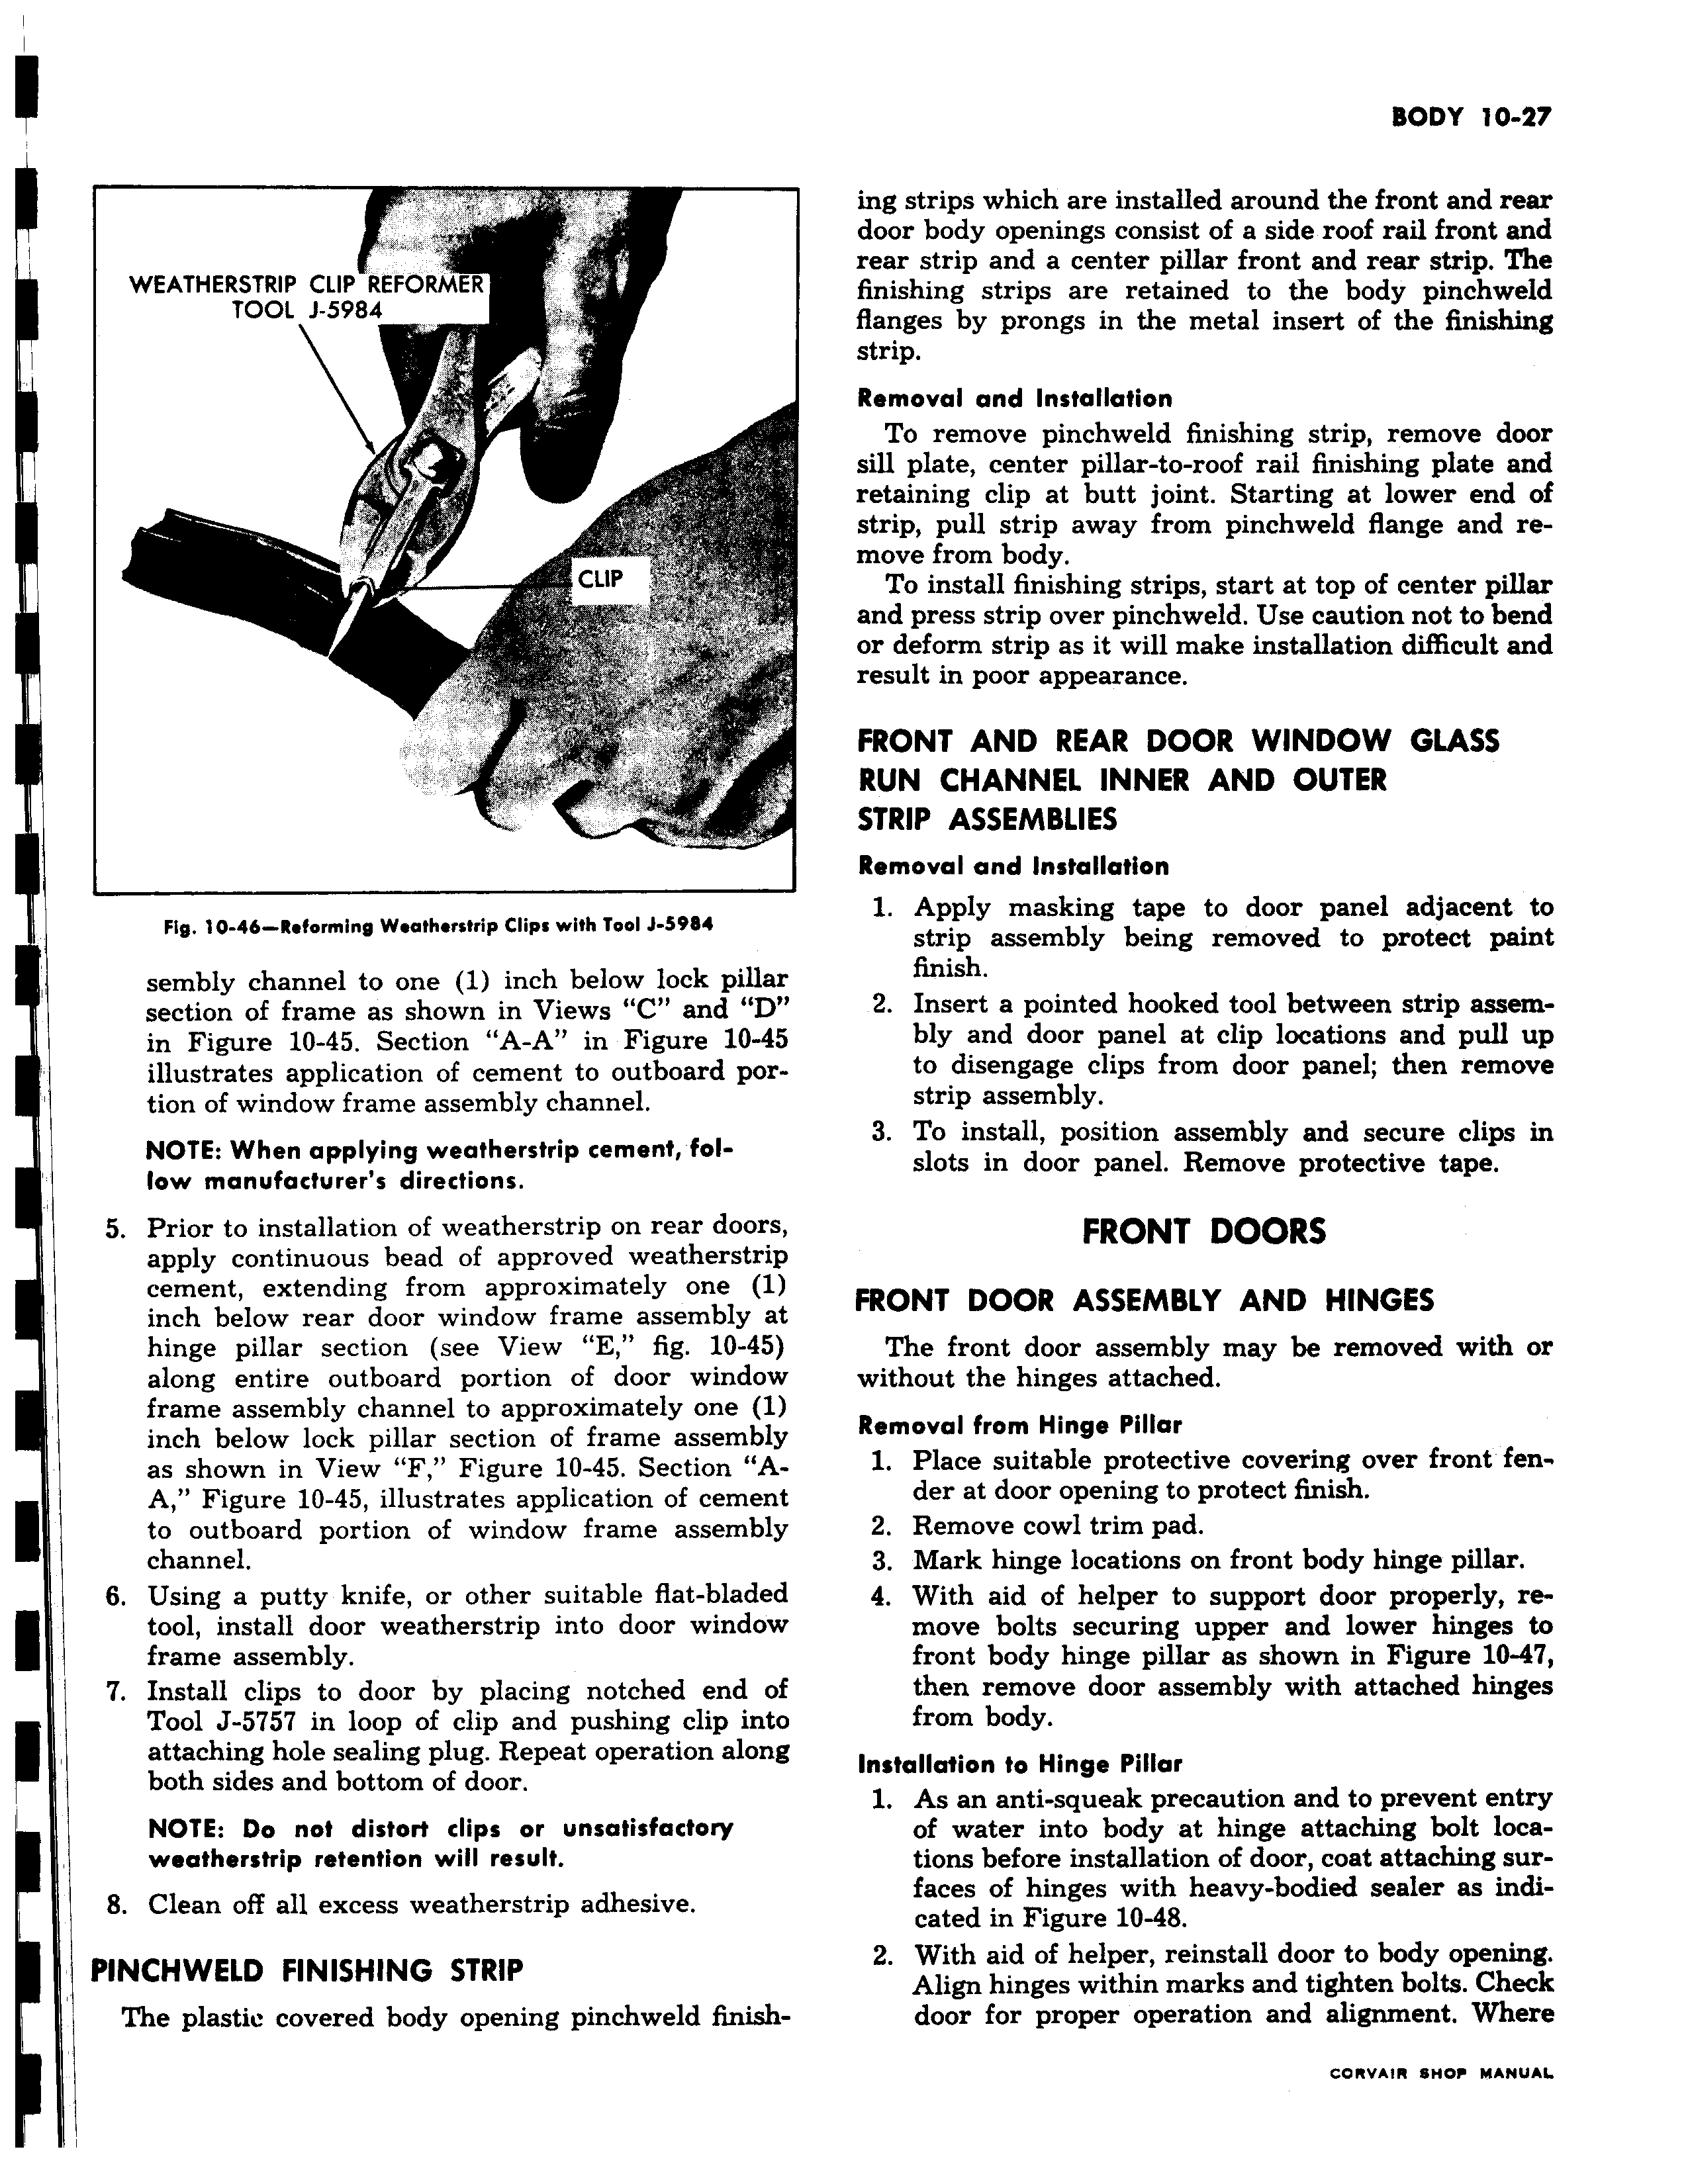
WEATHERSTRIP CLIP REFORMER r TOOL J 5984 I CLIP o Fig 10 46 Reforming Weatherstrip Clips with Tool J 5984 sembly channel to one 1 inch below lock pillar section of frame as shown in Views C and D in Figure 10 45 Section A A in Figure 10 45 illustrates application of cement to outboard portion of window frame assembly channel NOTE When applying weatherstrip cement follow manufacturer s directions 5 Prior to installation of weatherstrip on rear doors apply continuous bead of approved weatherstrip cement extending from approximately one 1 inch below rear door window frame assembly at hinge pillar section see View E fig 10 45 along entire outboard portion of door window frame assembly channel to approximately one 1 inch below lock pillar section of frame assembly as shown in View F Figure 10 45 Section AA Figure 10 45 illustrates application of cement to outboard portion of window frame assembly channel 6 Using a putty knife or other suitable flat bladed tool install door weatherstrip into door window frame assembly 7 Install clips to door by placing notched end of Tool J 5757 in loop of clip and pushing clip into attaching hole sealing plug Repeat operation along both sides and bottom of door NOTE Do not distort dips or unsatisfactory weatherstrip retention will result 8 Clean off all excess weatherstrip adhesive PINCHWELD FINISHING STRIP The plastic covered body opening pinchweld finish ing strips which are installed around the front and rear door body openings consist of a side roof rail front and rear strip and a center pillar front and rear strip The finishing strips are retained to the body pinchweld flanges by prongs in the metal insert of the finishing strip Removal and Installation To remove pinchweld finishing strip remove door sill plate center pillar to roof rail finishing plate and retaining clip at butt joint Starting at lower end of strip pull strip away from pinchweld flange and remove from body To install finishing strips start at top of center pillar and press strip over pinchweld Use caution not to bend or deform strip as it will make installation difficult and result in poor appearance FRONT AND REAR DOOR WINDOW GLASS RUN CHANNEL INNER AND OUTER STRIP ASSEMBLIES Removal and Installation 1 Apply masking tape to door panel adjacent to strip assembly being removed to protect paint finish 2 Insert a pointed hooked tool between strip assembly and door panel at clip locations and pull up to disengage clips from door panel then remove strip assembly 3 To install position assembly and secure clips in slots in door panel Remove protective tape FRONT DOORS FRONT DOOR ASSEMBLY AND HINGES The front door assembly may be removed with or without the hinges attached Removal from Hinge Pillar 1 Place suitable protective covering over front fender at door opening to protect finish 2 Remove cowl trim pad 3 Mark hinge locations on front body hinge pillar 4 With aid of helper to support door properly remove bolts securing upper and lower hinges to front body hinge pillar as shown in Figure 10 47 then remove door assembly with attached hinges from body Installation to Hinge Pillar 1 As an anti squeak precaution and to prevent entry of water into body at hinge attaching bolt locations before installation of door coat attaching surfaces of hinges with heavy bodied sealer as indicated in Figure 10 48 2 With aid of helper reinstall door to body opening Align hinges within marks and tighten bolts Check door for proper operation and alignment Where

 Next
Next