Jeep Parts Wiki | Ford Parts Wiki
Home | Search | Browse
Prev

 Next
Next
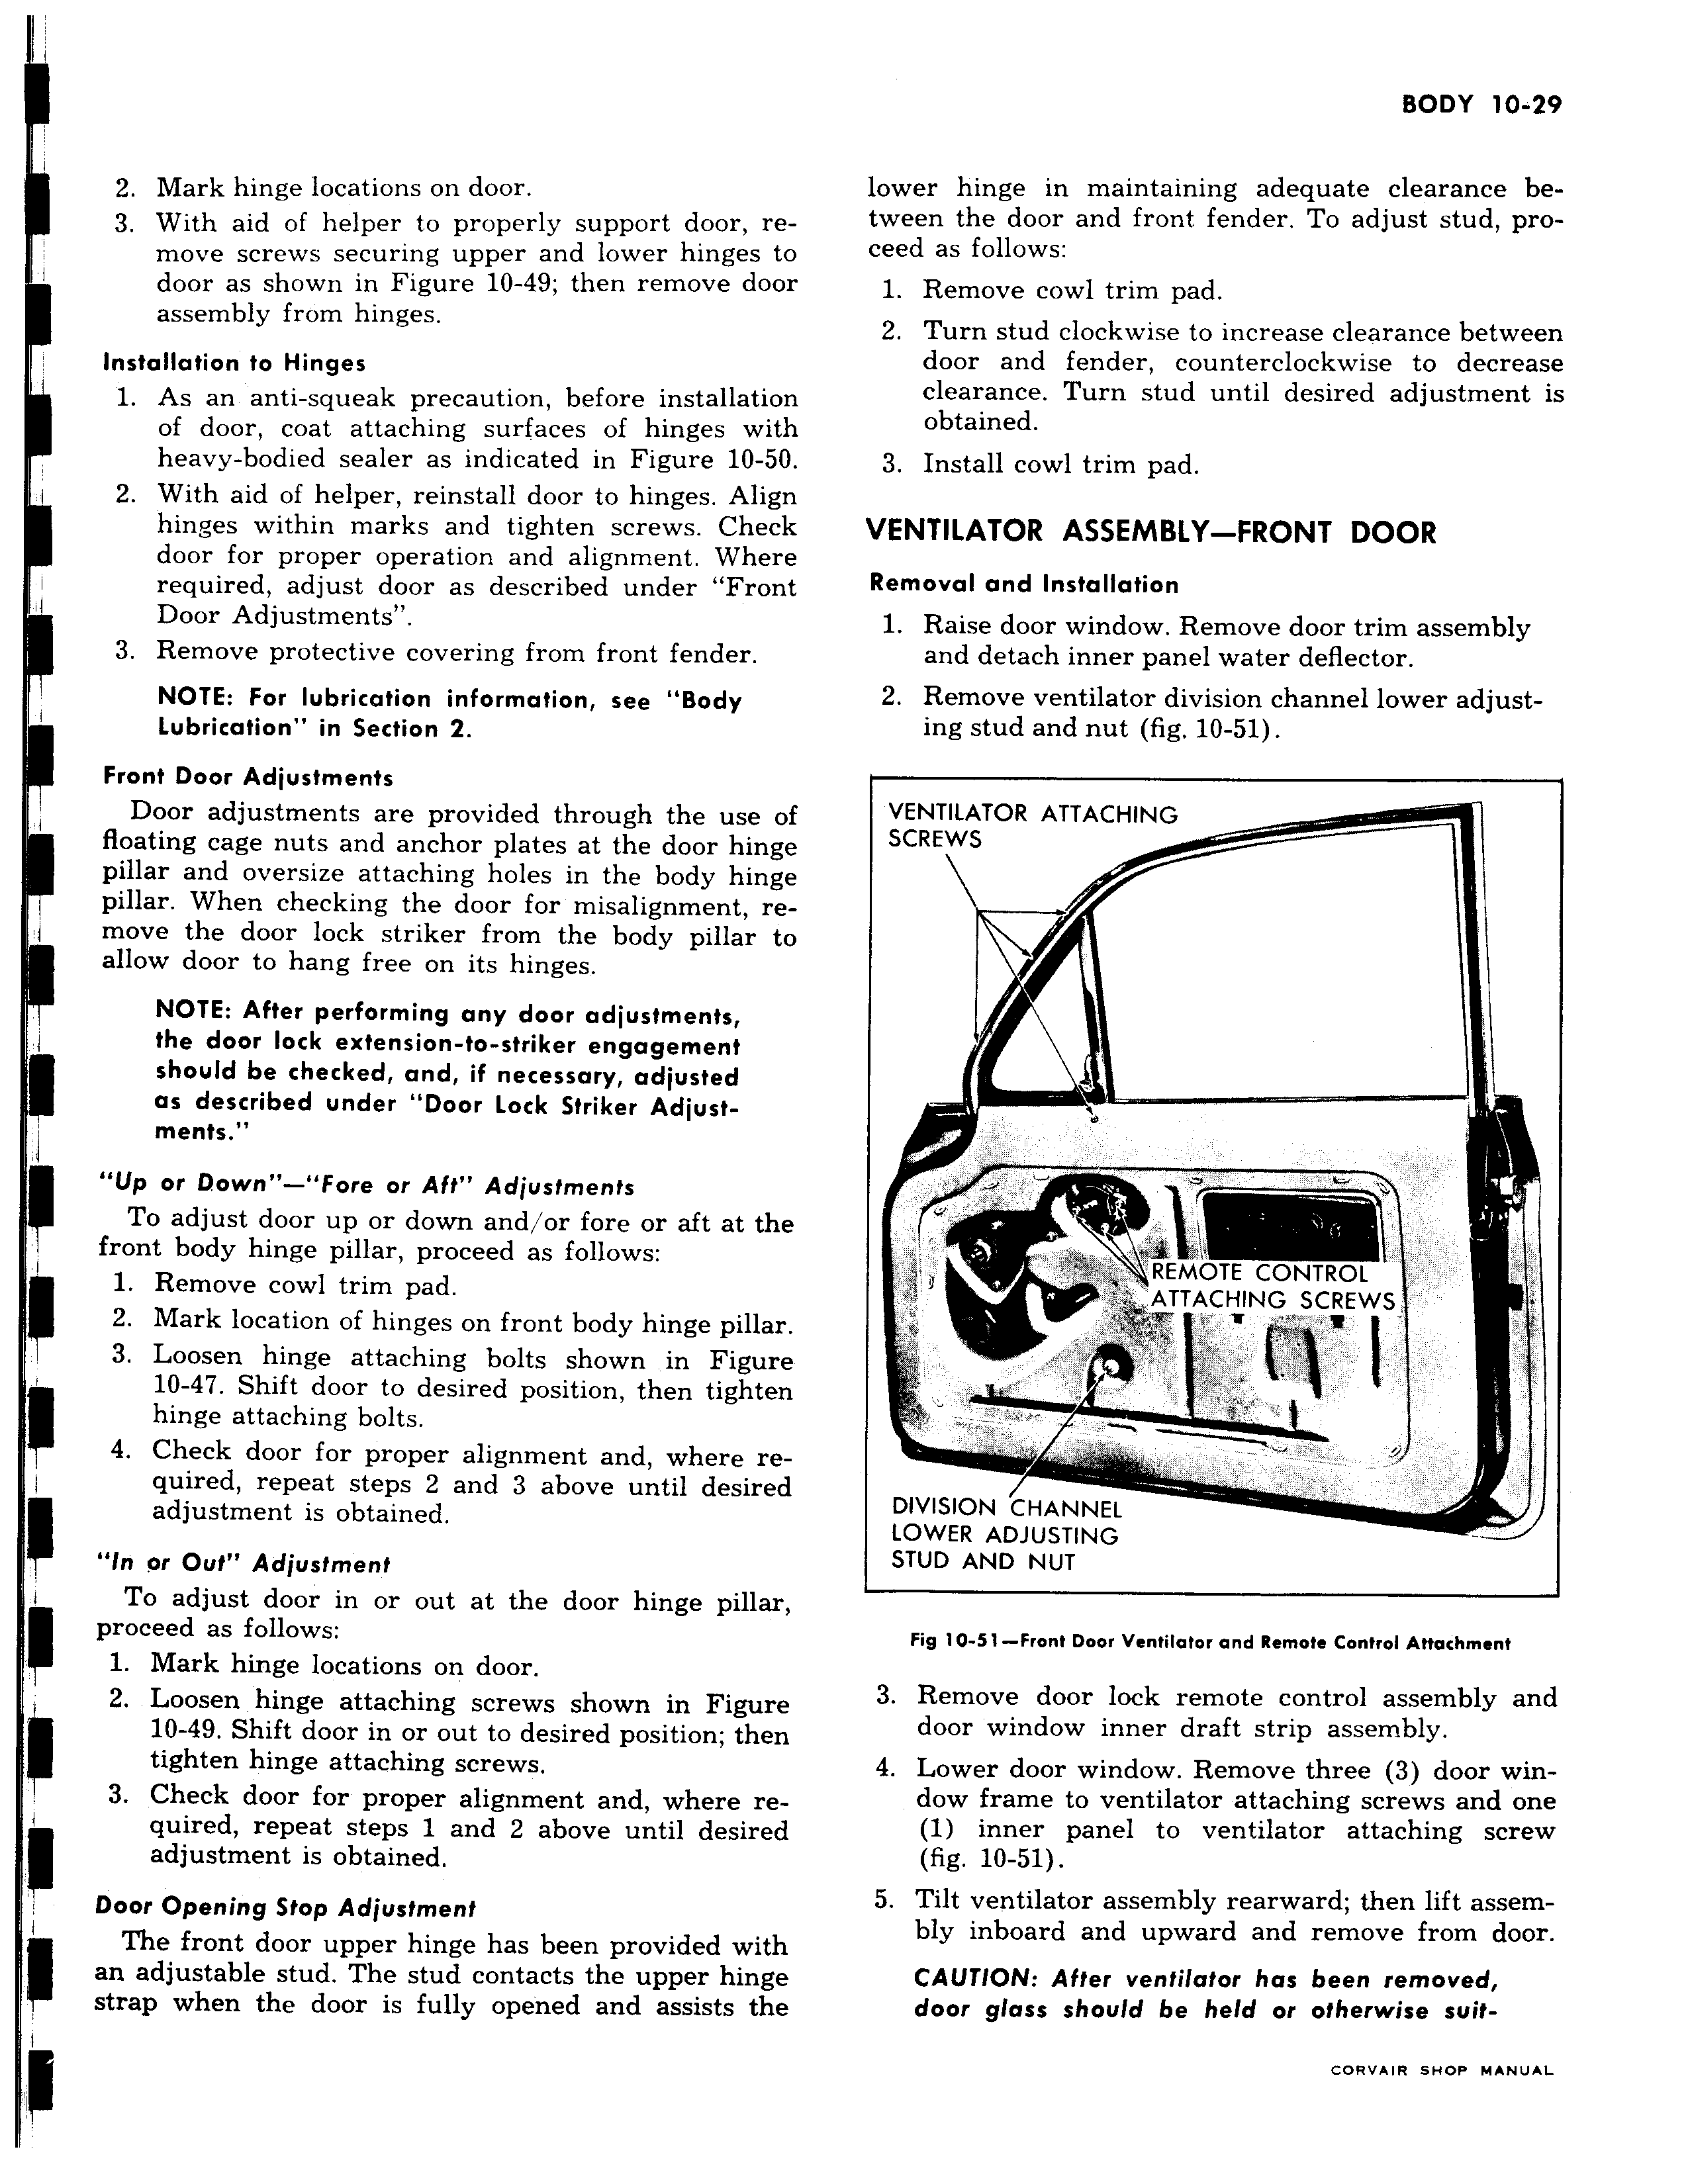
2 Mark hinge locations on door 3 With aid of helper to properly support door remove screws securing upper and lower hinges to door as shown in Figure 10 49 then remove door assembly from hinges Installation to Hinges 1 As an anti squeak precaution before installation of door coat attaching surfaces of hinges with heavy bodied sealer as indicated in Figure 10 50 2 With aid of helper reinstall door to hinges Align hinges within marks and tighten screws Check door for proper operation and alignment Where required adjust door as described under Front Door Adjustments I 3 Remove protective covering from front fender NOTE For lubrication information see Body Lubrication in Section 2 Front Door Adjustments Door adjustments are provided through the use of floating cage nuts and anchor plates at the door hinge pillar and oversize attaching holes in the body hinge pillar When checking the door for misalignment remove the door lock striker from the body pillar to allow door to hang free on its hinges NOTE After performing any door adjustments the door lock extension to striker engagement should be checked and if necessary adjusted as described under Door Lock Striker Adjustments Up or Down Fore or Aft Adjustments To adjust door up or down and or fore or aft at the front body hinge pillar proceed as follows 1 Remove cowl trim pad f 2 Mark location of hinges on front body hinge pillar 3 Loosen hinge attaching bolts shown in Figure 10 47 Shift door to desired position then tighten hinge attaching bolts 4 Check door for proper alignment and where required repeat steps 2 and 3 above until desired adjustment is obtained in or Out Adjustment To adjust door in or out at the door hinge pillar proceed as follows 1 Mark hinge locations on door 2 Loosen hinge attaching screws shown in Figure 10 49 Shift door in or out to desired position then tighten hinge attaching screws 3 Check door for proper alignment and where required repeat steps 1 and 2 above until desired adjustment is obtained Door Opening Slop Adjustment The front door upper hinge has been provided with an adjustable stud The stud contacts the upper hinge strap when the door is fully opened and assists the lower hinge in maintaining adequate clearance between the door and front fender To adjust stud proceed as follows 1 Remove cowl trim pad 2 Turn stud clockwise to increase clearance between door and fender counterclockwise to decrease clearance Turn stud until desired adjustment is obtained 3 Install cowl trim pad VENTILATOR ASSEMBLY FRONT DOOR Removal and Installation 1 Raise door window Remove door trim assembly and detach inner panel water deflector 2 Remove ventilator division channel lower adjusting stud and nut fig 10 51 VENTILATOR ATTACHING SCREWS d e REnnOTE CONTROL ATTACHING SCREWS I DIVISION CHANNEL LOWER ADJUSTING STUD AND NUT Fig 10 51 Front Door Ventilator and Remote Control Attachment 3 Remove door lock remote control assembly and door window inner draft strip assembly 4 Lower door window Remove three 3 door window frame to ventilator attaching screws and one 1 inner panel to ventilator attaching screw fig 10 51 5 Tilt ventilator assembly rearward then lift assembly inboard and upward and remove from door CAUTION After ventilator has been removed door glass should be held or otherwise suit

 Next
Next