Jeep Parts Wiki | Ford Parts Wiki
Home | Search | Browse | Marketplace | Messages | FAQ | Guest
Prev

 Next
Next
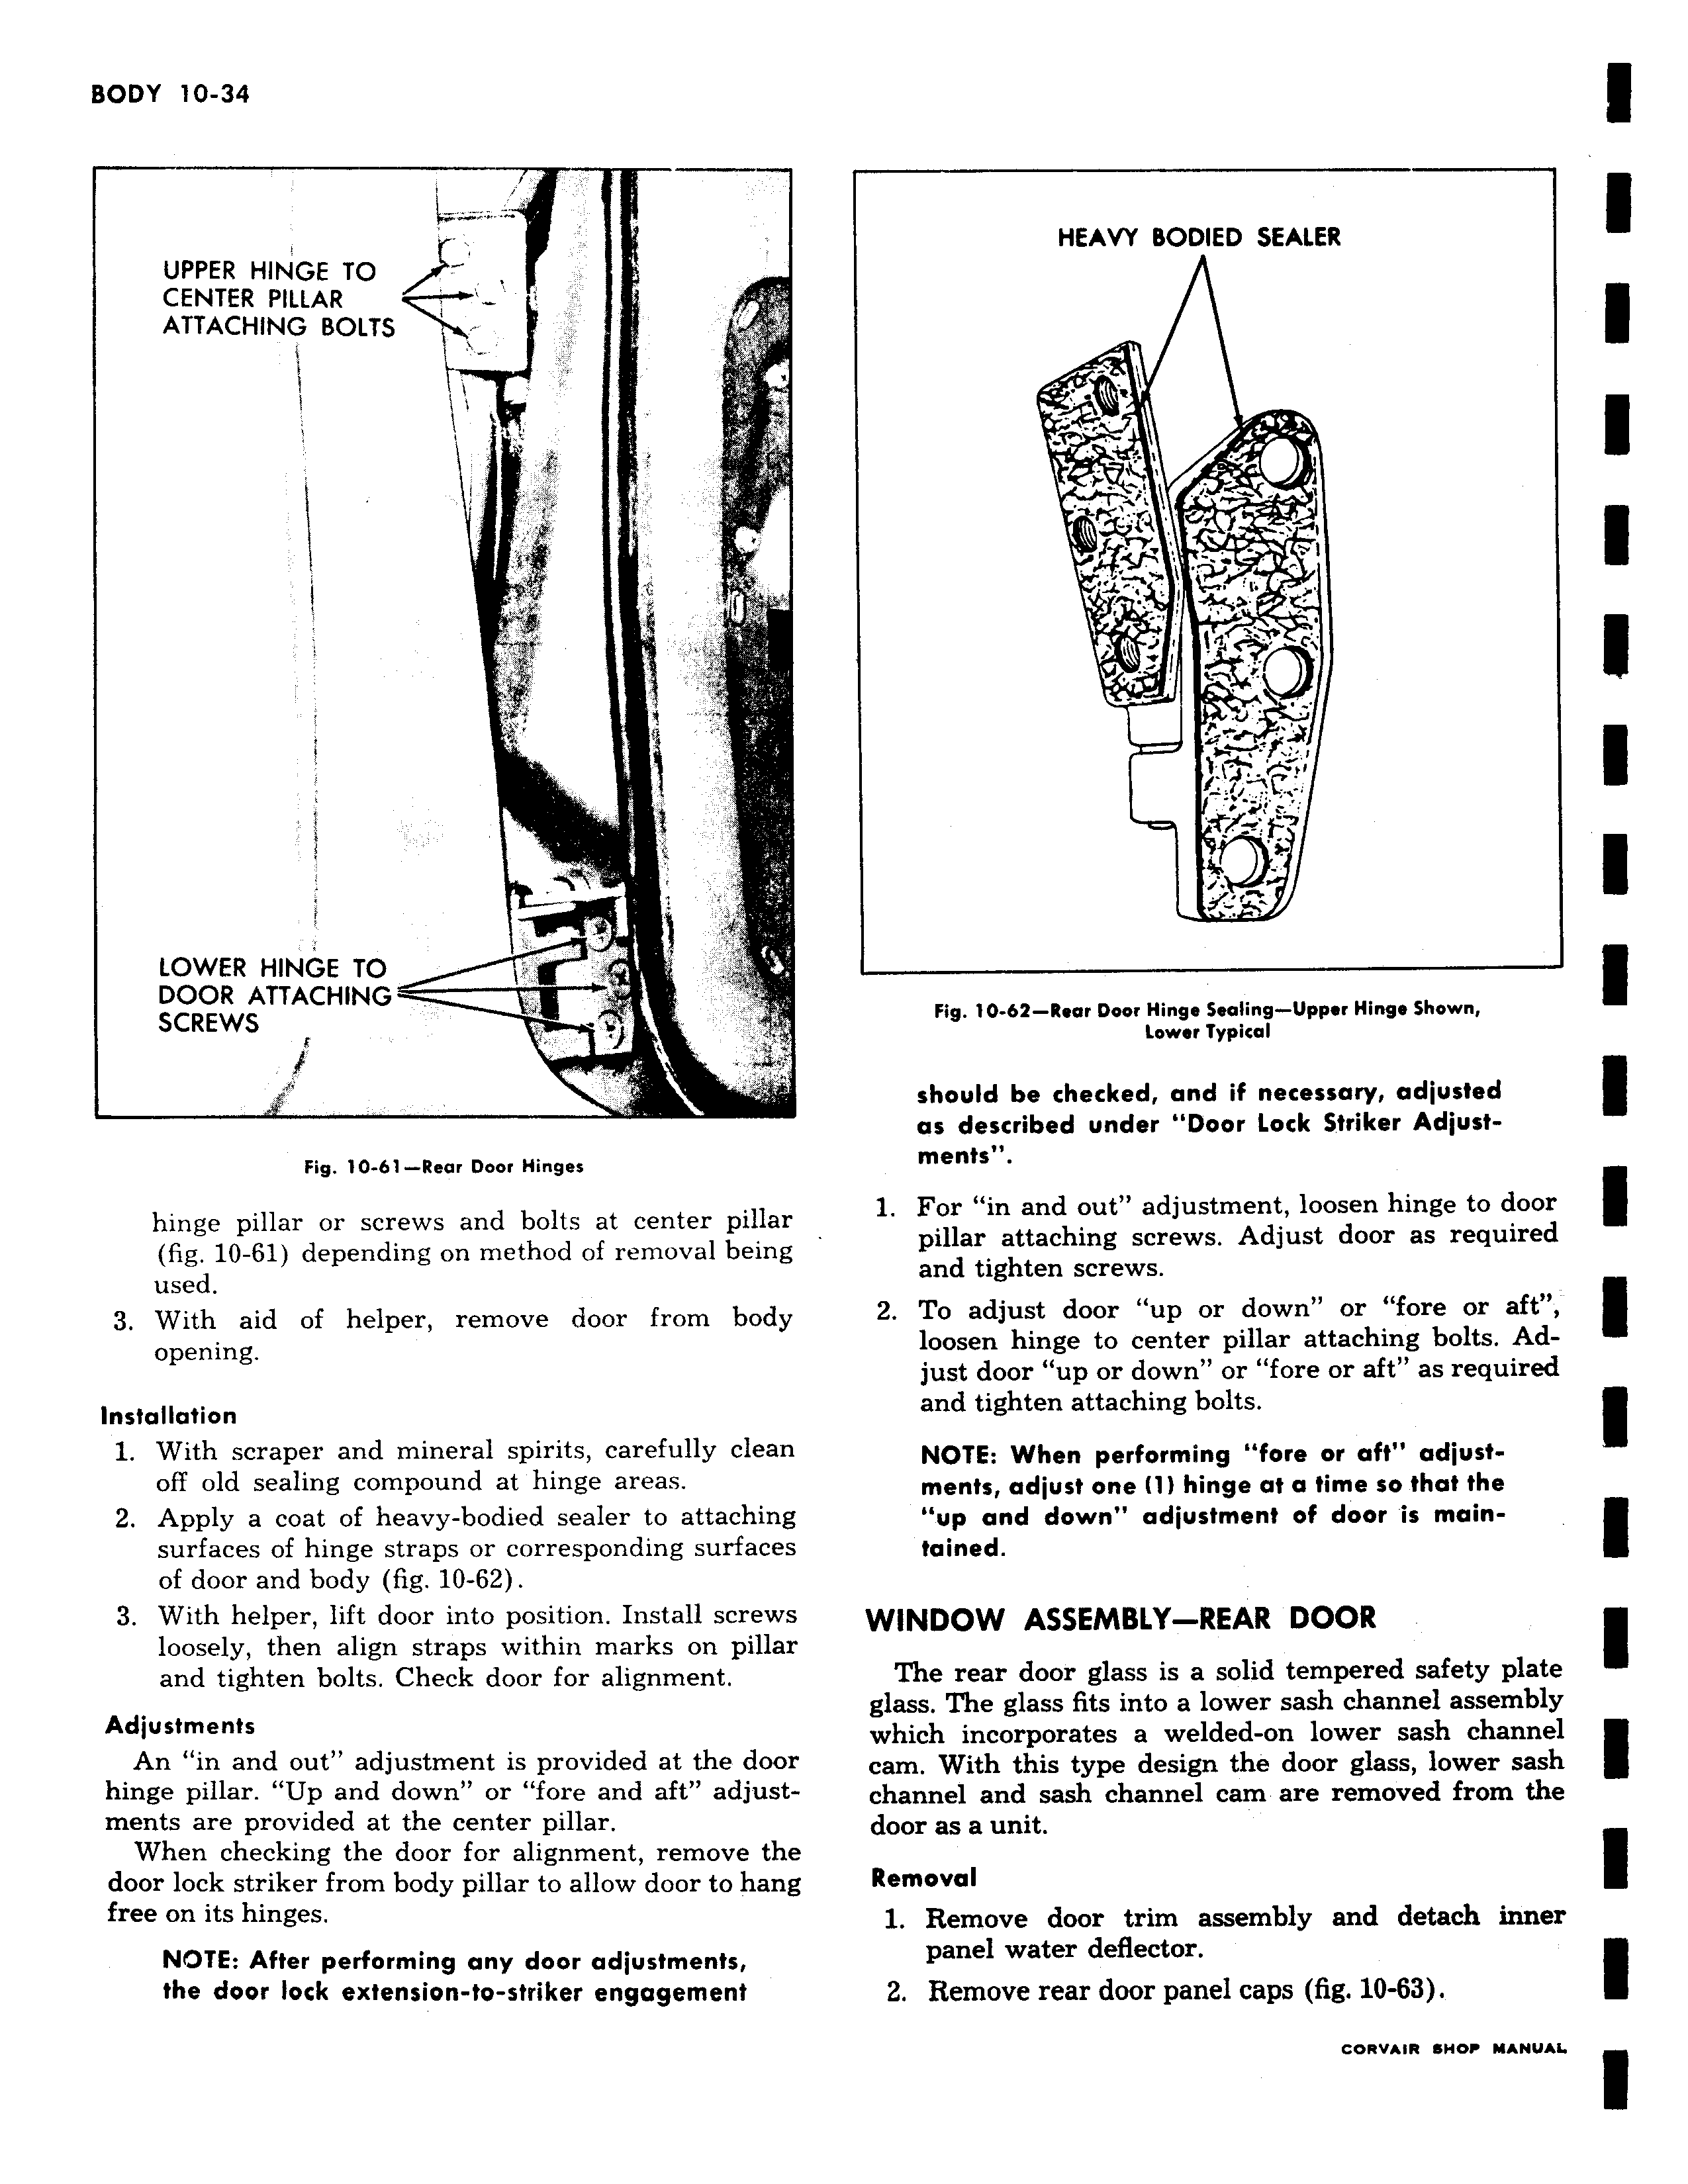
q UPPER HINGE TO CENTER PILLAR ATTACHING BOLTS I r i i LOWER HINGE TO DOOR ATTACHING SCREWS Fig 10 61 Rear Door Hinges hinge pillar or screws and bolts at center pillar fig 10 61 depending on method of removal being used 3 With aid of helper remove door from body opening Installation 1 With scraper and mineral spirits carefully clean off old sealing compound at hinge areas 2 Apply a coat of heavy bodied sealer to attaching surfaces of hinge straps or corresponding surfaces of door and body fig 10 62 3 With helper lift door into position Install screws loosely then align straps within marks on pillar and tighten bolts Check door for alignment Adjustments An in and out adjustment is provided at the door hinge pillar Up and down or fore and aft adjustments are provided at the center pillar When checking the door for alignment remove the door lock striker from body pillar to allow door to hang free on its hinges NOTE After performing any door adjustments the door lock extension to striker engagement HEAVY BODIED SEALER r C 11 wl I r m Fig 10 62 Rear Door Hinge Sealing Upper Hinge Shown Lower Typical should be checked and if necessary adjusted as described under Door Lock Striker Adjustments 1 For in and out adjustment loosen hinge to door pillar attaching screws Adjust door as required and tighten screws 2 To adjust door up or down or fore or aft loosen hinge to center pillar attaching bolts Adjust door up or down or fore or aft as required and tighten attaching bolts NOTE When performing fore or aft adjustments adjust one 1 hinge at a time so that the up and down adjustment of door is maintained WINDOW ASSEMBLY REAR DOOR The rear door glass is a solid tempered safety plate glass The glass fits into a lower sash channel assembly which incorporates a welded on lower sash channel cam With this type design the door glass lower sash channel and sash channel cam are removed from the door as a unit Removal 1 Remove door trim assembly and detach inner panel water deflector 2 Remove rear door panel caps fig 10 63 GORVAIR 6N0 MANUAL

 Next
Next