Jeep Parts Wiki | Ford Parts Wiki
Home | Search | Browse | Marketplace | Messages | FAQ | Guest
Prev

 Next
Next
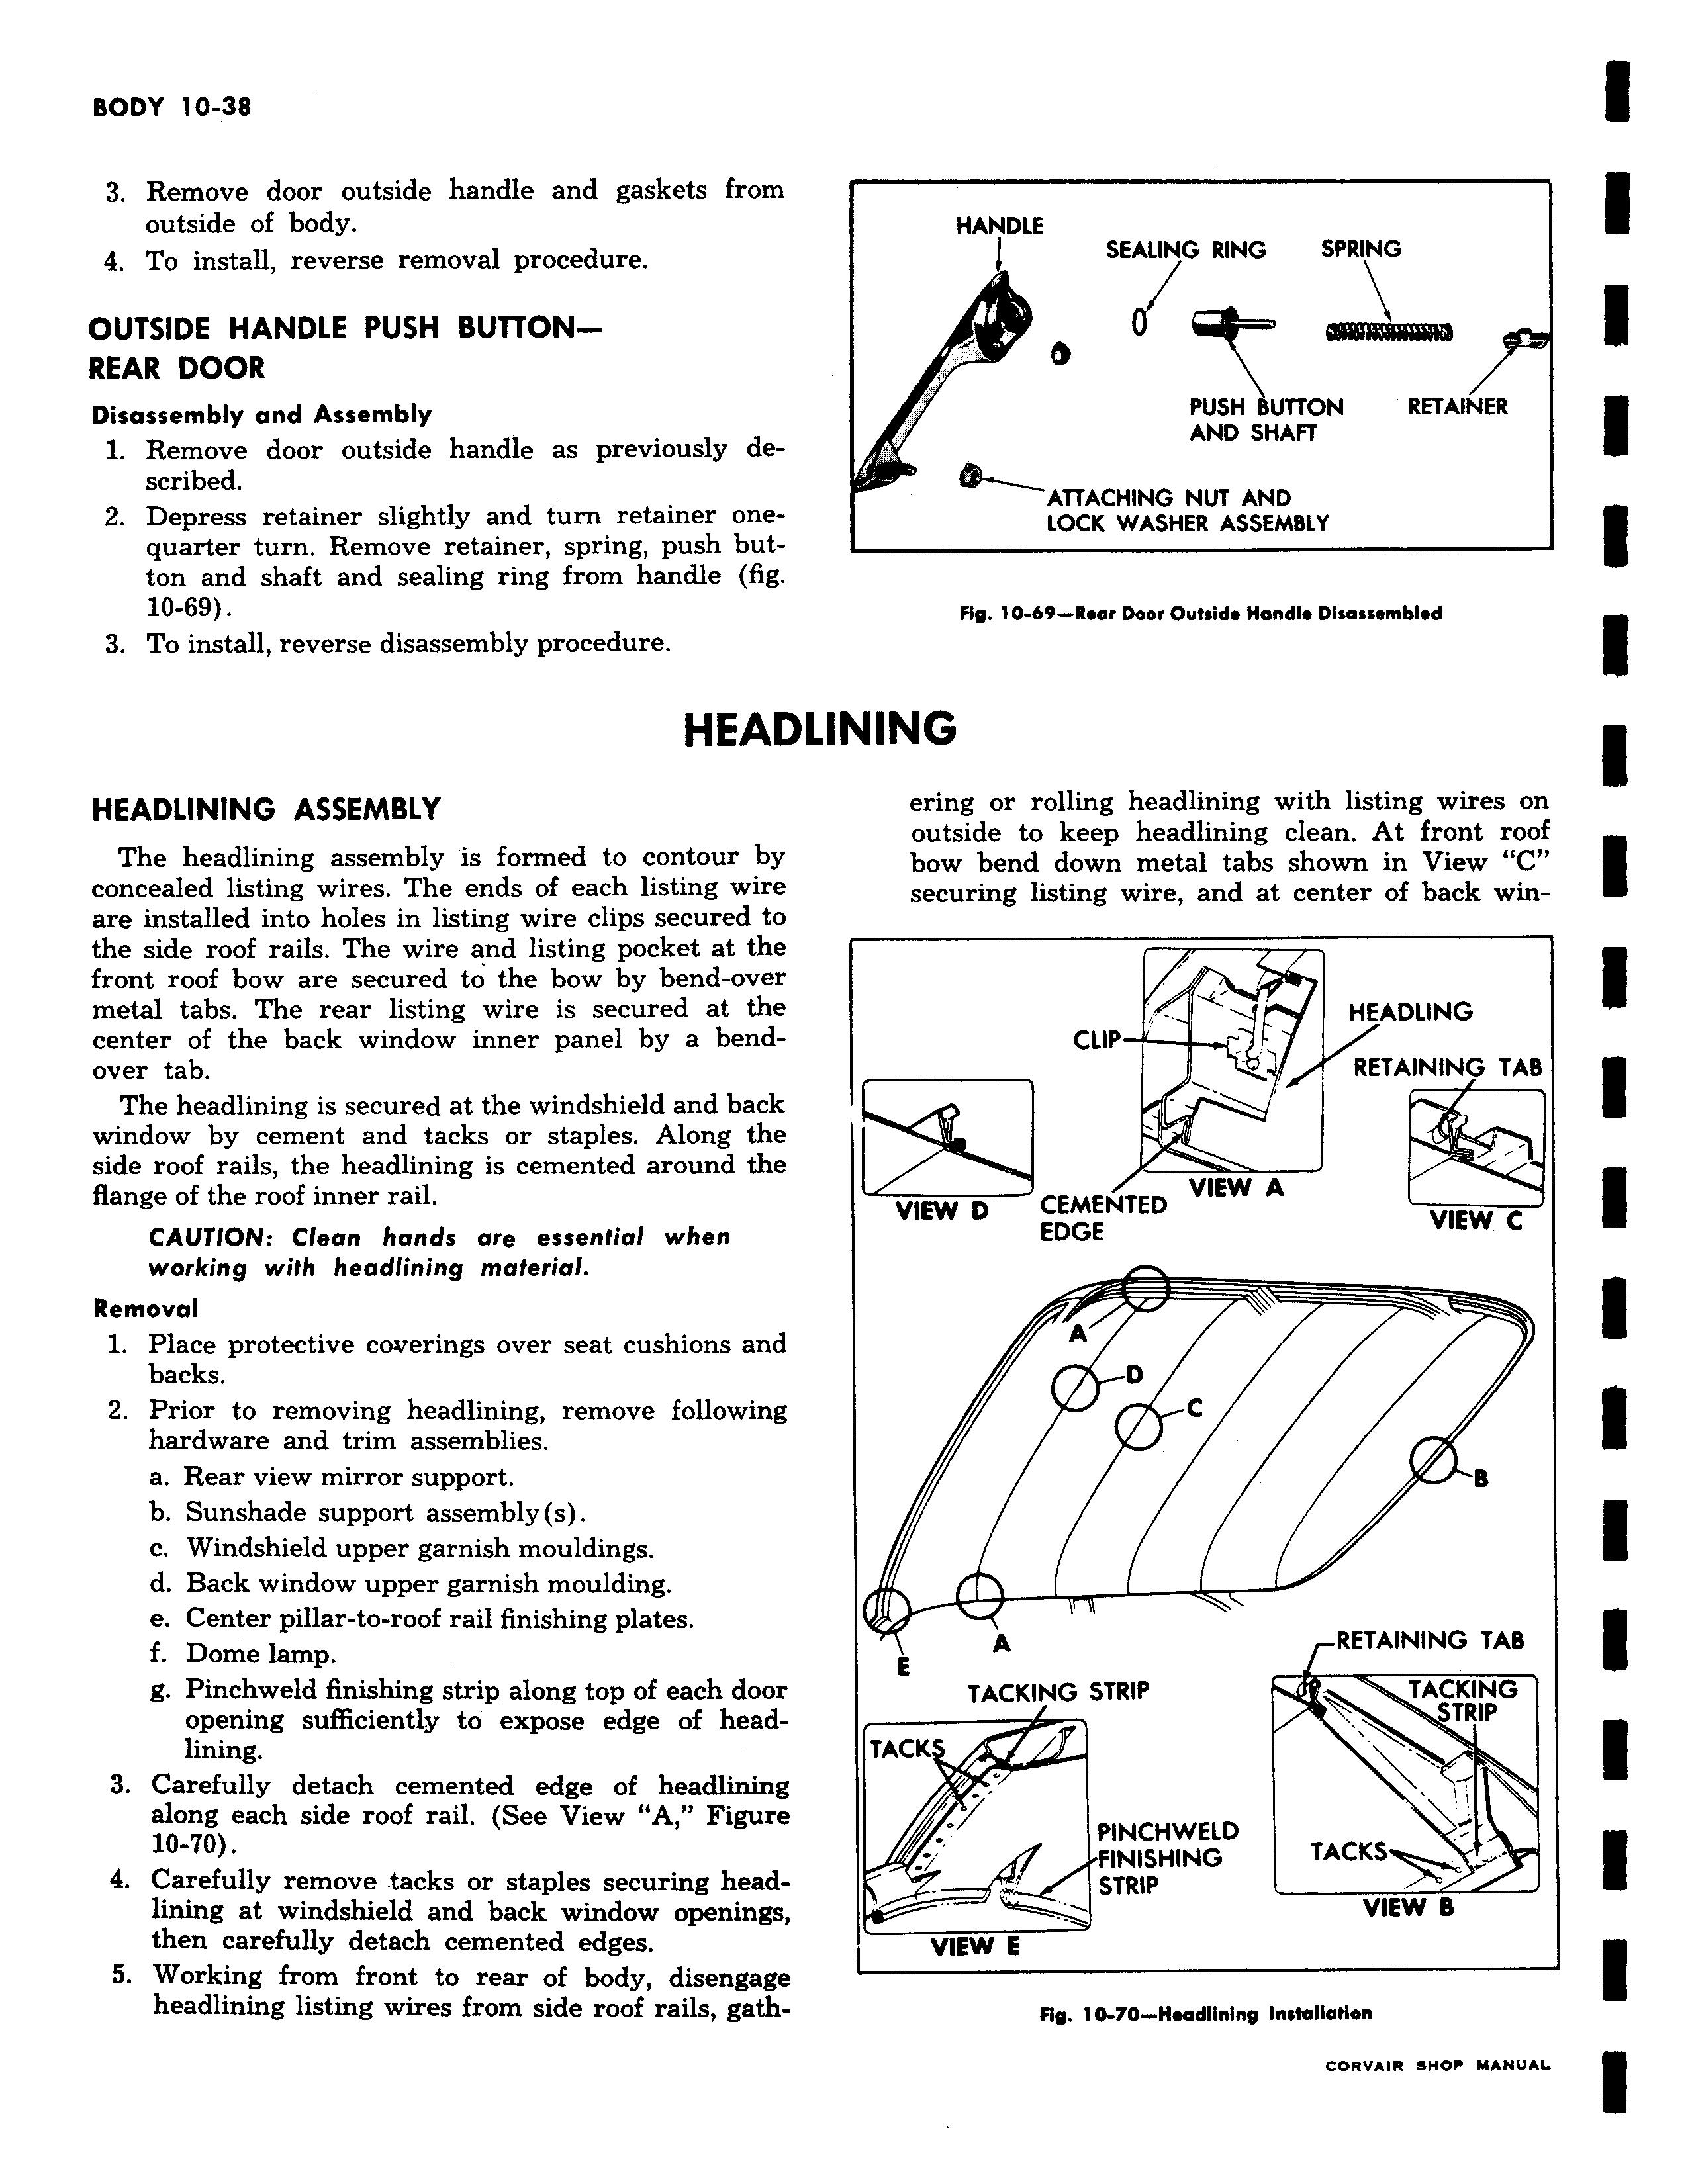
3 Remove door outside handle and gaskets from outside of body 4 To install reverse removal procedure OUTSIDE HANDLE PUSH BUTTONREAR DOOR Disassembly and Assembly 1 Remove door outside handle as previously described 2 Depress retainer slightly and turn retainer onequarter turn Remove retainer spring push button and shaft and sealing ring from handle fig 10 69 3 To install reverse disassembly procedure HEAD HEADLINING ASSEMBLY The headlining assembly is formed to contour by concealed listing wires The ends of each listing wire are installed into holes in listing wire clips secured to the side roof rails The wire and listing pocket at the front roof bow are secured to the bow by bend over metal tabs The rear listing wire is secured at the center of the back window inner panel by a bendover tab The headlining is secured at the windshield and back window by cement and tacks or staples Along the side roof rails the headlining is cemented around the flange of the roof inner rail CAUTION Clean hands are essential when working with headlining material Removal 1 Place protective coverings over seat cushions and backs 2 Prior to removing headlining remove following hardware and trim assemblies a Rear view mirror support b Sunshade support assembly s c Windshield upper garnish mouldings d Back window upper garnish moulding e Center pillar to roof rail finishing plates f Dome lamp g Pinchweld finishing strip along top of each door opening sufficiently to expose edge of headlining 3 Carefully detach cemented edge of headlining along each side roof rail See View A Figure 10 70 4 Carefully remove tacks or staples securing headlining at windshield and back window openings then carefully detach cemented edges 5 Working from front to rear of body disengage headlining listing wires from side roof rails gath l F l HANDLE SEALING RING SPRING SH SUTTON RETAINER AND SHAFT ATTACHING NUT AND LOCK WASHER ASSEMBLY w y L v s y a

 Next
Next