Jeep Parts Wiki | Ford Parts Wiki
Home | Search | Browse | Marketplace | Messages | FAQ | Guest
|
Corvair Chassis Shop Manual December 1964 |
|
Prev

 Next
Next
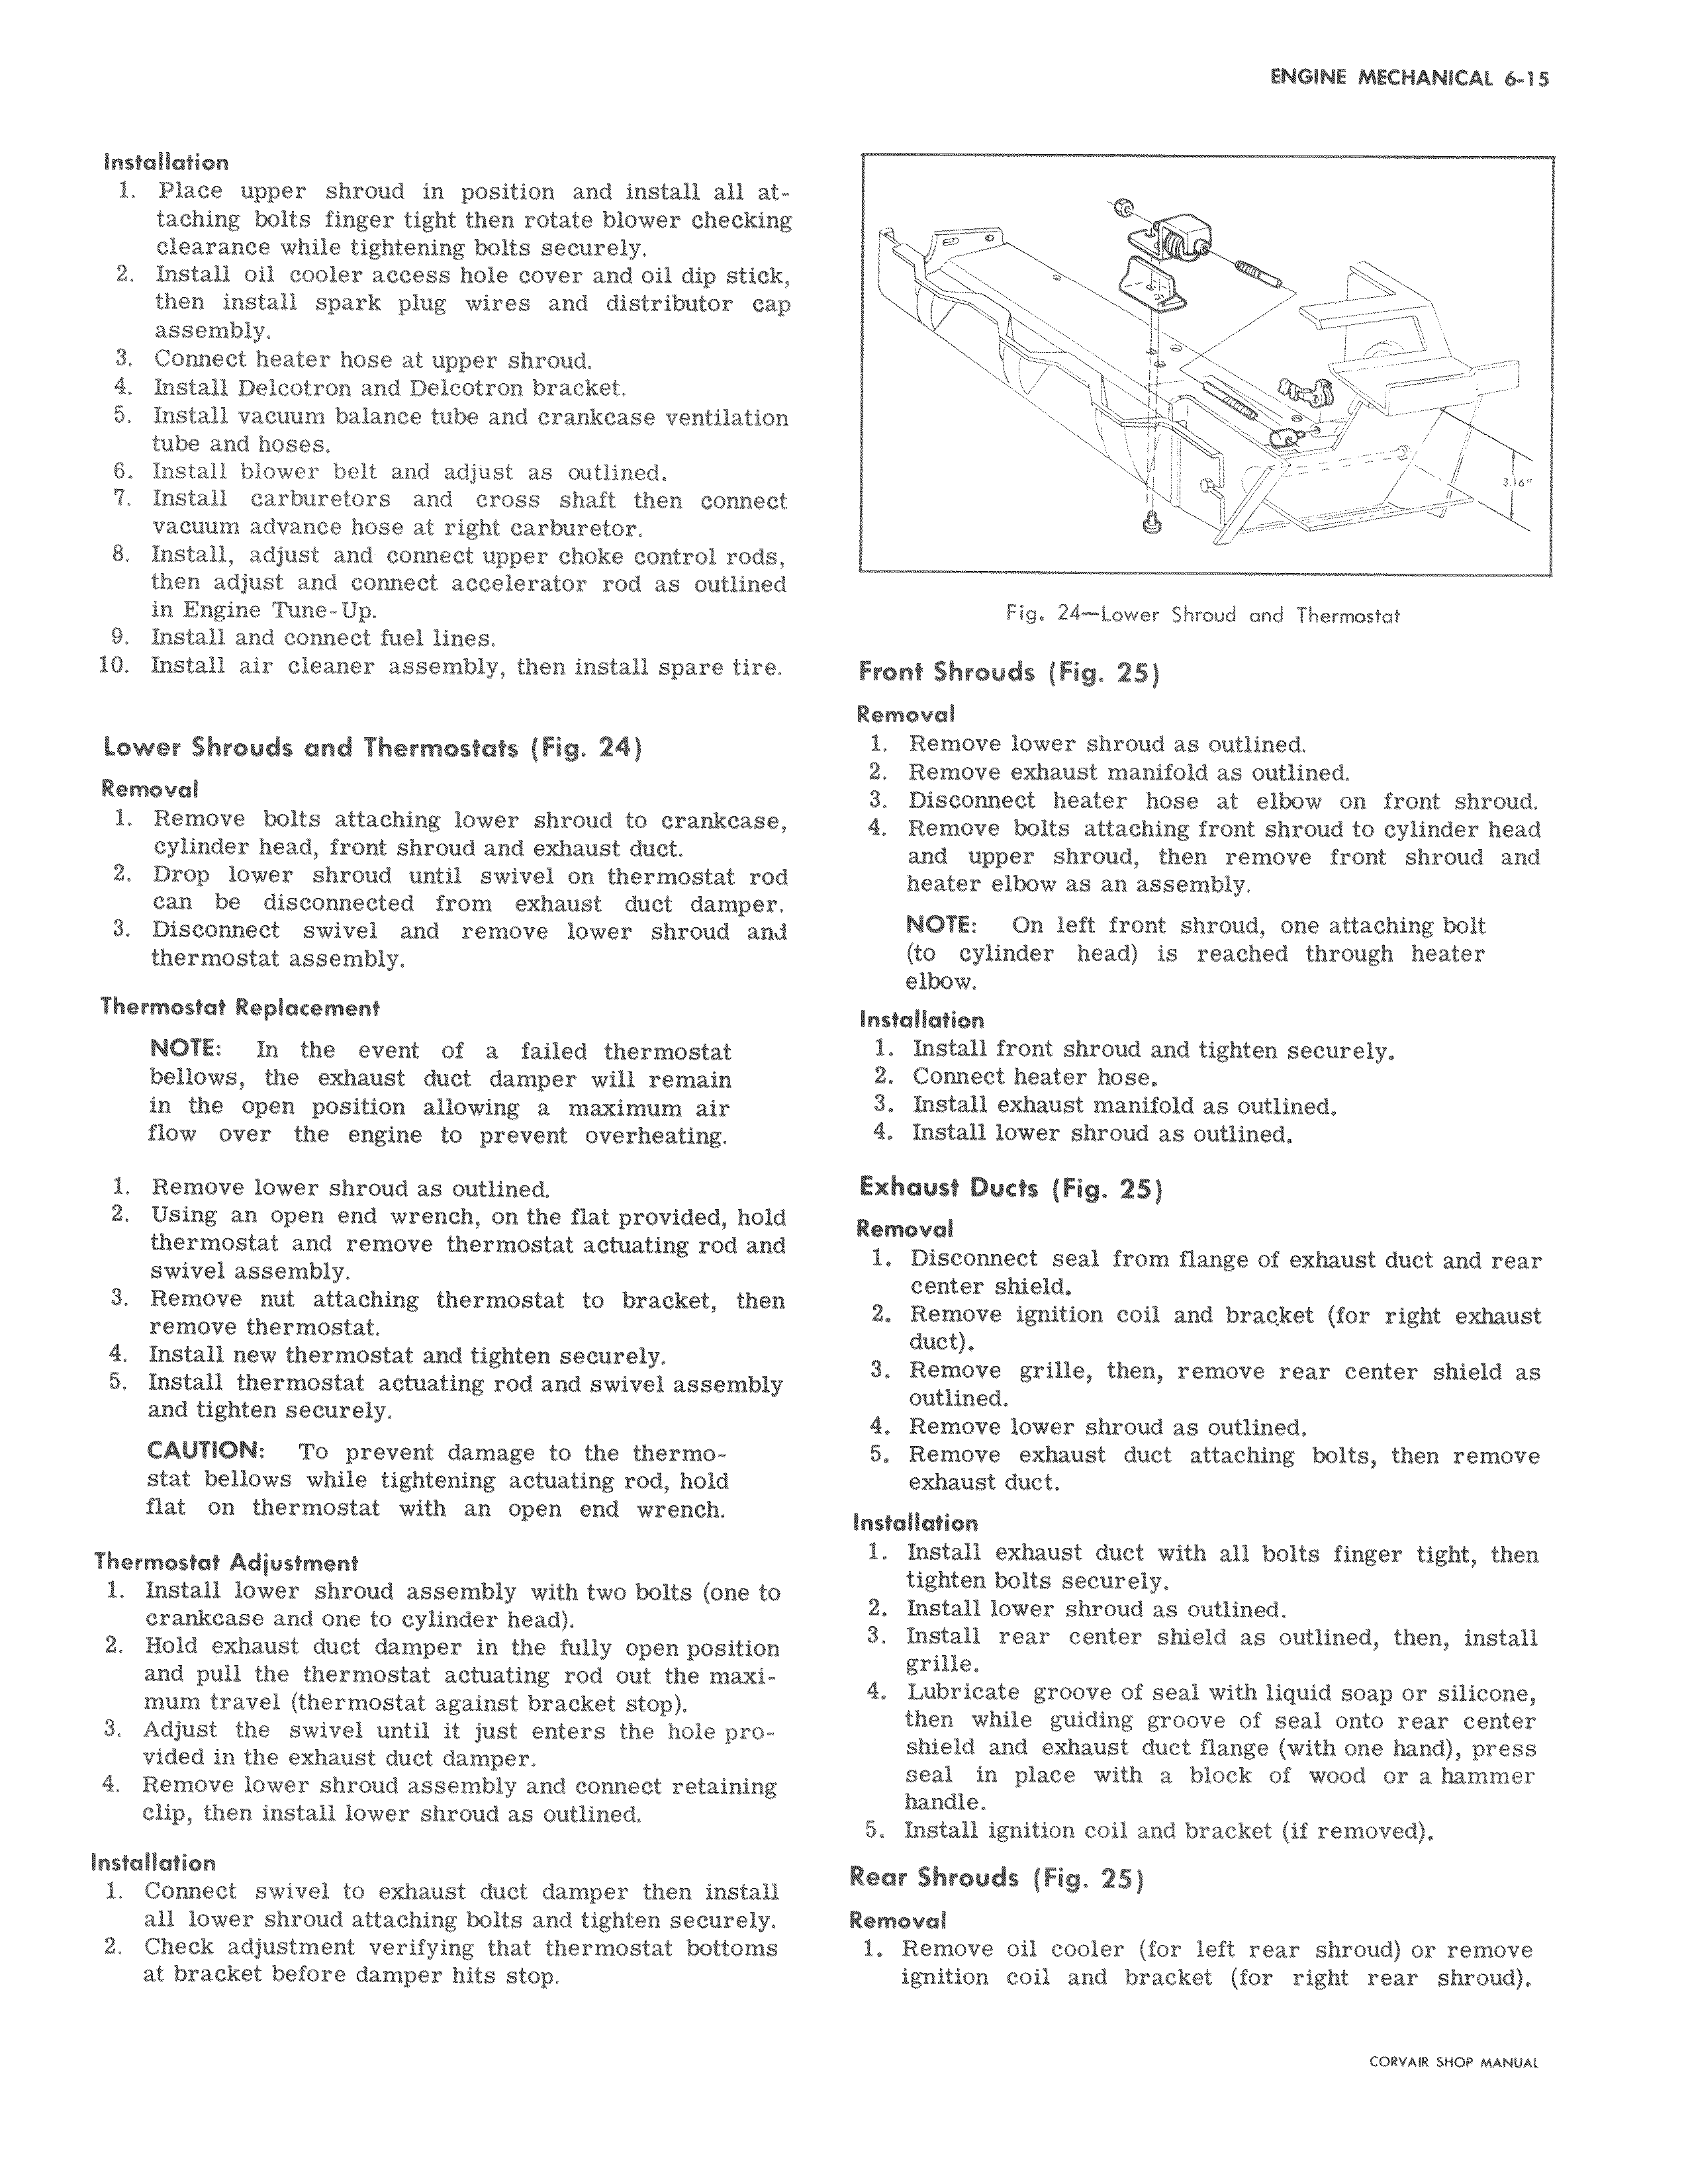
Installation 1 Place upper shroud in position and install all attaching bolts finger tight then rotate blower checking clearance while tightening bolts securely 2 Install oil cooler access hole cover and oil dip stick then install spark plug wires and distributor cap assembly 3 Connect heater hose at upper shroud 4 Install Delcotron and Delcotron bracket 5 Install vacuum balance tube and crankcase ventilation tube and hoses 6 Install blower belt and adjust as outlined 7 Install carburetors and cross shaft then connect vacuum advance hose at right carburetor 8 Install adjust and connect upper choke control rods then adjust and connect accelerator rod as outlined in Engine Tune Up 9 Install and connect fuel lines 10 Install air cleaner assembly then install spare tire Lower Shrouds and Thermostats Fig 24 Removal 1 Remove bolts attaching lower shroud to crankcase cylinder head front shroud and exhaust duct 2 Drop lower shroud until swivel on thermostat rod can be disconnected from exhaust duct damper 3 Disconnect swivel and remove lower shroud and thermostat assembly Thermostat Replacement NOTE In the event of a failed thermostat bellows the exhaust duct damper will remain in the open position allowing a maximum air flow over the engine to prevent overheating 1 Remove lower shroud as outlined 2 Using an open end wrench on the flat provided hold thermostat and remove thermostat actuating rod and swivel assembly 3 Remove nut attaching thermostat to bracket then remove thermostat 4 Install new thermostat and tighten securely 5 Install thermostat actuating rod and swivel assembly and tighten securely CAUTION To prevent damage to the thermostat bellows while tightening actuating rod hold flat on thermostat with an open end wrench Thermostat Adjustment 1 Install lower shroud assembly with two bolts one to crankcase and one to cylinder head 2 Hold exhaust duct damper in the fully open position and pull the thermostat actuating rod out the maximum travel thermostat against bracket stop 3 Adjust the swivel until it just enters the hole provided in the exhaust duct damper 4 Remove lower shroud assembly and connect retaining clip then install lower shroud as outlined Installation 1 Connect swivel to exhaust duct damper then install all lower shroud attaching bolts and tighten securely 2 Check adjustment verifying that thermostat bottoms at bracket before damper hits stop m o x u f z I I 3 dm v u ll Fig 24 Lower Shroud and Thermostat Front Shrouds Fig 25 Removal 1 Remove lower shroud as outlined 2 Remove exhaust manifold as outlined 3 Disconnect heater hose at elbow on front shroud 4 Remove bolts attaching front shroud to cylinder head and upper shroud then remove front shroud and heater elbow as an assembly NOTE On left front shroud one attaching bolt to cylinder head is reached through heater elbow Installation 1 Install front shroud and tighten securely 2 Connect heater hose 3 Install exhaust manifold as outlined 4 Install lower shroud as outlined Exhaust Ducts Fig 25 Removal 1 Disconnect seal from flange of exhaust duct and rear center shield 2 Remove ignition coil and bracket for right exhaust duct 3 Remove grille then remove rear center shield as outlined 4 Remove lower shroud as outlined 5 Remove exhaust duct attaching bolts then remove exhaust duct Installation 1 Install exhaust duct with all bolts finger tight then tighten bolts securely 2 Install lower shroud as outlined 3 Install rear center shield as outlined then install grille 4 Lubricate groove of seal with liquid soap or silicone then while guiding groove of seal onto rear center shield and exhaust duct flange with one hand press seal in place with a block of wood or a hammer handle 5 Install ignition coil and bracket if removed Rear Shrouds Fig 25 Removal 1 Remove oil cooler for left rear shroud or remove ignition coil and bracket for right rear shroud

 Next
Next