Jeep Parts Wiki | Ford Parts Wiki
Home | Search | Browse
|
Corvair Chassis Shop Manual December 1964 |
|
Prev

 Next
Next
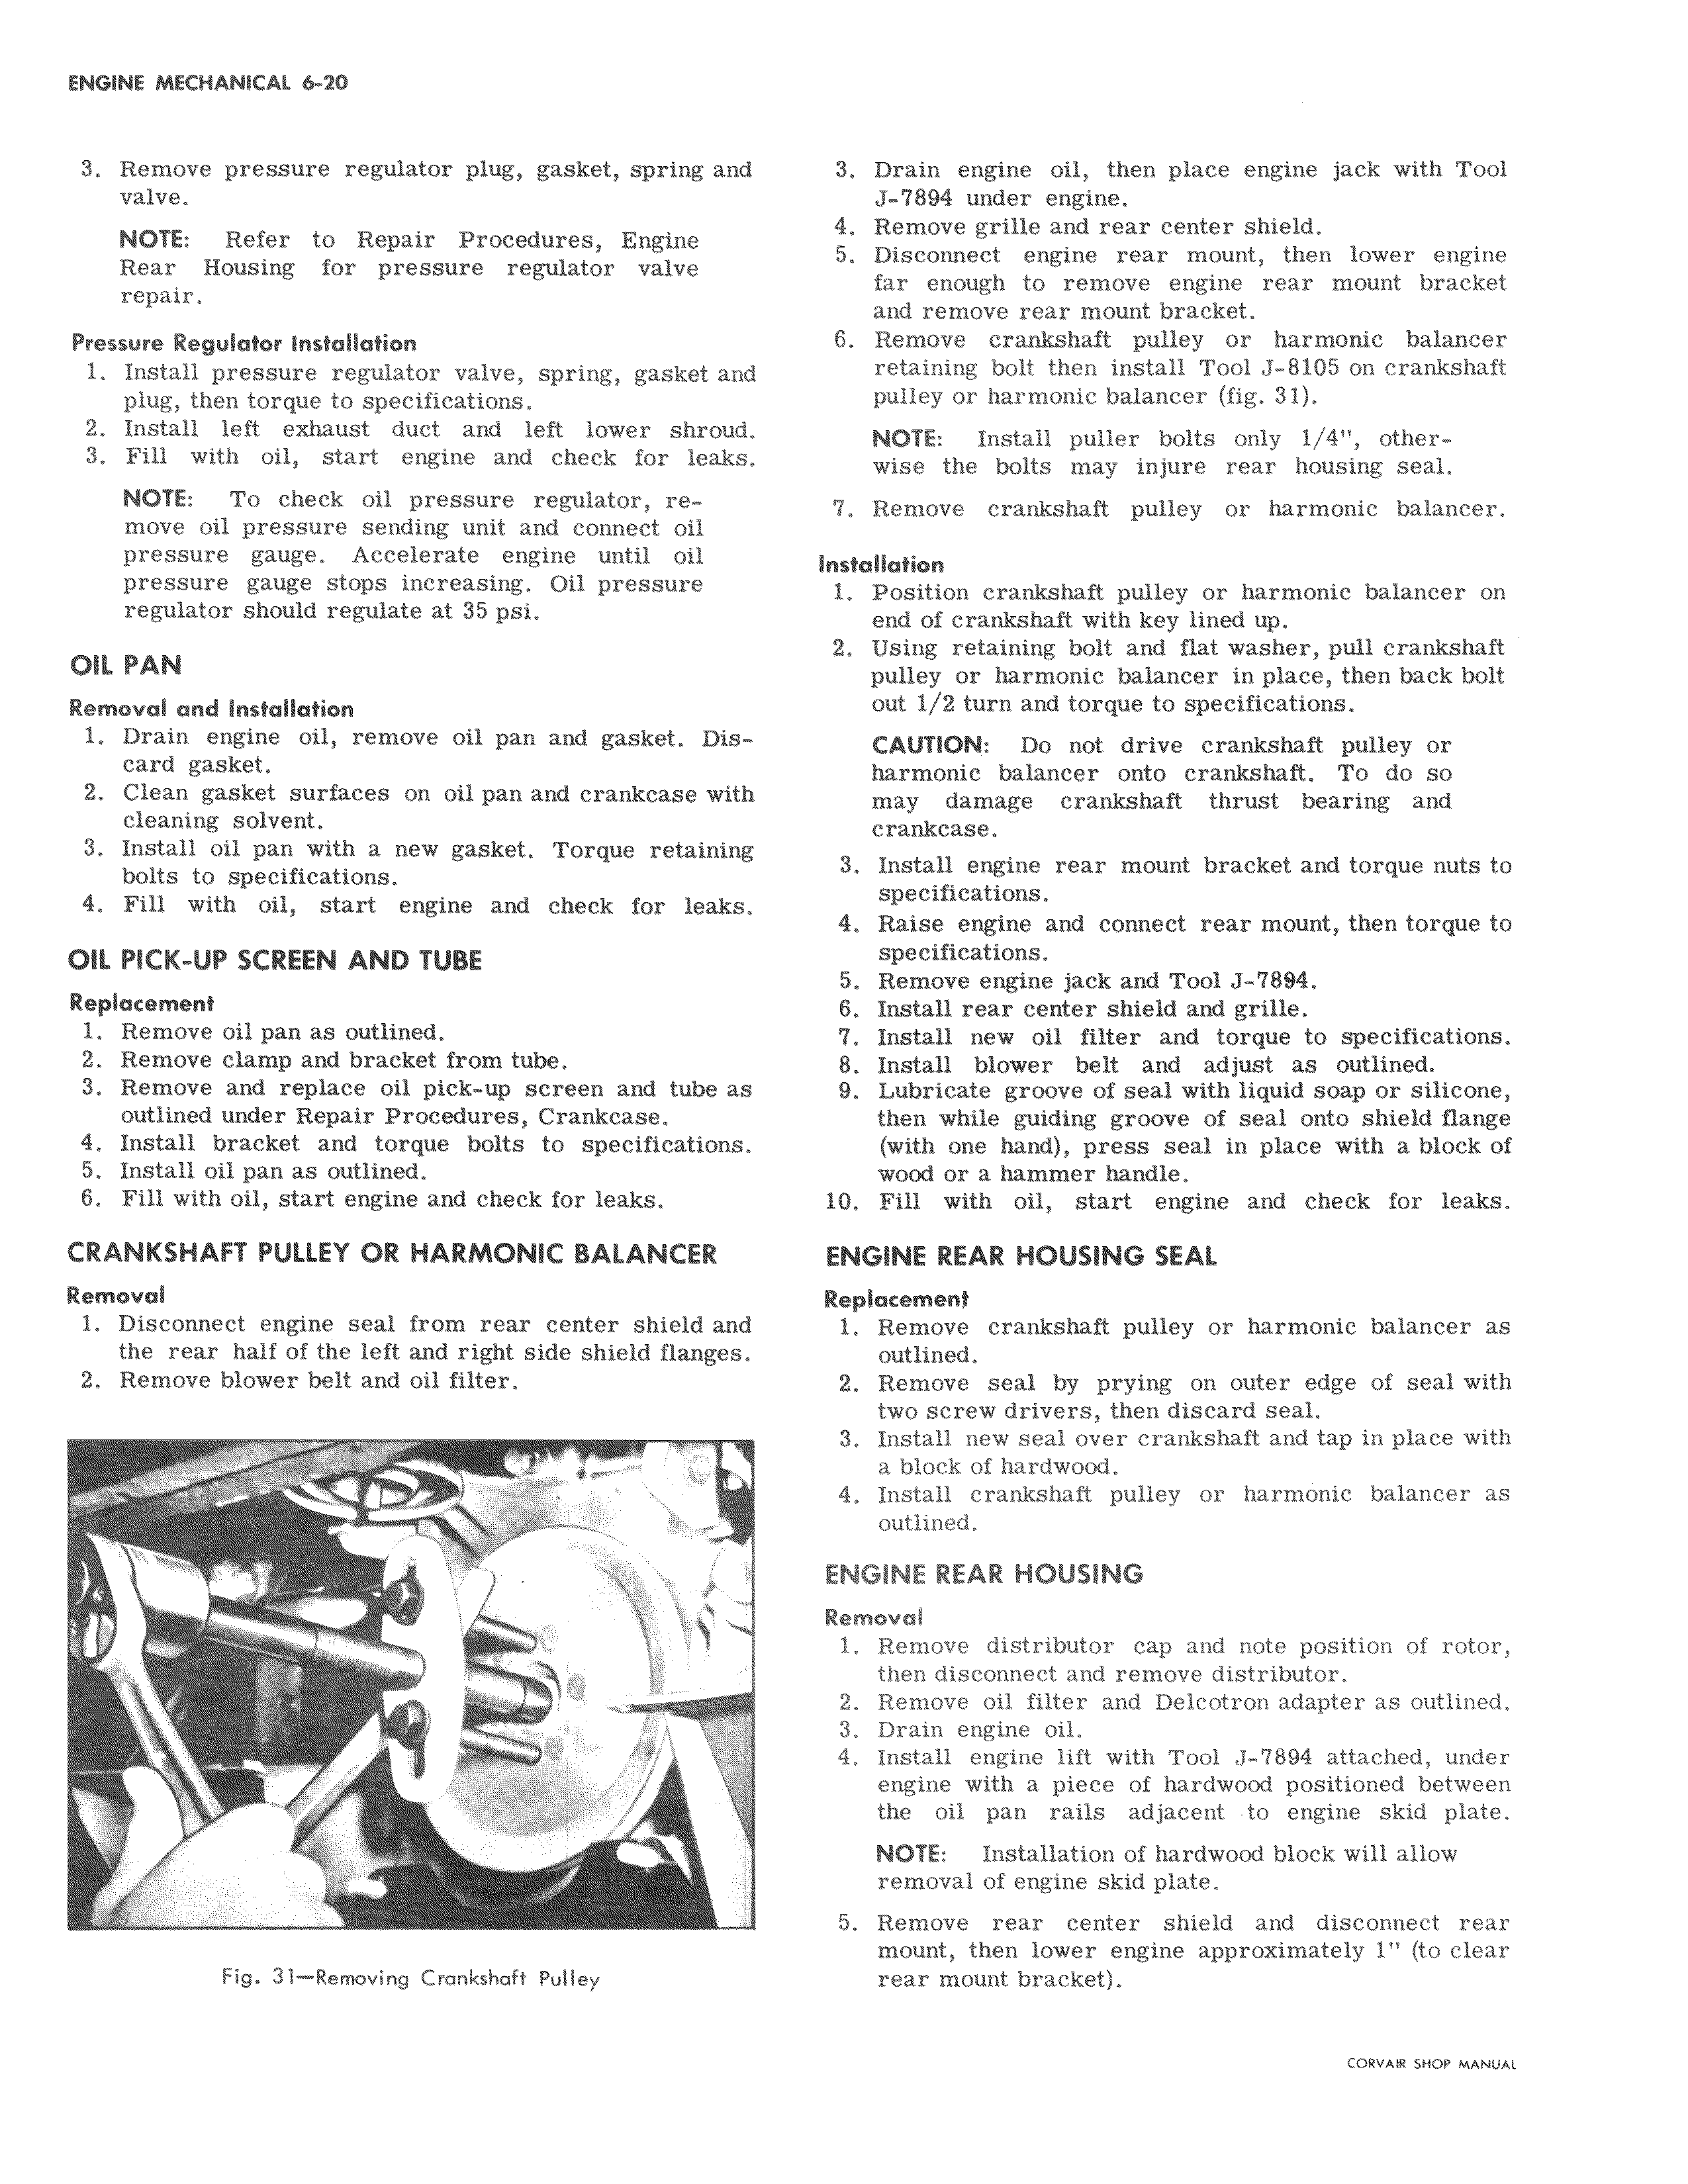
3 Remove pressure regulator plug gasket spring and valve NOTE Refer to Repair Procedures Engine Rear Housing for pressure regulator valve repair Pressure Regulator installation 1 Install pressure regulator valve spring gasket and plug then torque to specifications 2 Install left exhaust duct and left lower shroud 3 Fill with oil start engine and check for leaks NOTE To check oil pressure regulator re I move oil pressure sending unit and connect oil pressure gauge Accelerate engine until oil pressure gauge stops increasing Oil pressure regulator should regulate at 35 psi OIL PAN Removal and Installation 1 Drain engine oil remove oil pan and gasket Discard gasket 2 Clean gasket surfaces on oil pan and crankcase wi cleaning solvent 3 Install oil pan with a new gasket Torque retaining bolts to specifications 4 Fill with oil start engine and check for leak OIL PICK UP SCREEN AND TUBE Replacement 1 Remove oil pan as outlined 2 Remove clamp and bracket from tube 3 Remove and replace oil pick up screen and tube as outlined under Repair Procedures Crankcase 4 Install bracket and torque bolts to specifications 5 Install oil pan as outlined 8 Fill with oil start engine and check for leaks CRANKSHAFT PULLEY OR HARMONIC BALANCER Removal 1 Disconnect engine seal from rear center shield and the rear half of the left and right side shield flanges 2 Remove blower belt and oil filter r i Fig 31 Removing Crankshaft Pulley I 3 Drain engine oil then place engine jack with Tool J 894 under engine 4 Remove grille and rear center shield 5 Disconnect engine rear mount then lower engine far enough to remove engine rear mount bracket and remove rear mount bracket 6 Remove crankshaft pulley or harmonic balancer retaining bolt then install Tool J 8105 on crankshaft pulley or harmonic balancer fig 31 NOTE Install puller bolts only 1 4 otherwise the bolts may injure rear housing seal 7 Remove crankshaft pulley or harmonic balancer Installation 1 Position crankshaft pulley or harmonic balancer on end of crankshaft with key lined up 2 Using retaining bolt and flat washer pull crankshaft pulley or harmonic balancer in place then back bolt out 1 2 turn and torque to specifications CAUTION Do not drive crankshaft pulley or harmonic bala ncer onto crankshaft To do so may damage crankshaft thrust bearing and crankcase 3 Install engine rear mount bracket and torque nuts to specifications 4 Raise engine and connect rear mount then torque to specifications 5 Remove engine jack and Tool J 7894 6 Install rear center shield and grille 7 Install new oil filter and torque to specifications 8 Install blower belt and adjust as outlined 9 Lubricate groove of seal with liquid soap or silicone then while guiding groove of seal onto shield flange with one hand press seal in place with a block of wood or a hammer handle 10 Fill with oil start engine and check for leaks ENGINE REAR HOUSING SEAL Replacement 1 Remove crankshaft pulley or harmonic balancer as outlined 2 Remove seal by prying on outer edge of seal with twd screw drivers then discard seal 3 Install new seal over crankshaft and tap in place with a block of hardwood 4 Install crankshaft pulley or harmonic balancer as outlined ENGINE REAR HOUSING Removal 1 Remove distributor cap and note position of rotor then disconnect and remove distributor 2 Remove oil filter and Delcotron adapter as outlined 3 Drain engine oil 4 Install engine lift with Tool J 7894 attached under engine with a piece of hardwood positioned between the oil pan rails adjacent to engine skid plate NOTE Installation of hardwood block will allow removal of engine skid plate 5 Remove rear center shield and disconnect rear mount then lower engine approximately 1 to clear rear mount bracket

 Next
Next