Jeep Parts Wiki | Ford Parts Wiki
Home | Search | Browse | Marketplace | Messages | FAQ | Guest
|
Corvair Chassis Shop Manual December 1964 |
|
Prev

 Next
Next
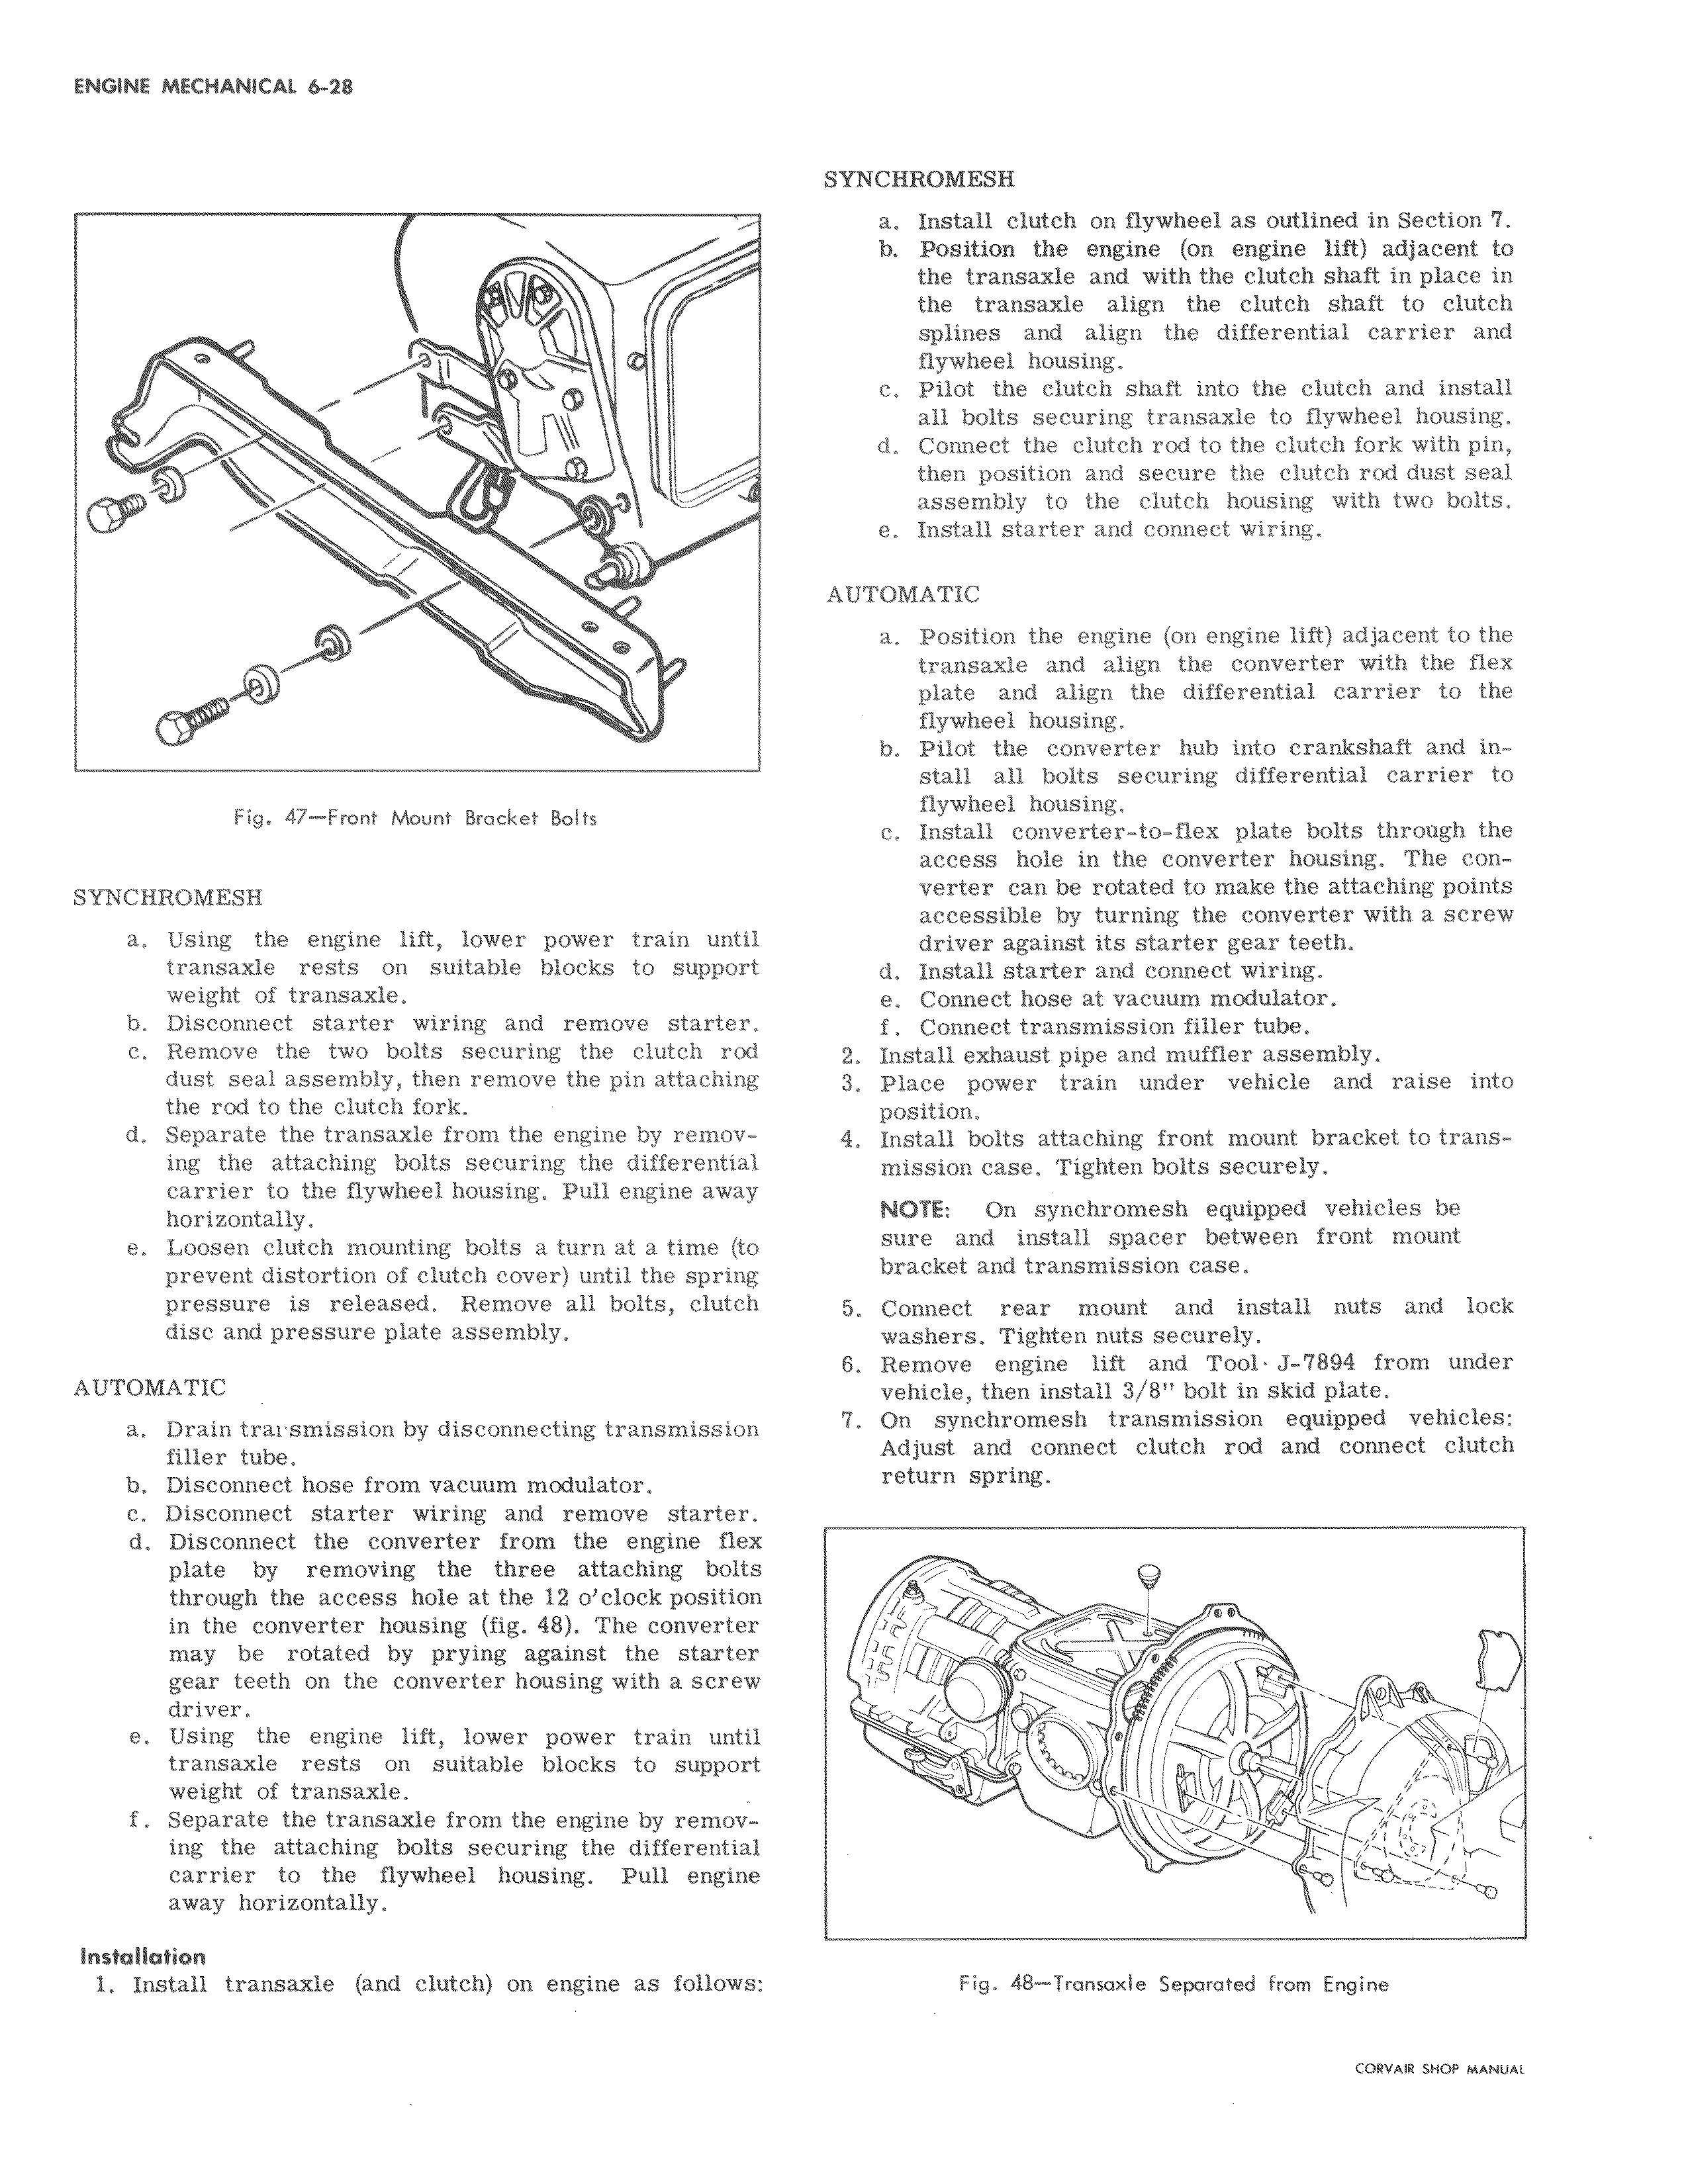
v y o v m Fig 47 Front Mount Bracket Bolts SYNCHROMESH a Using the engine lift lower power train until transaxle rests on suitable blocks to supp o weight of transaxle b Disconnect starter wiring and remove starter c Remove the two bolts securing the clutch rod dust seal assembly then remove the pin attaching the rod to the clutch fork I d Separate the transaxle from the engine by remov ing the attaching bolts securing the differenti 1 carrier to the flywheel housing Pull engine away horizontally e Loosen clutch mounting bolts a turn at a time to prevent distortion of clutch cover until the spri pressure is released Remove all bolts clutc disc and pressure plate assembly AUTOMATIC a Drain trausmission by disconnecting transmission filler tube b Disconnect hose from vacuum modulator c Disconnect starter wiring and remove starte d Disconnect the converter from the engine fl x plate by removing the three attaching bolts through the access hole at the 12 o clock position in the converter housing fig 48 The converter may be rotated by prying against the starter gear teeth on the converter housing with a scre w driver e Using the engine lift lower power train unt 1 transaxle rests on suitable blocks to support weight of transaxle f Separate the transaxle from the engine by removing the attaching bolts securing the differential carrier to the flywheel housing Pull engi e away horizontally Installation 1 Install transaxle and clutch on engine as follows I snNcHl oMESx a tnstall clutch on flywheel as outlined in Section 7 b Position the engine on engine lift adjacent to the transaxle and with the clutch shaft in place in the transaxle align the clutch shaft to clutch splines and align the differential carrier and flywheel housing c Pilot the clutch shaft into the clutch and install 811 bolts securing transaxle to flywheel housing d Connect the clutch rod to the clutch fork with pin then position and secure the clutch rod dust seal assembly to the clutch housing with two bolts e Install starter and connect wiring AUTOMATIC a Position the engine on engine lift adjacent to the transaxle and align the converter with the flex plate and align the differential carrier to the flywheel housing b Pilot the converter hub into crankshaft and in tall all bolts securing differential carrier to flywheel housing c Install converter to flex plate bolts through the access hole in the converter housing The conwerter can be rotated to make the attaching points ccessible by turning the converter with a screw driver against its starter gear teeth d Install starter and connect wiring e Connect hose at vacuum modulator f Connect transmission filler tube 2 Install exhaust pipe and muffler assembly 3 Place power train under vehicle and raise into position 4 Install bolts attaching front mount bracket to transmission case Tighten bolts securely NOTE On synchromesh equipped vehicles be surle and install spacer between front mount bracket and transmission case 5 Connect rear mount and install nuts and lock washers Tighten nuts securely 6 Remove engine lift and Tool J 7894 from under vehicle then install 3 8 bolt in skid plate 7 On synchromesh transmission equipped vehicles Adjust and connect clutch rod and connect clutch return spring Fig 48 Transaxle Separated from Engine

 Next
Next