Jeep Parts Wiki | Ford Parts Wiki
Home | Search | Browse
Prev

 Next
Next
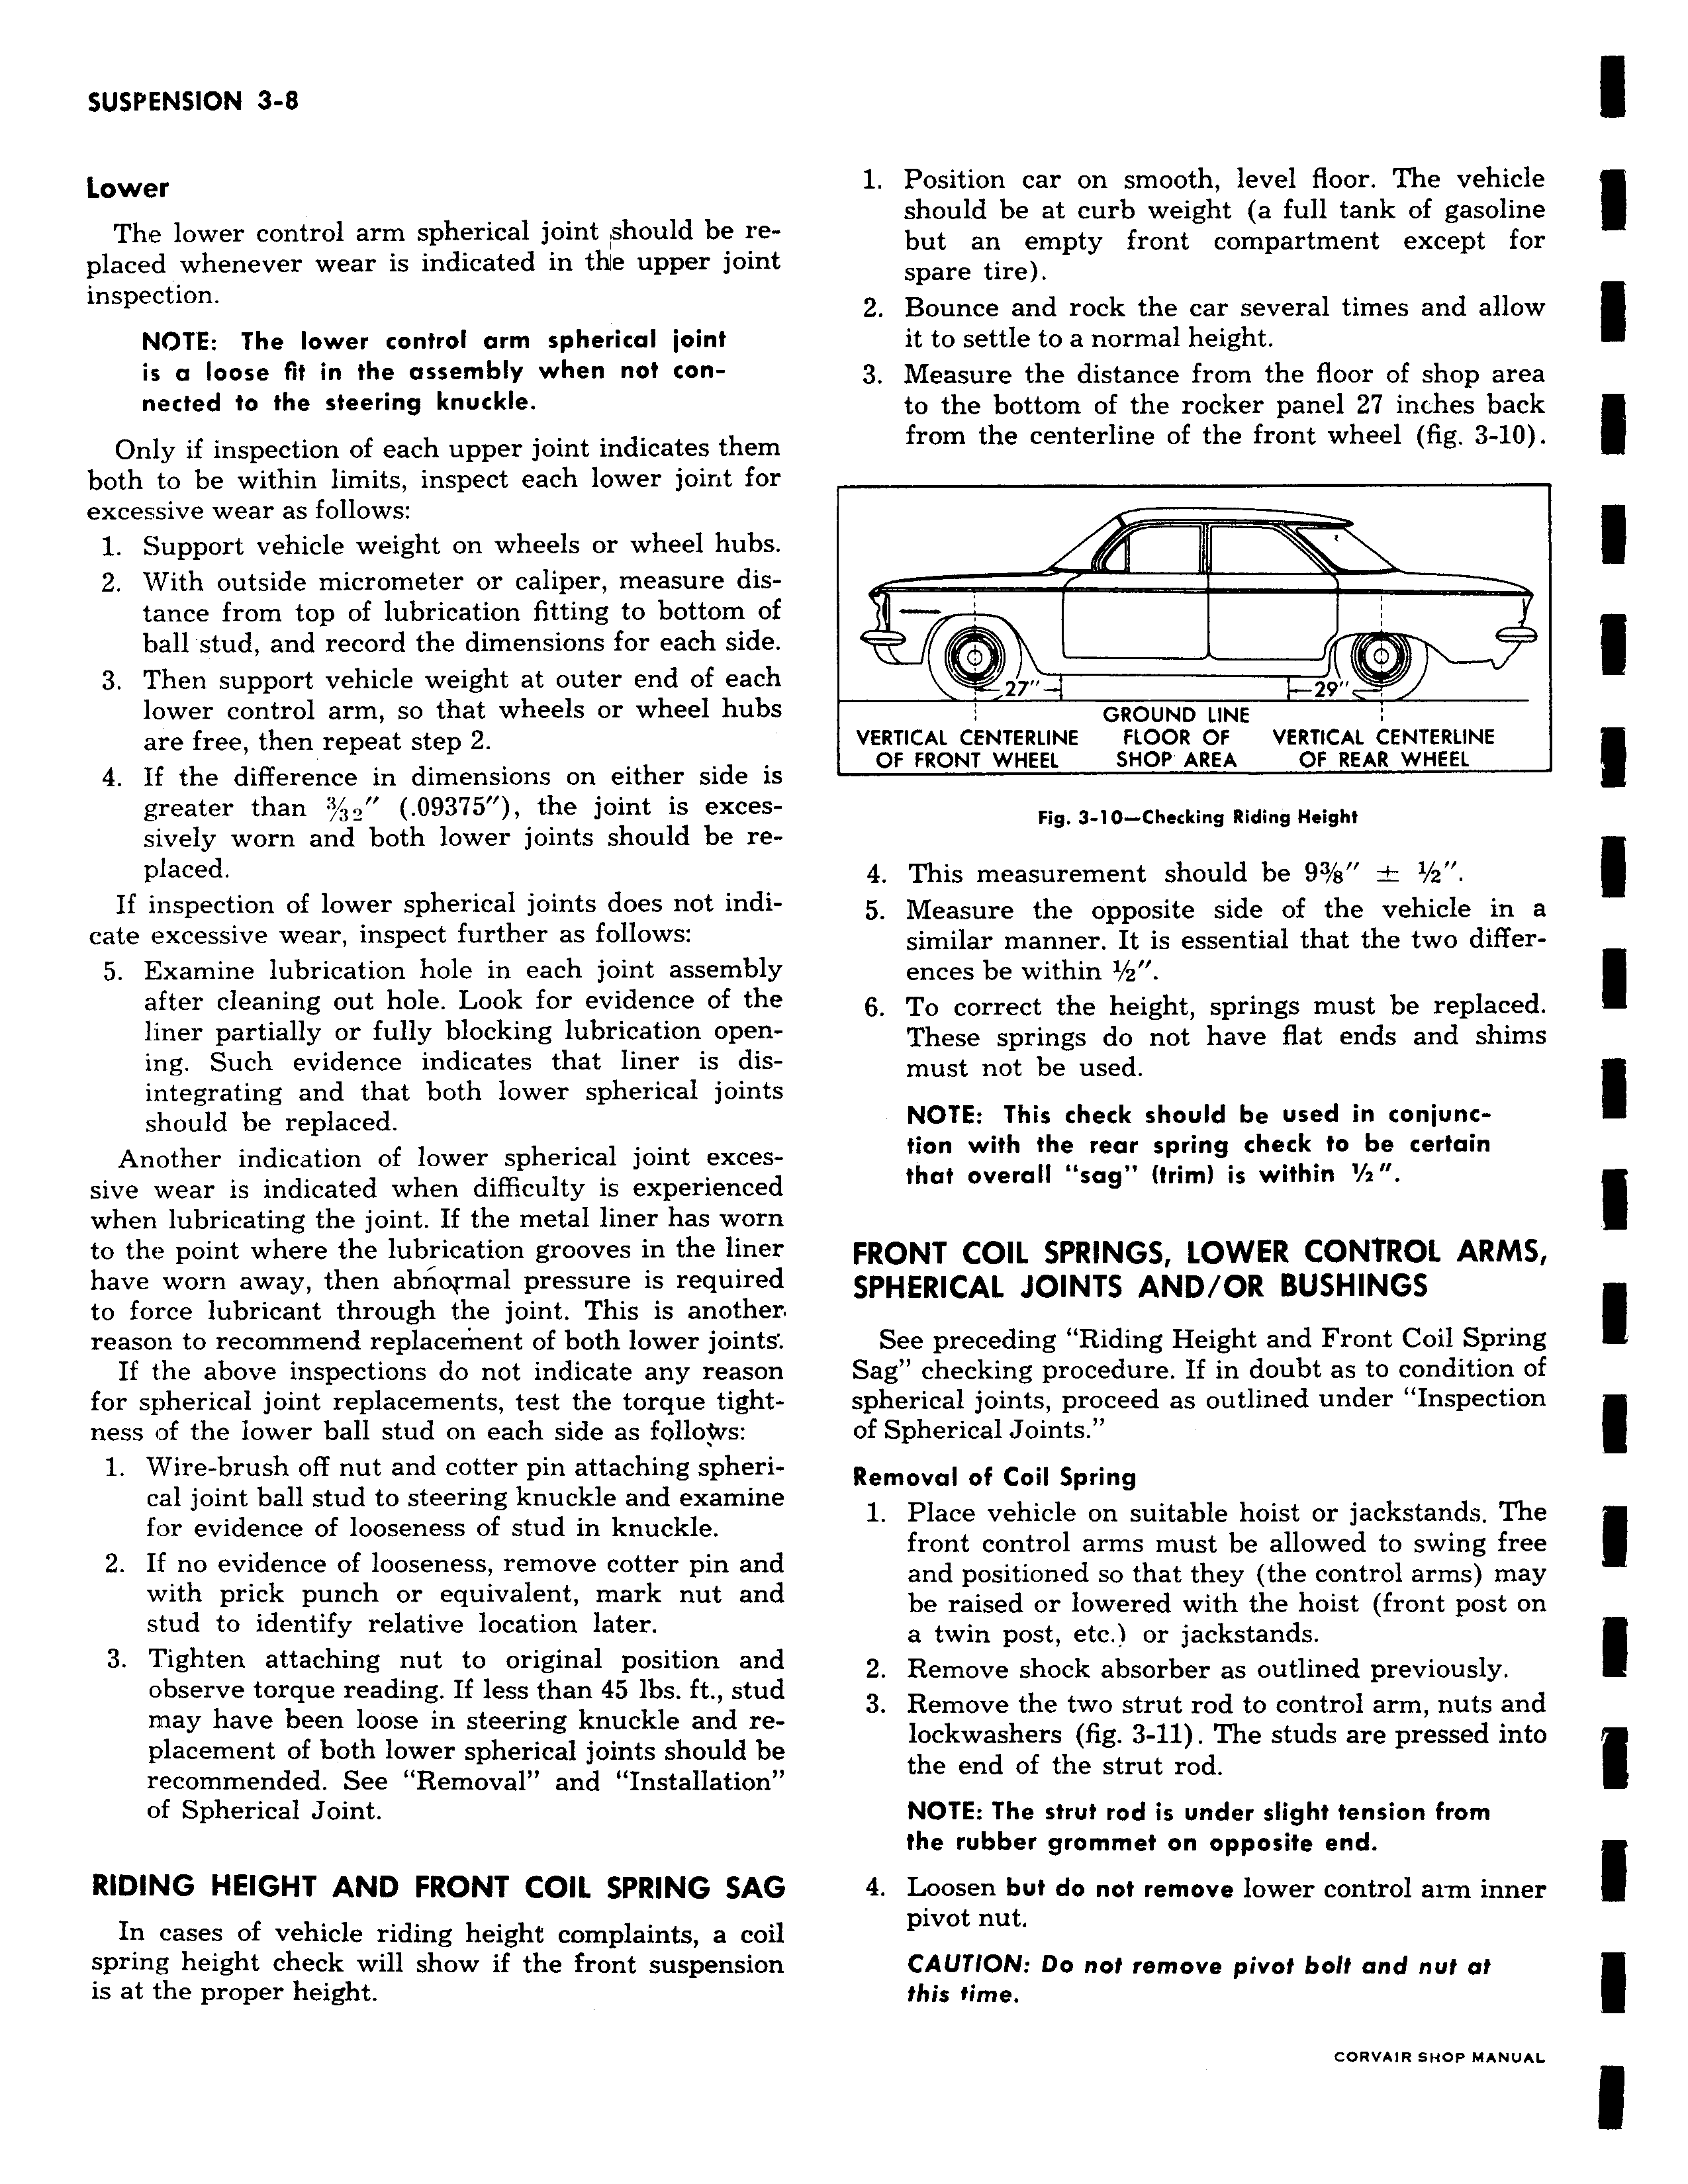
Lower The lower control arm spherical joint should be replaced whenever wear is indicated in the upper joint inspection NOTE The lower control arm spherical joint is a loose fit in the assembly when not connected to the steering knuckle Only if inspection of each upper joint indicates them both to be within limits inspect each lower joint for excessive wear as follows 1 Support vehicle weight on wheels or wheel hubs 2 With outside micrometer or caliper measure distance from top of lubrication fitting to bottom of ball stud and record the dimensions for each side 3 Then support vehicle weight at outer end of each lower control arm so that wheels or wheel hubs are free then repeat step 2 4 If the difference in dimensions on either side is greater than 3 32 09375 the joint is excessively worn and both lower joints should be replaced If inspection of lower spherical joints does not indicate excessive wear inspect further as follows 5 Examine lubrication hole in each joint assembly after cleaning out hole Look for evidence of the liner partially or fully blocking lubrication open ing Such evidence indicates that liner is disintegrating and that both lower spherical joints should be replaced Another indication of lower spherical joint excessive wear is indicated when difficulty is experienced when lubricating the joint If the metal liner has worn to the point where the lubrication grooves in the liner have worn away then abnoqrmal pressure is required to force lubricant through the joint This is another reason to recommend replacement of both lower joints If the above inspections do not indicate any reason for spherical joint replacements test the torque tightness of the lower ball stud on each side as follobvs 1 Wire brush off nut and cotter pin attaching spheri cal joint ball stud to steering knuckle and examine for evidence of looseness of stud in knuckle 2 If no evidence of looseness remove cotter pin and with prick punch or equivalent mark nut and stud to identify relative location later 3 Tighten attaching nut to original position and observe torque reading If less than 45 lbs ft stud may have been loose in steering knuckle and replacement of both lower spherical joints should be recommended See Removal and Installation of Spherical Joint RIDING HEIGHT AND FRONT COIL SPRING SAG In cases of vehicle riding height complaints a coil spring height check will show if the front suspension is at the proper height 1 Position car on smooth level floor The vehicle should be at curb weight a full tank of gasoline but an empty front compartment except for spare tire 2 Bounce and rock the car several times and allow it to settle to a normal height 3 Measure the distance from the floor of shop area to the bottom of the rocker panel 27 inches back from the centerline of the front wheel fig 3 10 b 027 1 29 GROUND LINE VERTICAL CENTERLINE FLOOR OF VERTICAL CENTERLINE OF FRONT WHEEL SHOP AREA OF REAR WHEEL Fig 3 10 Checking Riding Height 4 This measurement should be 93 s 1 2 5 Measure the opposite side of the vehicle in a similar manner It is essential that the two differences be within 1 z 6 To correct the height springs must be replaced These springs do not have flat ends and shims must not be used NOTE This check should be used in conjunction with the rear spring check to be certain that overall sag trim is within 1 2 FRONT COIL SPRINGS LOWER CONTROL ARMS SPHERICAL JOINTS AND OR BUSHINGS See preceding Riding Height and Front Coil Spring Sag checking procedure If in doubt as to condition of spherical joints proceed as outlined under Inspection of Spherical Joints Removal of Coil Spring 1 Place vehicle on suitable hoist or jackstands The front control arms must be allowed to swing free and positioned so that they the control arms may be raised or lowered with the hoist front post on a twin post etc or jackstands 2 Remove shock absorber as outlined previously 3 Remove the two strut rod to control arm nuts and lockwashers fig 3 11 The studs are pressed into the end of the strut rod NOTE The strut rod is under slight tension from the rubber grommet on opposite end 4 Loosen but do not remove lower control arm inner pivot nut CAUTION Do not remove pivot bolt and nut at this time rnwveoo euno uenmm

 Next
Next