Jeep Parts Wiki | Ford Parts Wiki
Home | Search | Browse
Prev
 Next
Next
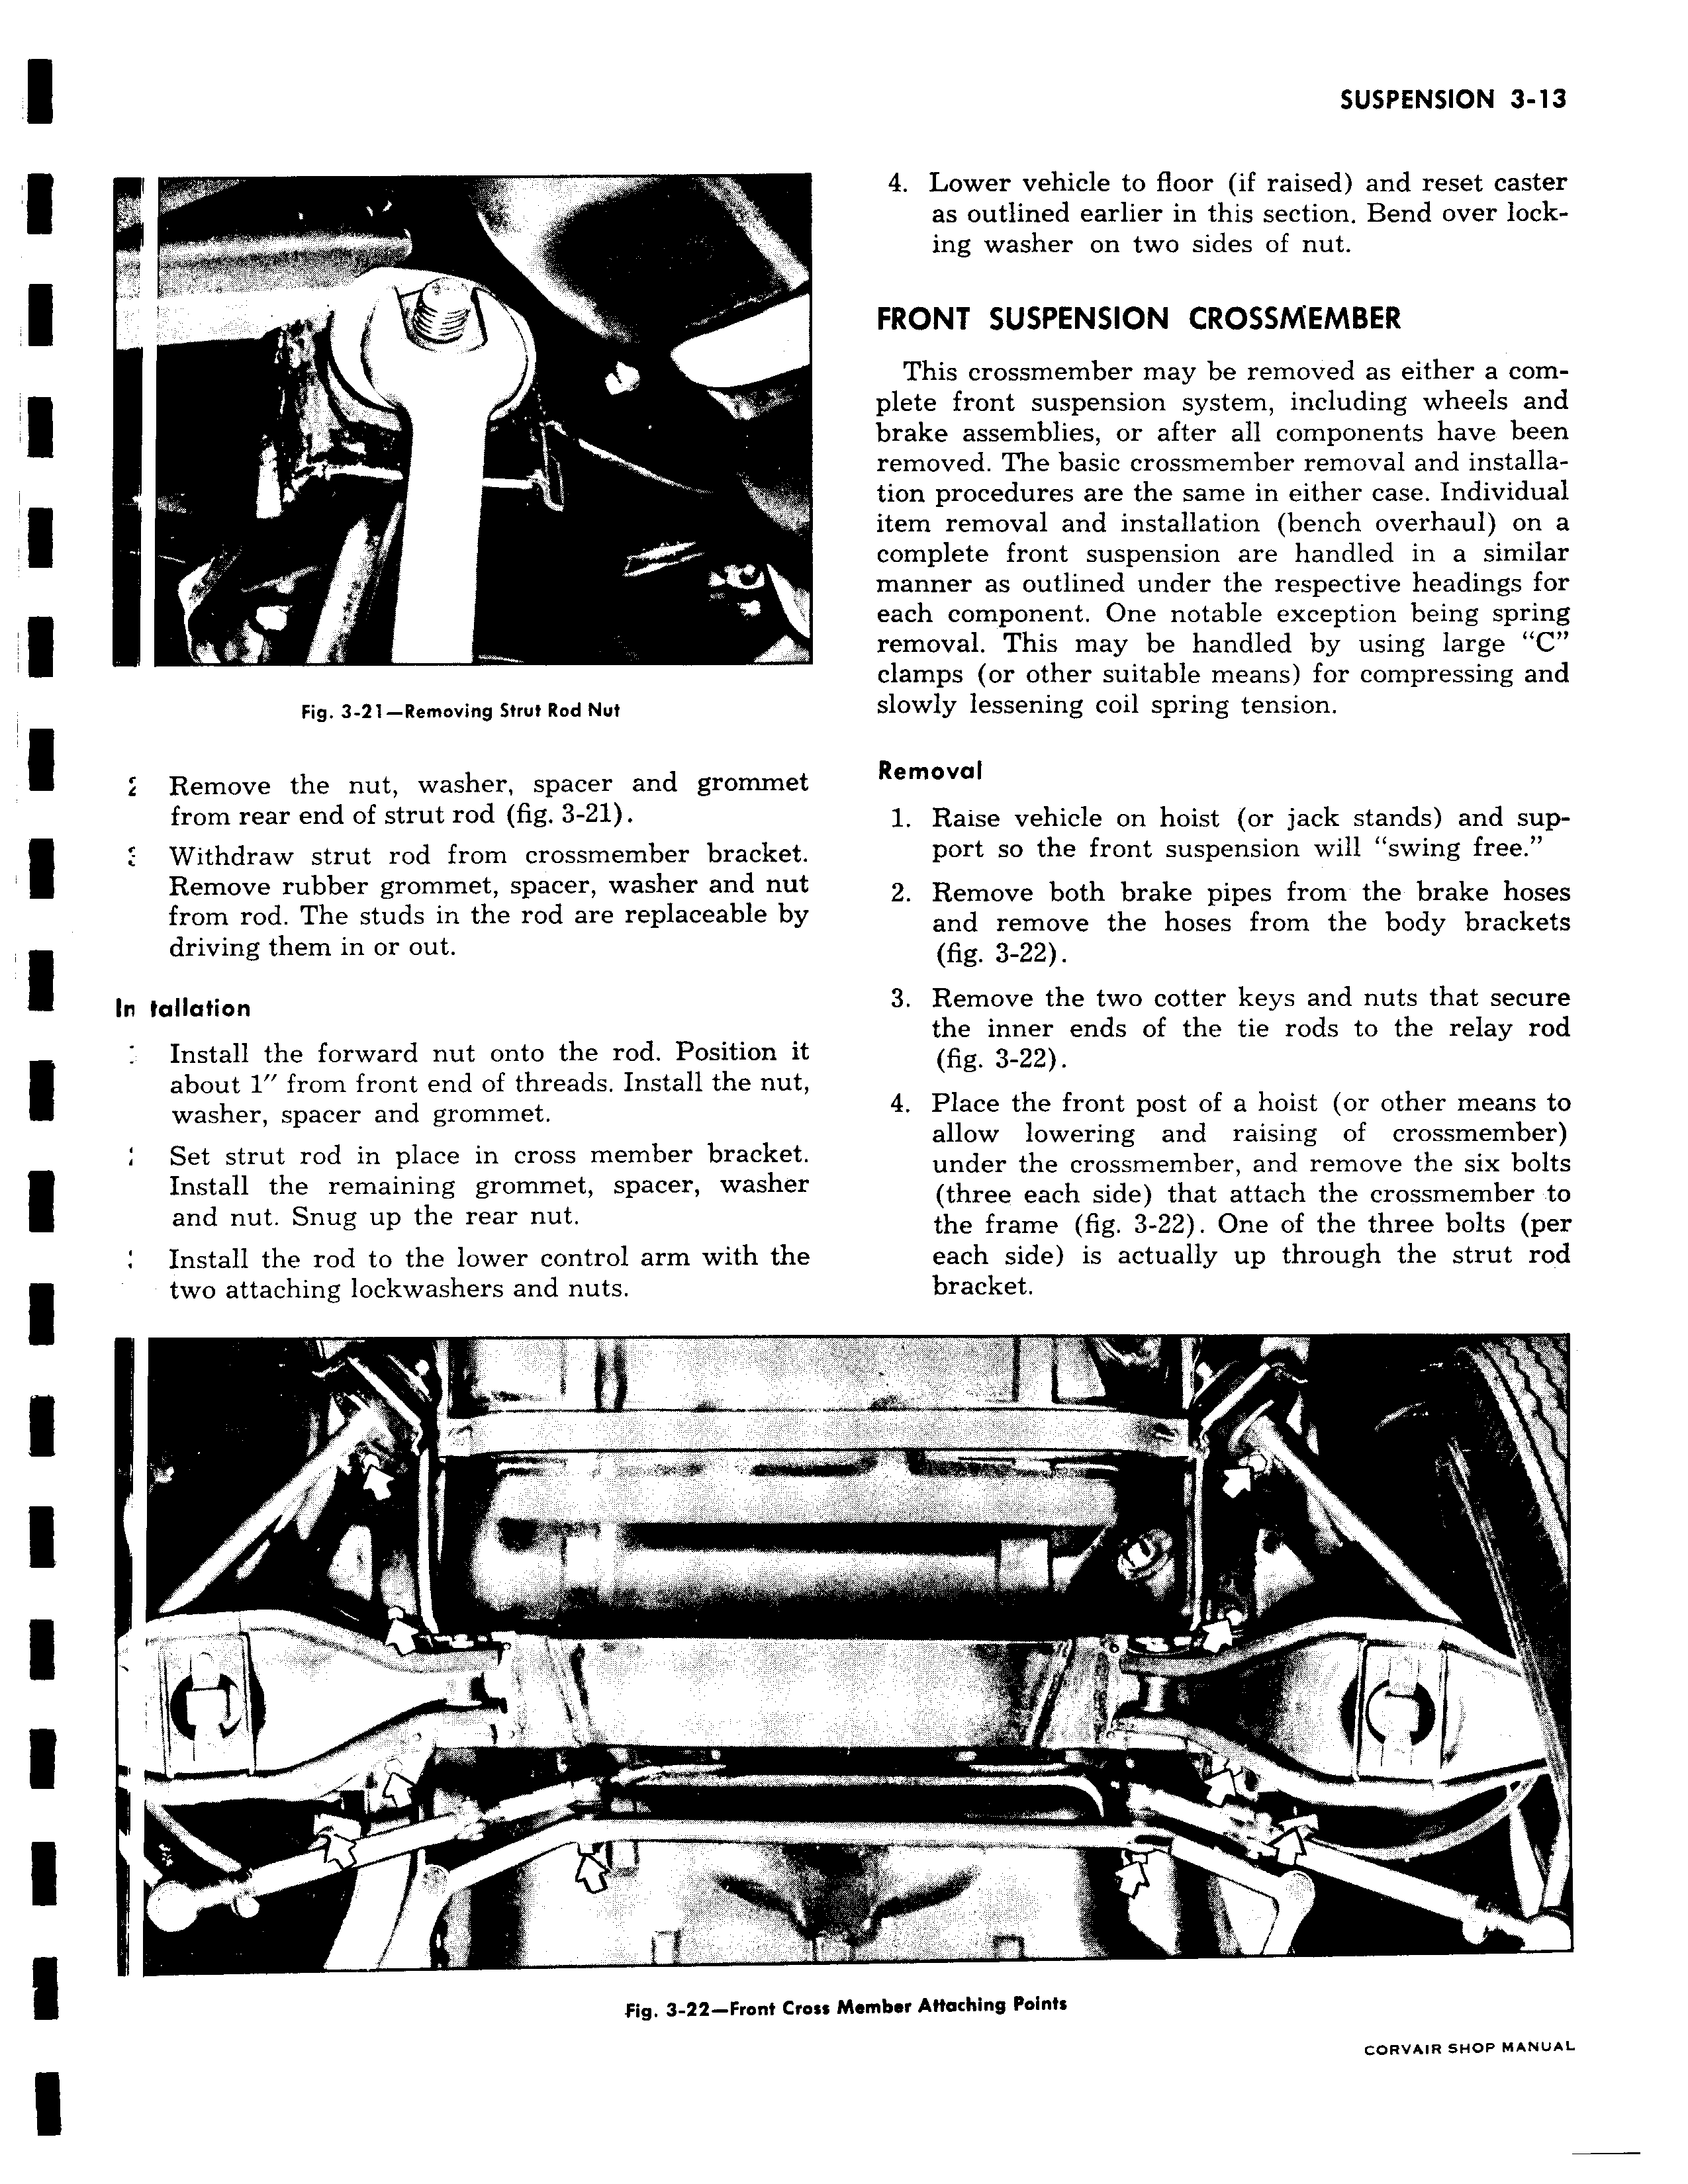
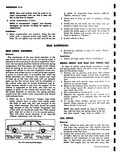
t t Fig 3 21 Removing Strut Rod Nut Remove the nut washer spacer and grommel from rear end of strut rod fig 3 21 Withdraw strut rod from crossmember bracket Remove rubber grommet spacer washer and nu1 from rod The studs in the rod are replaceable by driving them in or out In tallation Install the forward nut onto the rod Position i1 f about 1 from front end of threads Install the nut washer spacer and grommet Set strut rod in place in cross member bracket Install the remaining grommet spacer washei and nut Snug up the rear nut Install the rod to the lower control arm with the two attaching lockwashers and nuts Fig 3 22 Front Cn 4 Lower vehicle to floor if raised and reset caster as outlined earlier in this section Bend over locking washer on two sides of nut FRONT SUSPENSION CROSSNfEMBER This crossmember may be removed as either a complete front suspension system including wheels and brake assemblies or after all components have been removed The basic crossmember removal and installation procedures are the same in either case Individual item removal and installation bench overhaul on a complete front suspension are handled in a similar manner as outlined under the respective headings for each component One notable exception being spring removal This may be handled by using large C clamps or other suitable means for compressing and slowly lessening coil spring tension Removal 1 Raise vehicle on hoist or jack stands and support so the front suspension will swing free 2 Remove both brake pipes from the brake hoses and remove the hoses from the body brackets fig 3 22 3 Remove the two cotter keys and nuts that secure the inner ends of the tie rods to the relay rod fig 3 22 4 Place the front post of a hoist or other means to allow lowering and raising of crossmember under the crossmember and remove the six bolts three each side that attach the crossmember to the frame fig 3 22 One of the three bolts per each side is actually up through the strut rod bracket a ON M ss Member AHaching Points CORVAIR SHOP MANUAL