Jeep Parts Wiki | Ford Parts Wiki
Home | Search | Browse
|
Body Service Manual August 1964 |
|
Prev
 Next
Next
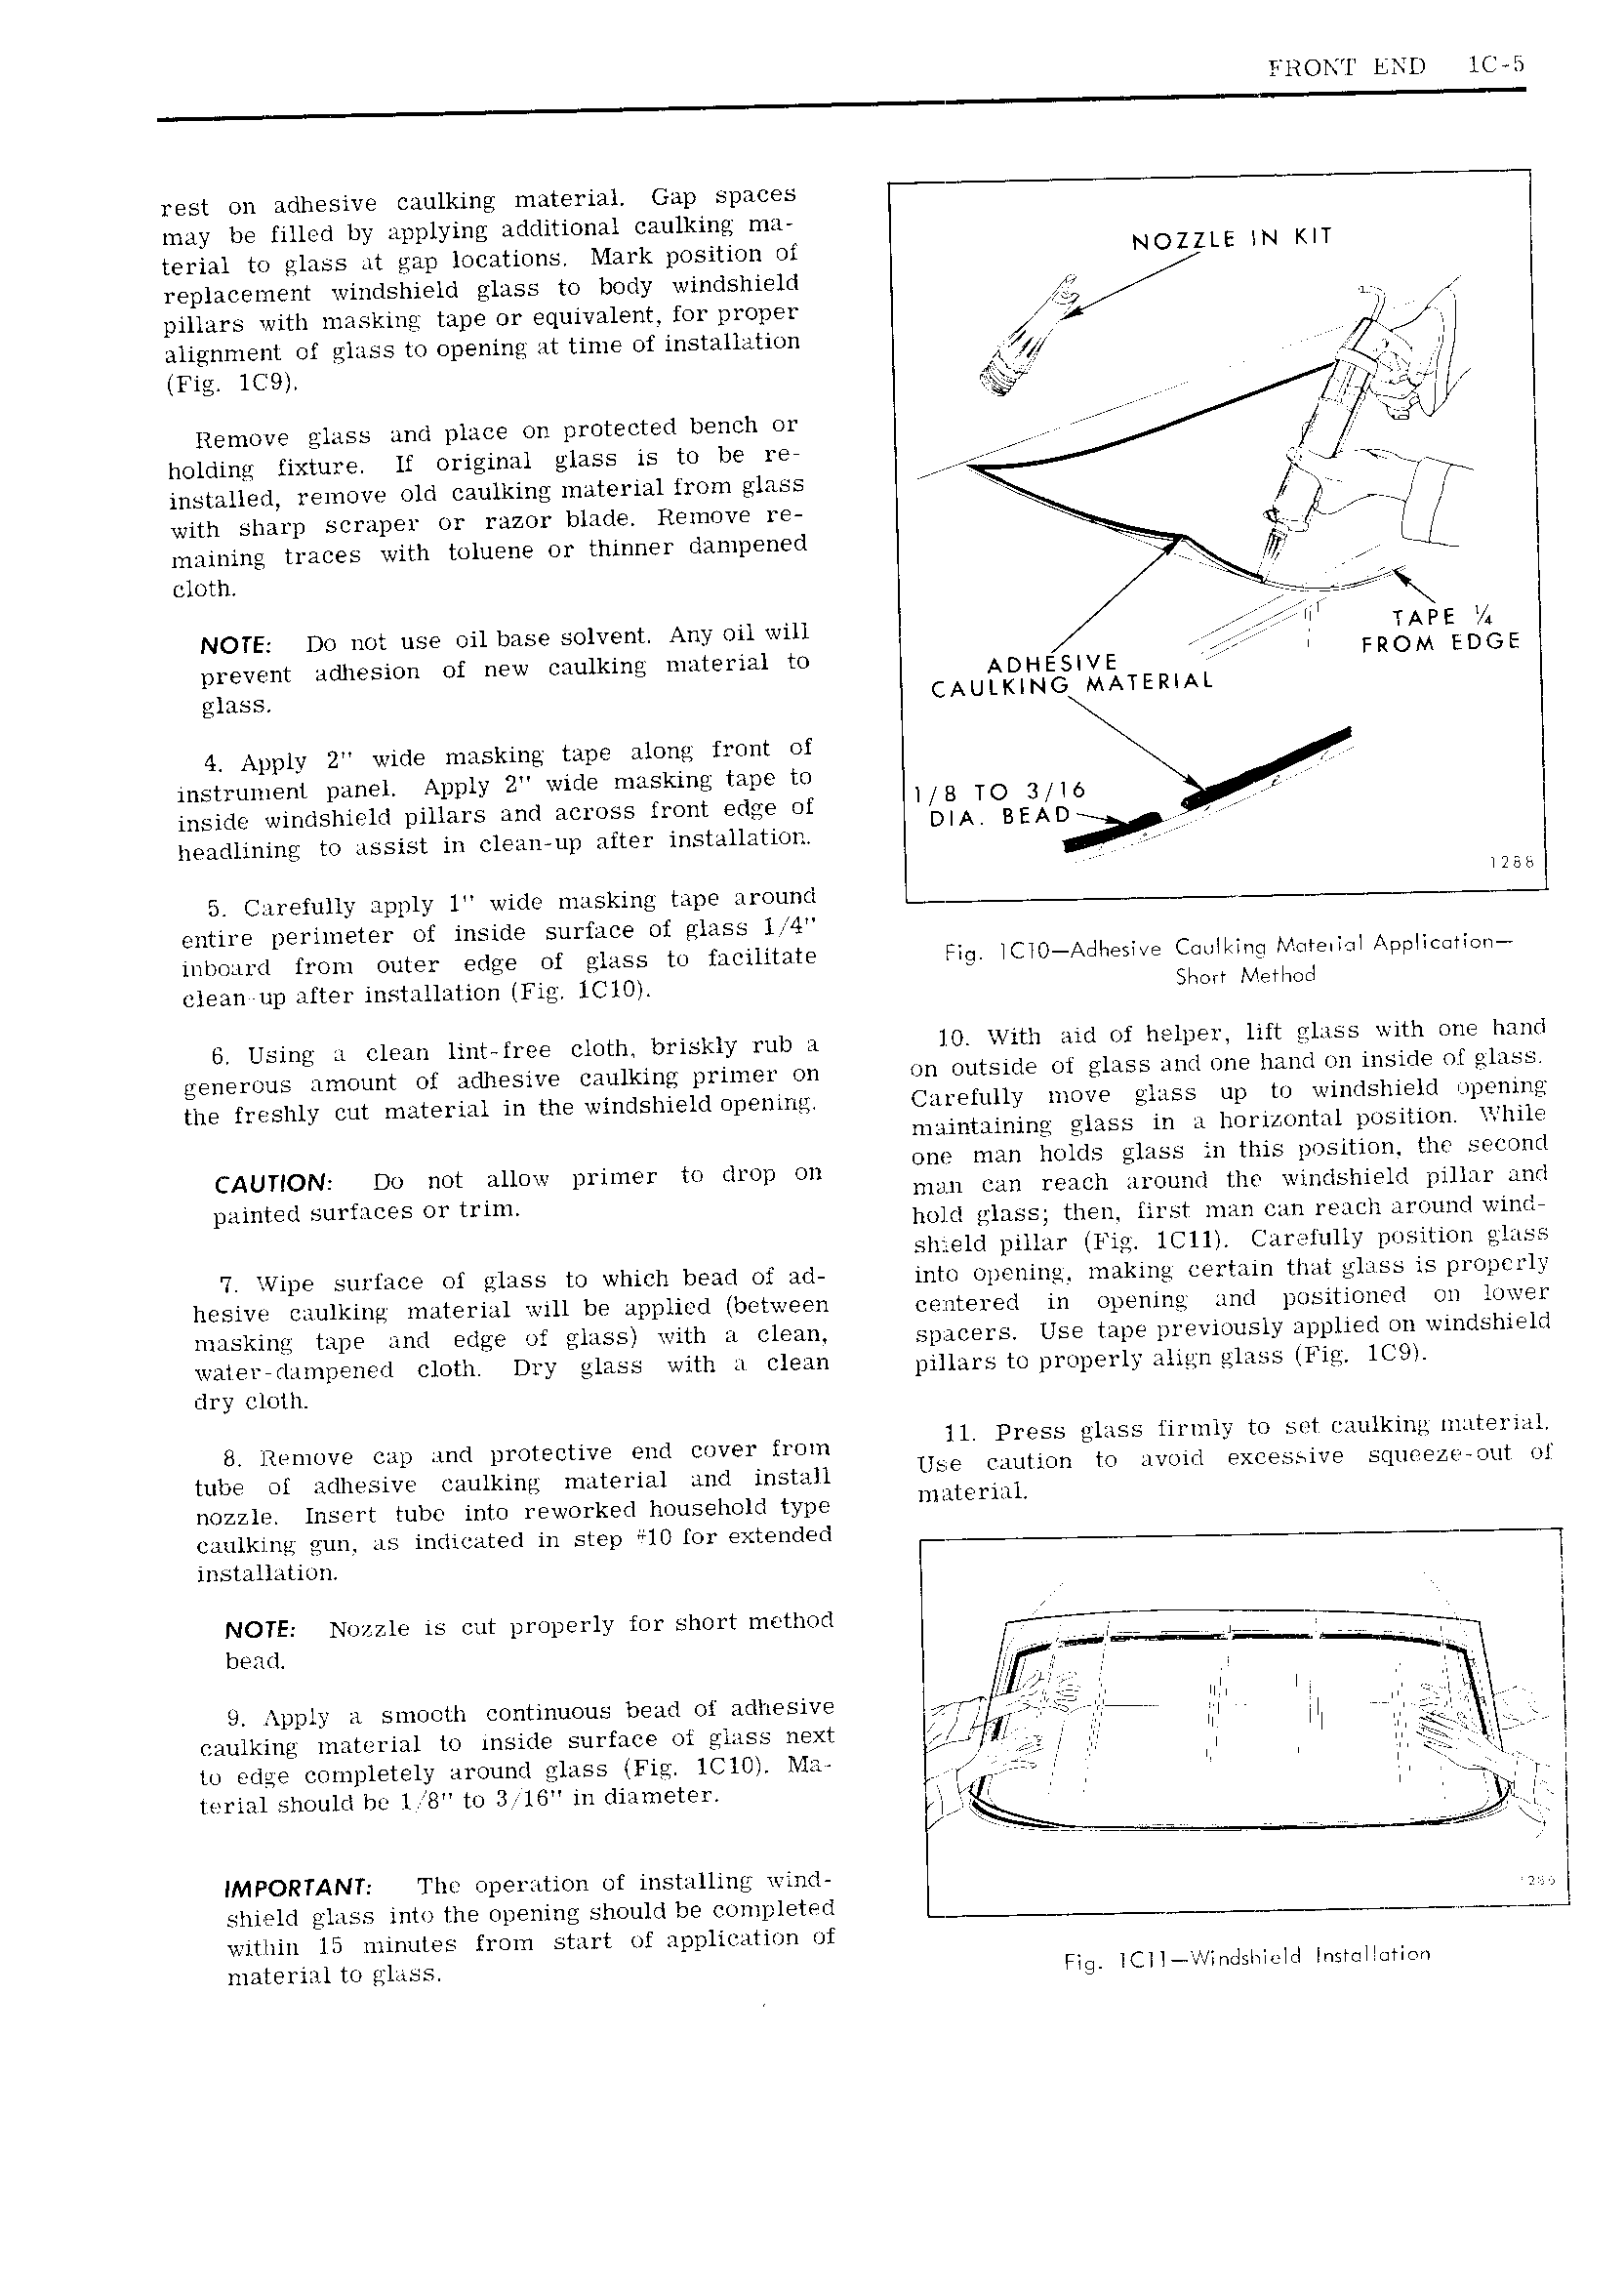
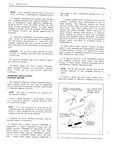
FROl l END lC Ei rest on adhesive caulking material Gap spaces may be filled by applying additional caulking ma terial to glass at gap locations Mark position of NOZZLE ll Kll replacement windshield glass to body windshield A pillars with masking tape or equivalent for proper lp li alignment of glass to opening at time of installation e A Fig ice lf ef ti Remove glass and place on protected bench or 4 a U l holding fixture lf original glass is to be re no J installed remove old caulkingg material from glass r V V tre with sharp scraper or razor blade Remove re r qv VVV 5 maining traces with toluene or thinner dampened V WM t J r cloth V NOTE Do not use oil base solvent Any oil will TAPE V4 prevent adhesion of new oaulking material to ADHESWE FROM EDGE glass CAULKING MATERIAL 4 Apply Z wide masking tape alone front of instrument panel Apply Z wide masking tape to I inside windshield pillars and across front edge of l ATOB Ecil V I I headlining to assist in elean up after installation J 5 Carefully apply l wide masking tape around MN entire perimeter of inside surface of glass li4 inhoard from outer edge of glass to facilitate Fig iCiO Adhesi e Cdnllinq Mtiteiidl Application elean up after installation Fig lClOl Show Ivtprhotl 6 Using a clean lint lree cloth briskly rub a O With aid of helper lift glass with one hand generous amount of achiesive caulking primer on on outside of glass and one hand on inside of glass the freshly cut material in the windshield opening Carefully move glass up to windshield opening maintaining glass in a horizontal position While CAUTION DU mt dumv primer to dwp On one man holds glass in this position the second nian can reach around the windsiiield pillar and painted surtaoes oi tum V V V hold glass then lirst man can reach around vsinoe shield pillar Fig lClll Carefully position glass 7 Vil7 5 U f i r of MHS5 to which bB3d of ad into opening making certain that glass is properly ll lV Ciililkiils 1 lT Fi ll Will be LiDDli0d tb tw ll centered in opening and positioned on lower Ruskin WP f il EGE of l1 SSl iU1 H Cl ml spacers Use tape previously applied on windshield 3 9 l ml l Clmh DYY Sheet Wllll il 9311 pillars to properly align glass Fig lC9 dry cloth B RHHUVQ wp Amd Drotgctive End CIWET mm ll Press glass llfllllfi to set raulkmg material tube Di MuWSiv Caulkiml mdtewial and install Use eaution to avoid excessive squoezs out of nozzle Insert tube into reworked household type nlmwml caulking gun as indicated in step 10 for extended installation NOTE Nyyygzle is tm properly for short method J s I bead X g Ji 1 l 1 H ipply a smooth continuous bead of adhesive ls T 3Yl T E ll j i tzaulking material to inside surface oi glass next s 3 ll 1 l to edge oompletely around glass Fig lClOl Ma r Y QQ i Vinh terial should be l 8 to 3 16 in diameter i l VUV I t Jl 7 Y V rr 7 rj lr 1 IMPORTANT Thr operation of installing wind shield glass into the opening should be completed within 15 minutes from start of applioatitni of 11l3l I liil to glass Fig lCll W thhi id lngmllorieii