Jeep Parts Wiki | Ford Parts Wiki
Home | Search | Browse
|
Body Service Manual August 1964 |
|
Prev
 Next
Next
4421823
4421823
4421823
4421823
4459429
4459429
4871330
4871330
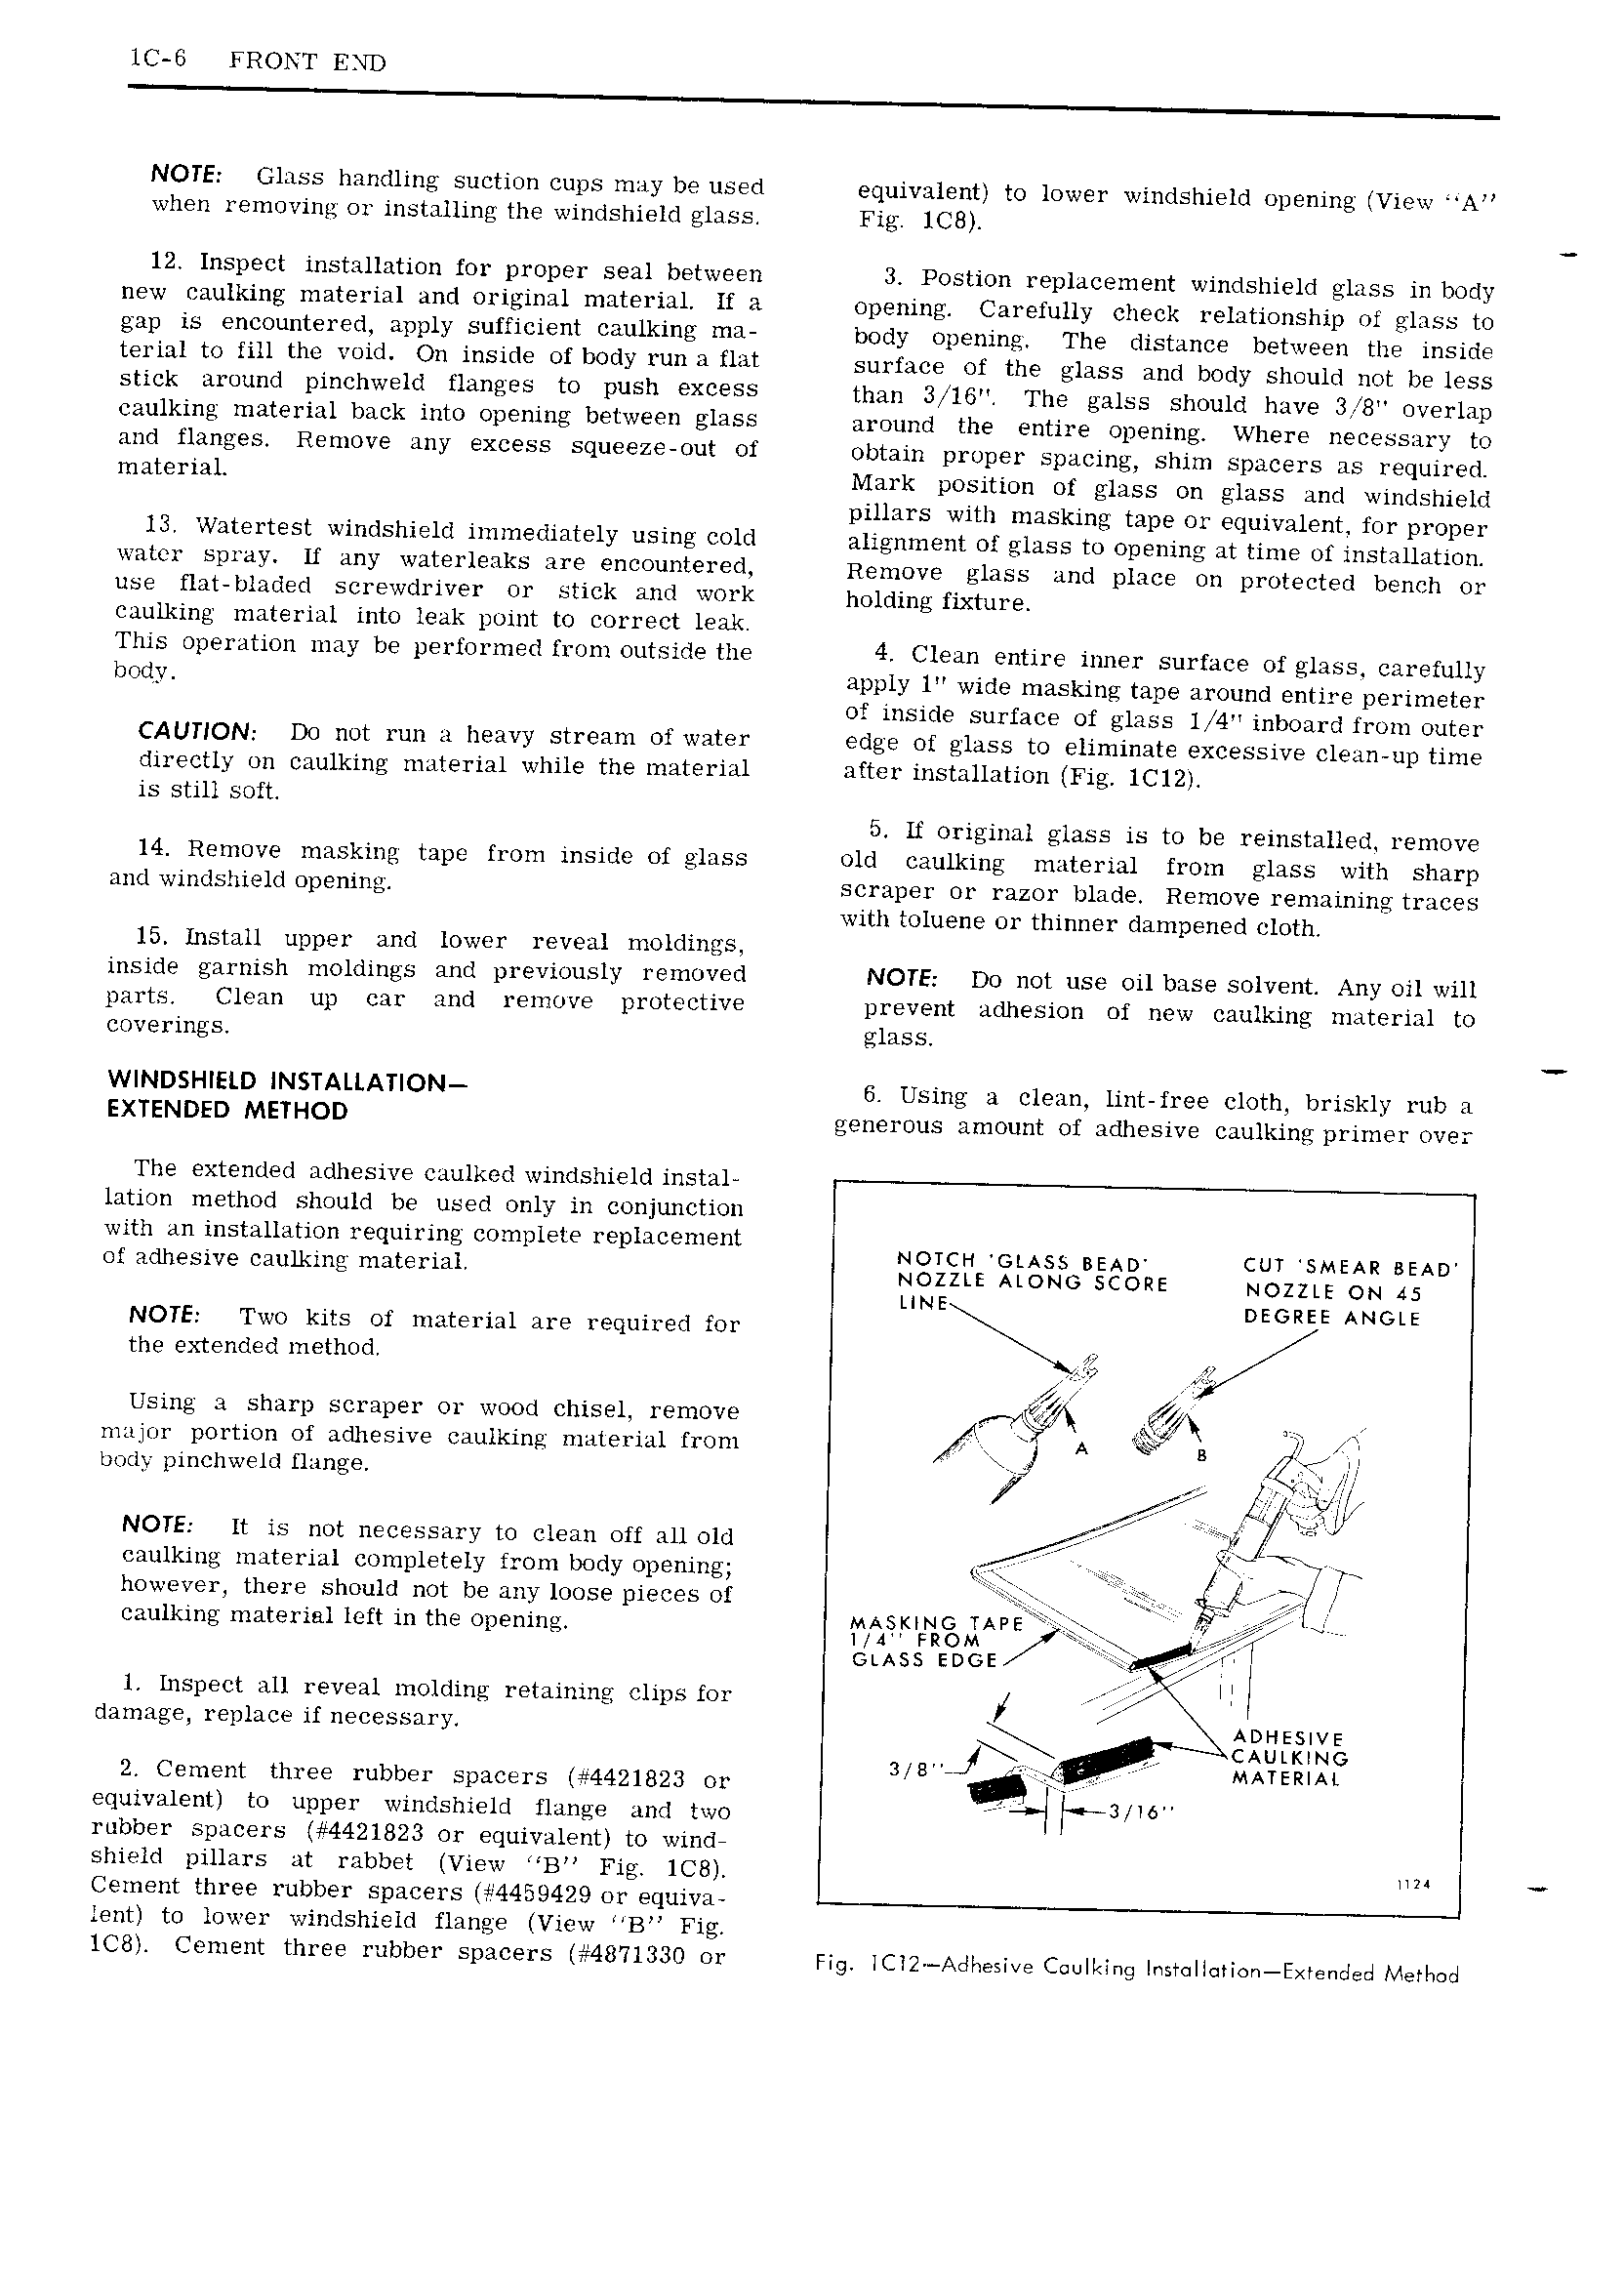
1C G FRONT END NOTE Glass handling suction cups maybe used equivalent to lower windshield opening View A when removing or installing the windshield glass Fig ICB 12 Inspect installation for proper seal between 3 Postion replacement windshield glass in body new caulking material and original material If a opening Carefully check relationship ot glass to gap is encountered apply sufficient caulking ma body opening The distance between the jngjdg terial to fill tho Void On inside of IJOEIY l 11Il B fliif surface of the glass and body should not be legs stick around pinchweld flanges to push excess than 3w 5o Thg ghlss Should have 3 8 OV I 1a p gaulking material back into opening between glass around the entire opening Where necessary to and flanges Remove any excess squeeze out of obtain proper spacing shim spacers required material Mark position of glass on glass and windshield pillars with masking tape or equivalent for proper 13 Watertest windshield immediately using cold alignment of glass to opening at time of installation water spray If any waterleaks are encountered Remove glass and place on protected bench or use flat bladed screwdriver or stick and work holding fixmpg caulking material into leak point to correct leak This operation may be performed from outside the 4 Clean entire inner surface of glass carefully body apply l wide masking tape around entire perimeter of inside surface of glass I 4 inboard from outer CAUTION Do not run a heavy stream of water edge of glass to eliminate excessive clean up time directly on caulking material while the material after installation Fig lC12 is still soft 5 If original glass is to be reinstalled remove 14 Remove masking tape from inside of glass old caulking material from glass with sharp and windshield opening scraper or razor blade Remove remaining traces with toluene or thinner dampened cloth 15 Install upper and lower reveal moldings inside garnish moldings and previously removed NOTE Do not use oil base solvent Any oil will parts Clean up car and remove protective prevent adhesion of new caulking material to coverings glass WINDSHIELD INSTALLATION 6 Using a clean lint free cloth briskly rub a EXTENDED METHOD generous amount of adhesive caulking primer over The extended adhesive caulkcd windshield instal lation method should be used only in conjunction with an installation requiring complete replacement NOTCH GLASS BEAD CUT ASMEAR KENT of adhesive caulking material NOZZLE MONO SCORE NOZZLE ON A5 LINE ozonee Amote NOTE Two kits of material are required for the extended method I N Using a sharp scraper or wood chisel remove major portion of adhesive caulking material from A o B 7 O body pinchweld flange J M t g z 4 NOTE It is not necessary to clean off all old ff caulkiug material completely from body opening t 7 however there should not be any loose pieces of Y caulking material lcft in the opening QI KIF A l or GLASS soc 1 Inspect all reveal molding retaining clips for II dam tge replace if necessary H 2 Cement three rubber spacers 4421823 or 3 B 7 Ai MATERIAL equivalent to upper windshield flange and two r 3 MM rubber spacers 4421823 or equivalent to wind shield pillars at rabbet View B Fig ICB IIN Cement three rubber spacers 4459429 or equiva lent to lower windshield flange View B Fig 1C8 Cement three rubber spacers 4871330 or Fig ICI2 Adhesive Caulking Inst II ri n E re ded Method