Jeep Parts Wiki | Ford Parts Wiki
Home | Search | Browse
|
Body Service Manual August 1964 |
|
Prev

 Next
Next
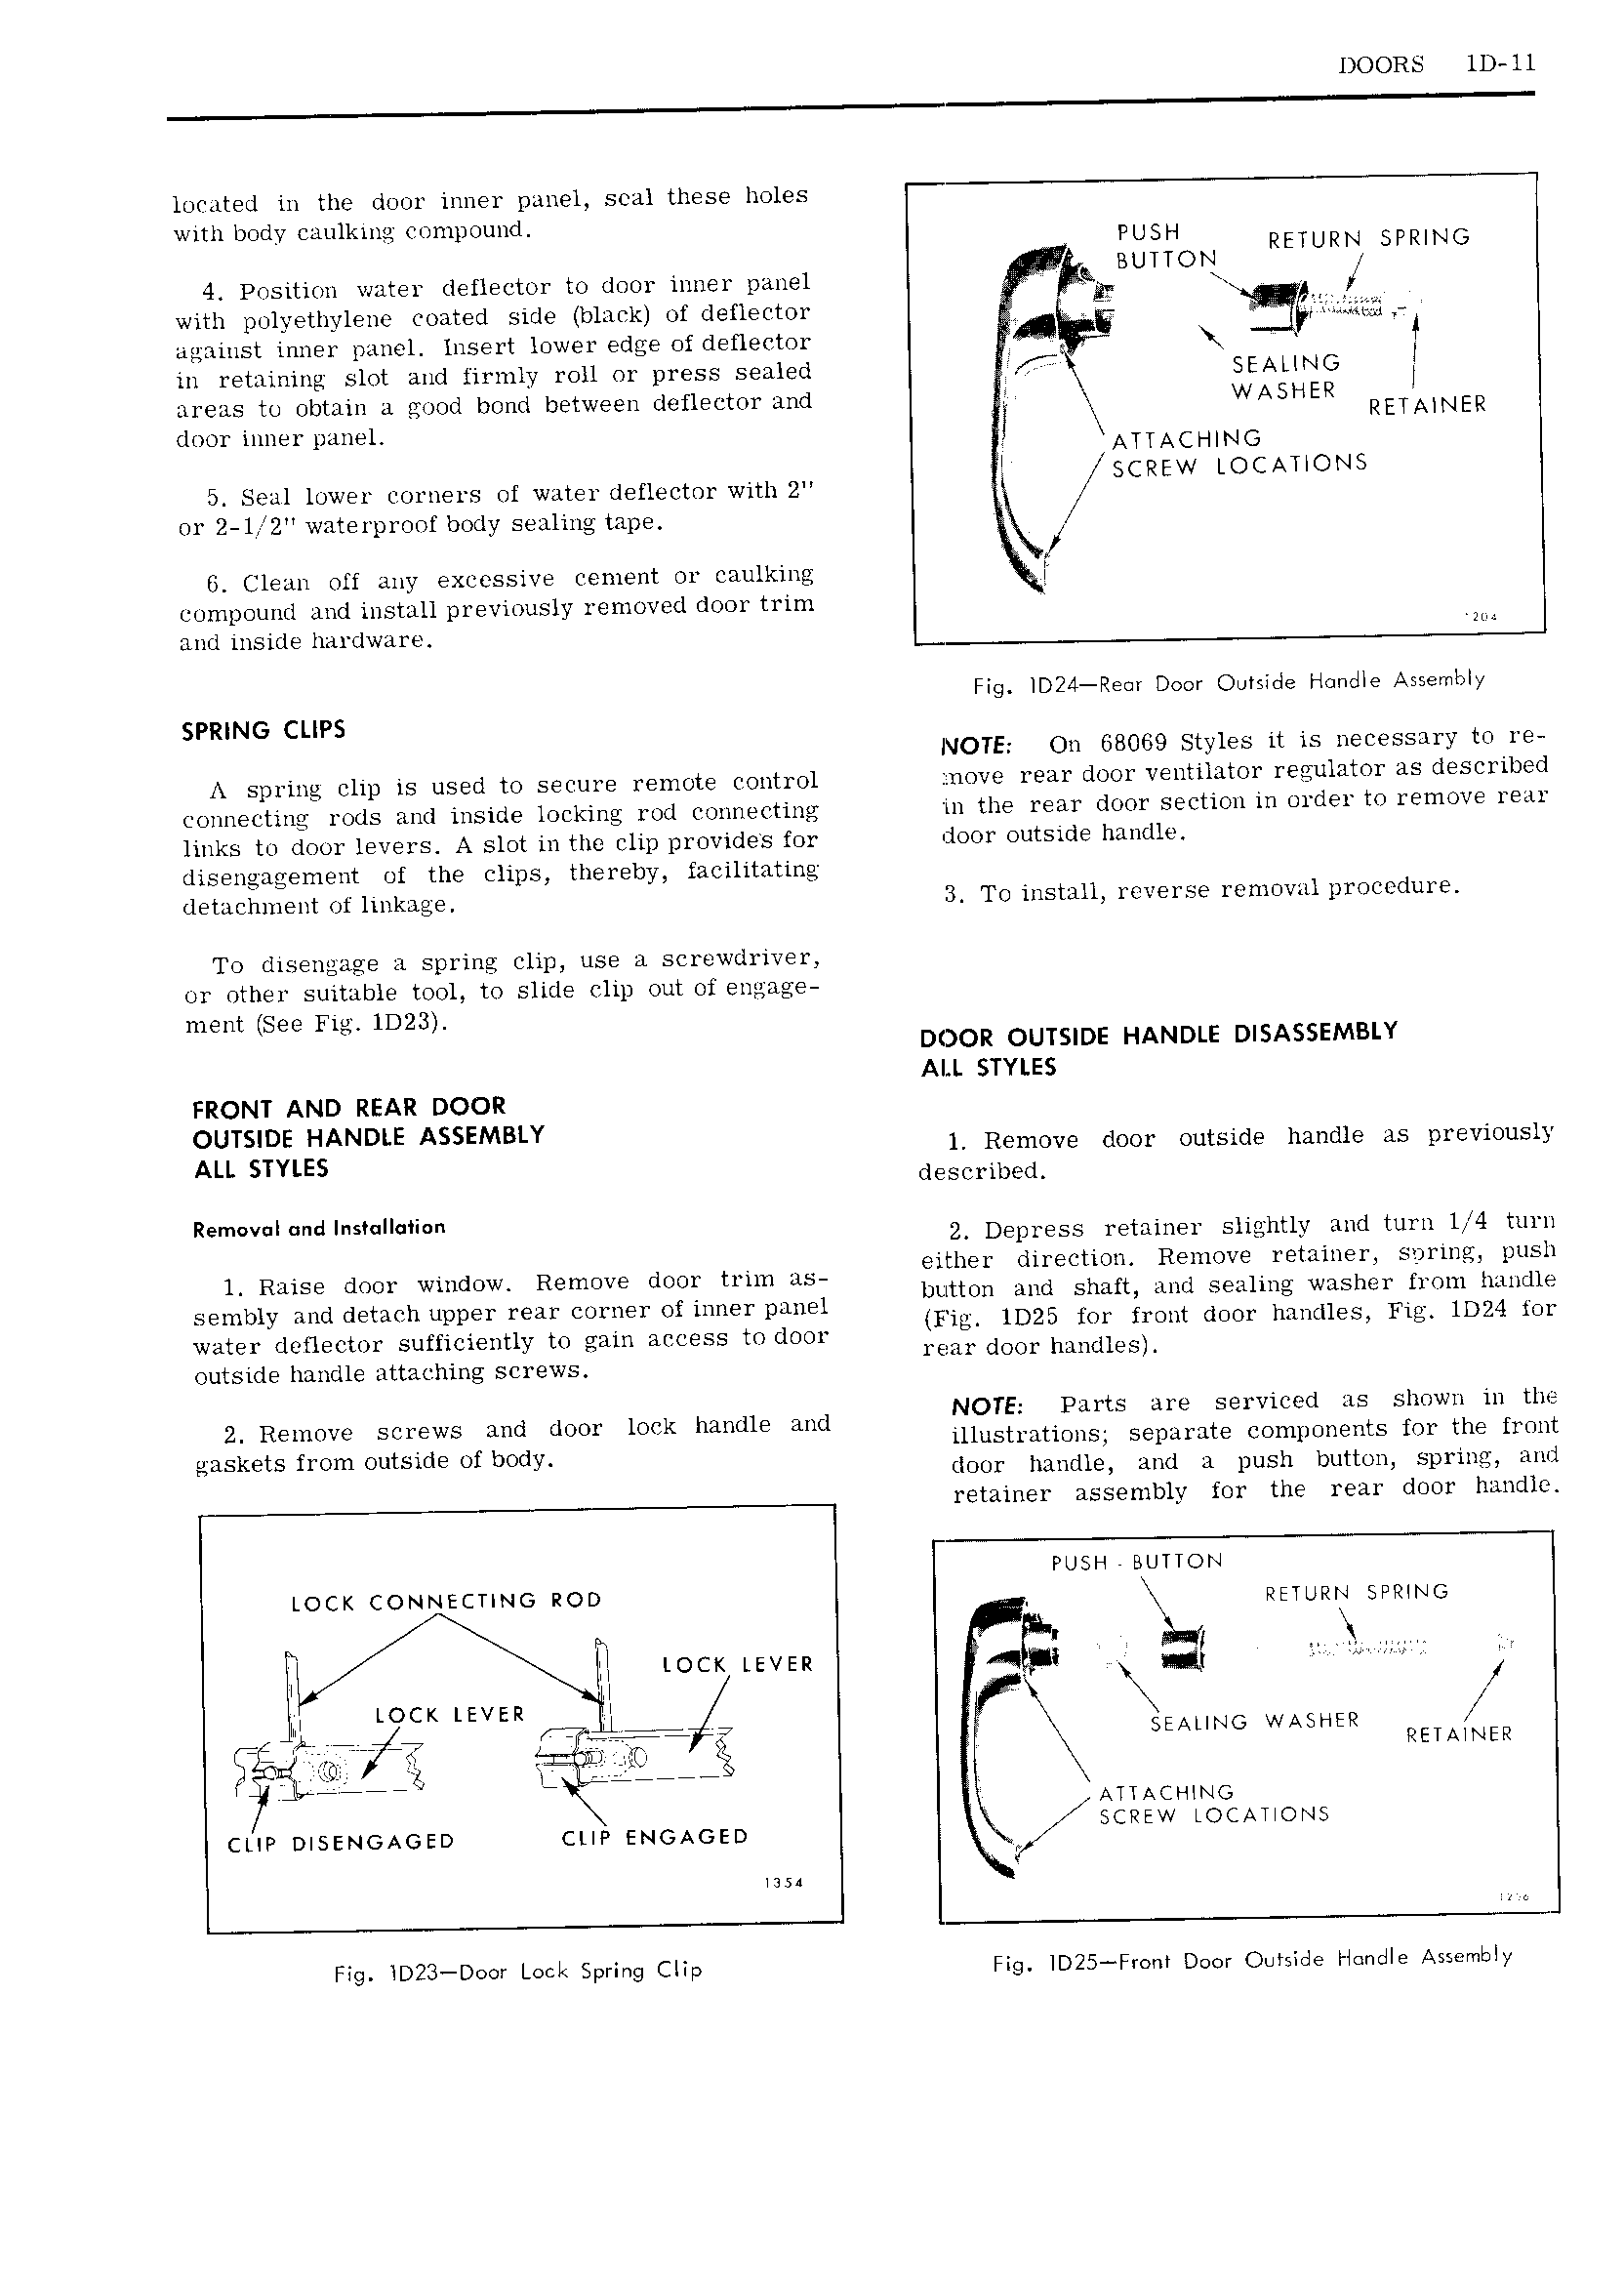
DOORS lD ll located in the door inner panel seal these holes with body caulking compound PUSH RETURN SPRING BUTTON r 4 Prclsition water deflector to door inner panel y with polyethylene coated side black of deflector Z E Q against inner panel insert lower edge of deflector A I in retaining slot and firmly roll or press sealed E SEALING areas to obtain a good bond between defleetor and WASHER RUNNER door inner panel AUACHING I W LOCATIONS 5 Seal lower corners of water dellector with 2 I y SCRE or 2 l 2 waterproof body sealing tape X i 6 Clean off any excessive cement or caulking l compound and install previously removed door trim and inside hardware Fig lD24 Re i Door Outside Handle As5emI ly SPRING CLIPS NOTE On 68069 Styles it is necessary to re A spring clip is used to secure remote control move rear door ventilator regulator as described connecting rods and inside locking rod connecting in the rear door section in order to remove rear links to door levers A slot in the clip provides for door outside handle disengagement of the clips thereby facilitating detachment of linkage 3 To install reverse removal procedure To disengage a spring clip use a screwdriver or other suitable tool to slide clip out of engage ment See Fig lD23 DOOR OUTSIDE HANDLE DISASSEMBLY ALL STYLES FRONT AND REAR DOOR OUTSIDE HANDLE ASSEMBLY 1 Remove door outside handle as previously ALL STYLES described REm vEI dI S II i n 2 Depress retainer slightly and turn l 4 turn either direction Remove retainer spring push l RAISE dom WmdUW Remmve EIUOL tmm its button and shaft and sealing washer from handle sembly and detach upper rear corner of inner panel Fil 11325 for grmlt dmw hjmdleg FW 1 4 my water detlector sufficiently to gain access to door F H E M i rear door handles outside handle attaching screws rtsr l1 31 tl 2 Remove screws and door lock handle and NOTE PU E UE E ElvLLE is Emwu m E k t f t fb I illustrations separate components for the frunt has ES 10m OUEKE O my door handle and a push button spring and retainer assembly for the rear door handle PUSH V BUTTON LOCK CONNECTING ROD RHURN SPRING R r s sun N LOCK LEVER dm A I I I LOCK LEVER Ll I me Y SEALING WASHER FETA ER lTl x 7 T f tr 1 I ii az vm 9 gs 2 R t jtaarrrw L rr R 7 ATTACHING cup DISENGAGED cue ENGAGED SCREW LOCATIONS L A Fig ID23 D r Luck S rin CIE Fig lD25 Fmm Deer Outside I lendle Assembly P 9 P

 Next
Next