Jeep Parts Wiki | Ford Parts Wiki
Home | Search | Browse
|
Body Service Manual August 1964 |
|
Prev
 Next
Next
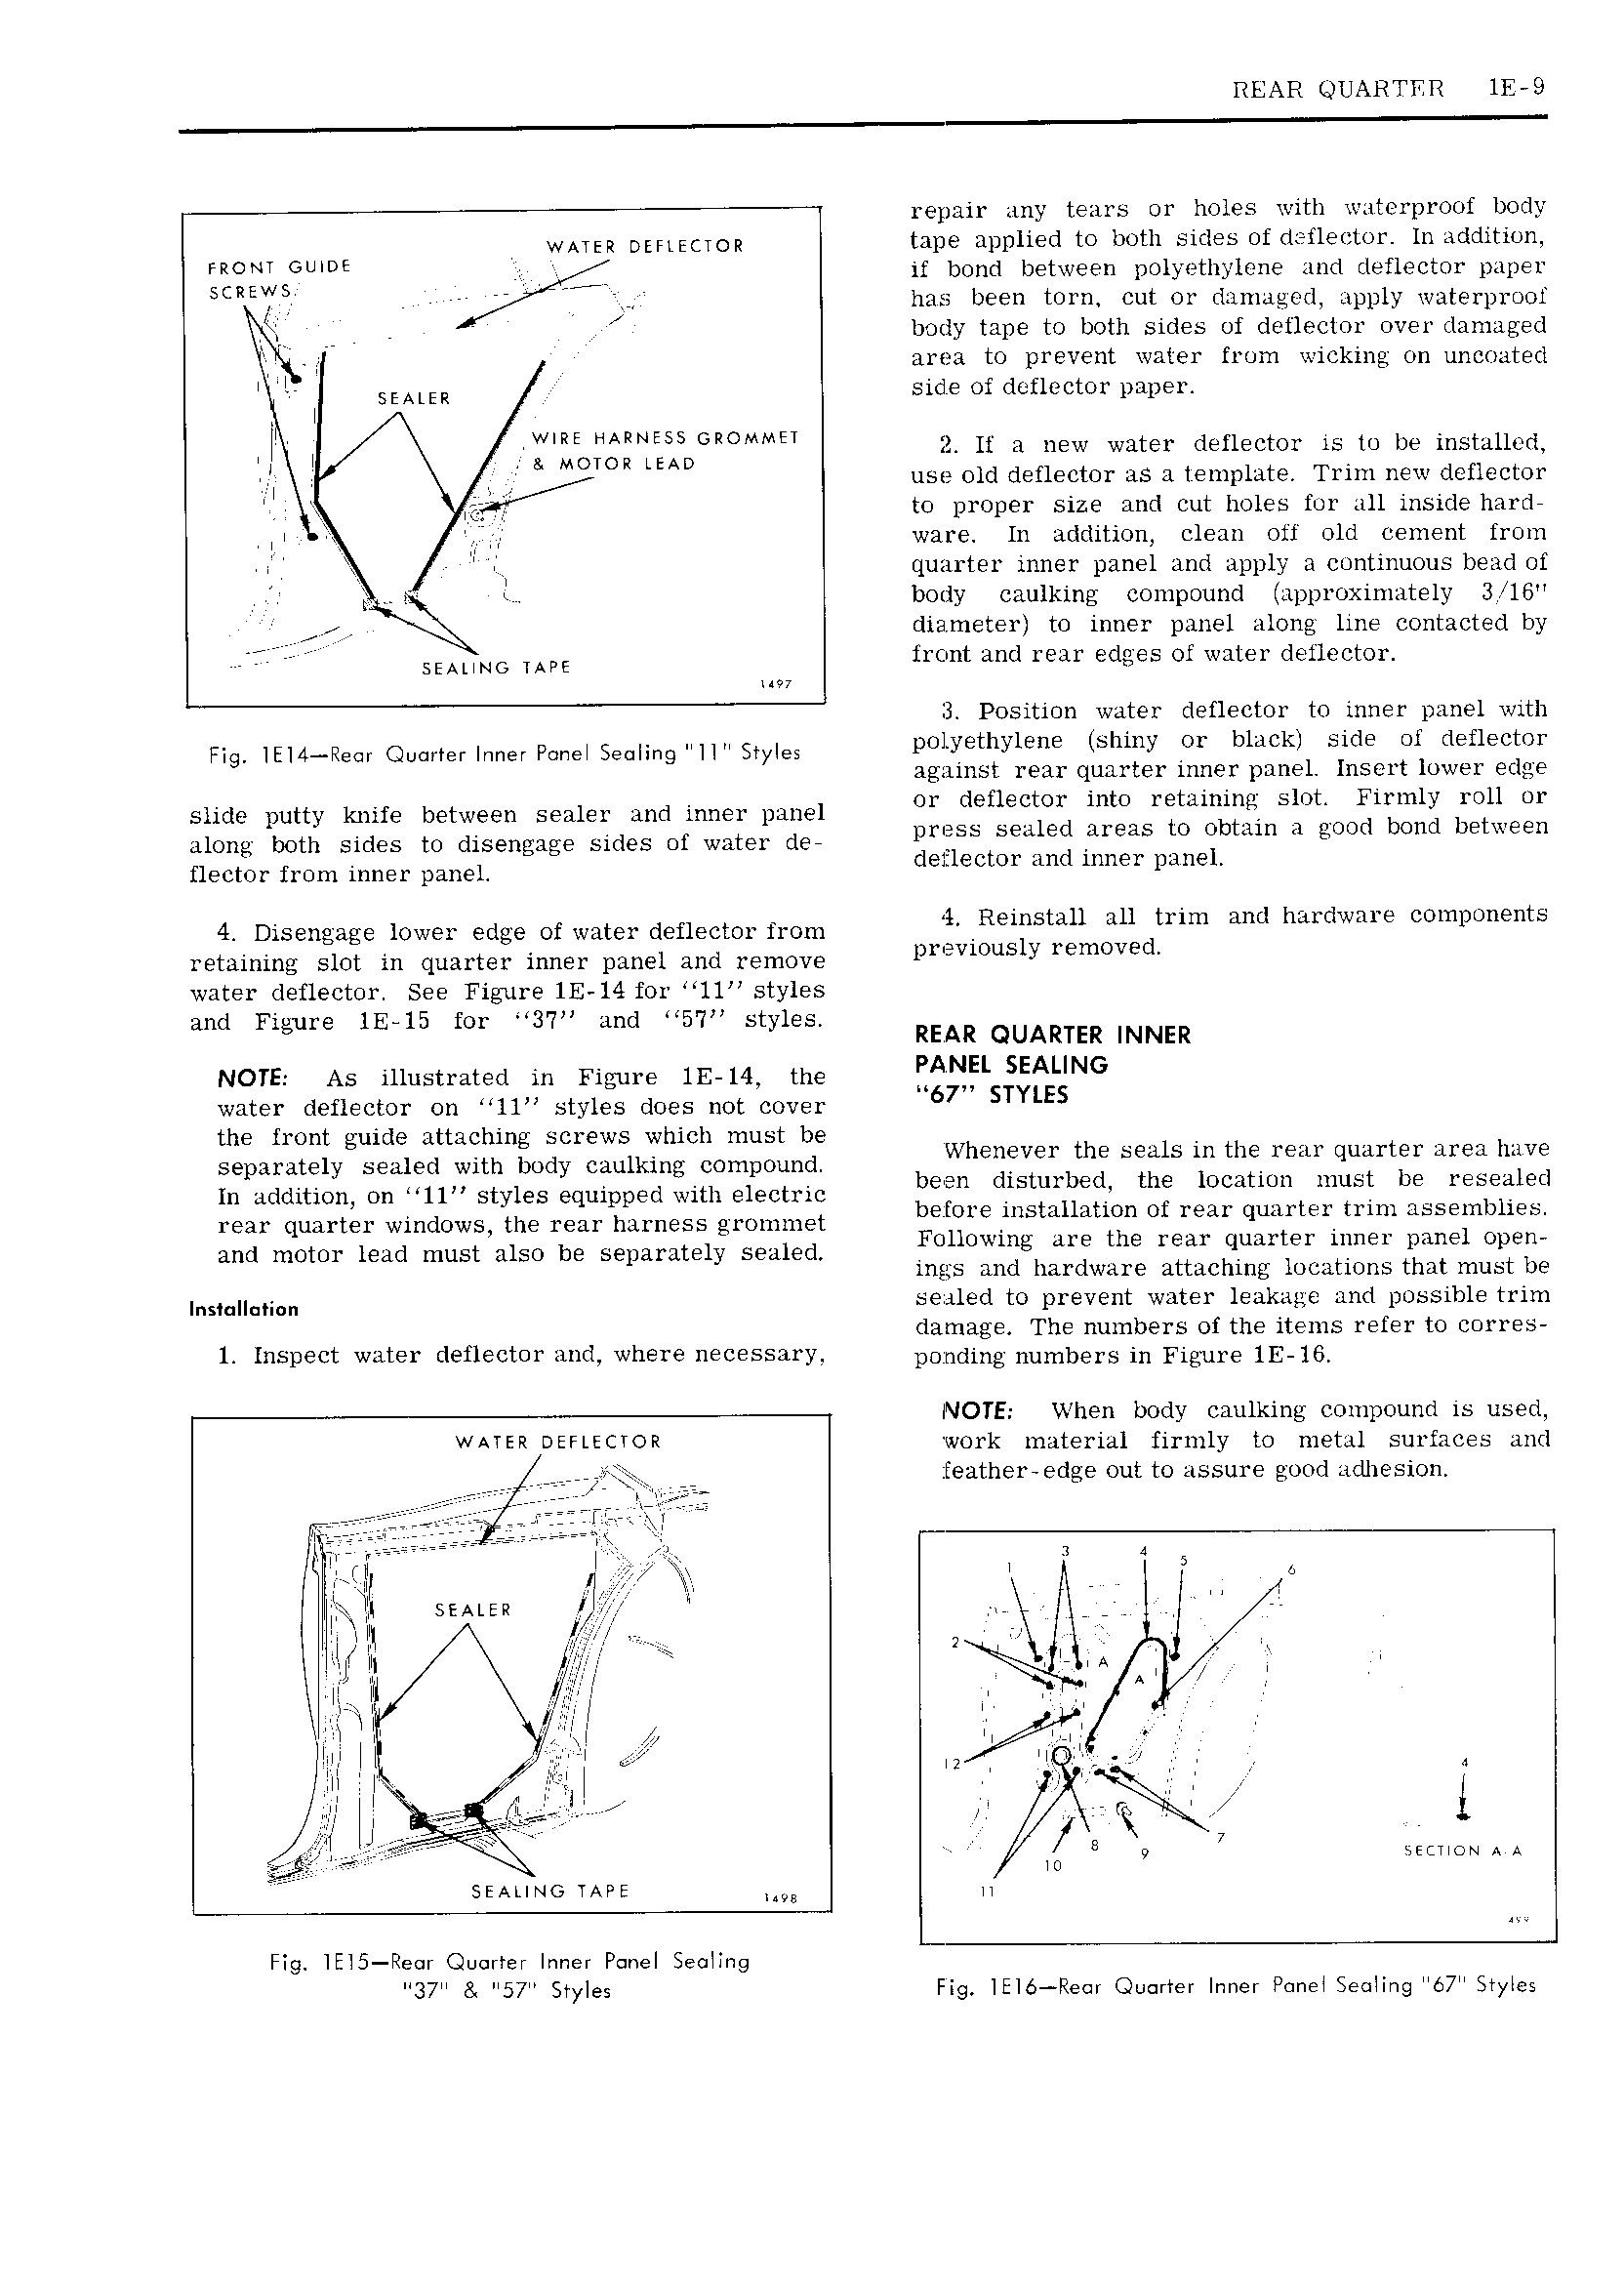
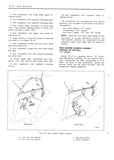
REAR LJLIARTIQR 1E 9 repair any tears or holes with waterproof body WATER DEFIEUOR tape applied to both sides of deflector In addition FRONT GU DE 7 if bond between polyethylene and deflector paper SC S V o H has been torn cut or dainagecl apply waterprool if I body tape to both sides of deflector over damaged area to prevent water from wicking on uncoatecl I V SEALER side of deflector paper I i EO i 1SD ROMMET 2 If a new water deflector is to be installed nl use old deflector as a template Trim new deflector to p1 O1JE l size and cut holes for A11 11 5j 1 g1 I ware In addition clean off old cement from U quarter inner panel and apply a continuous bead oi body caulking compound approximately 3 16 7 4 J diameter to inner panel along line contacted by SEAUNG MPE tront and rear edges of water deilector 3 Position water deflector to inner panel with rig IEI4 Req owner Inner Panel seuung 11 Smeg i I yetlwlene Ishiuy Or b1 k I Side f Ief1 t against rear quarter inner panel Insert lower edge slide putty knife between sealer and inner panel mq deuector Wm remliung S10t Fwmly mu or Along both Sides to diseugage Sides Of Water dG press sealed areas to obtain a good bond between flgcmr from Umar pane dexlector and inner panel 4 Disenmge lower edwe of water deflecmr from 4 Reinstall all trim and hardware components t r 7 retaining slot in quarter inner panel and remove pl v10uS1 lE mO d water deflector See Figure IE 14 for ll styles and F u e lE l5 fo 3 7 1 I 5 I style lg m REAR QUARTER INNER NOTE As illustrated in Figure IE 14 the ANFL SEALING water deflector on ll styles does not cover 67 STYLES the front guide attaching screws which must be Wh th 1 tl I t p l separately sealed with body caulking compound b S elfletb is b 1 qklir 1 tuff In addition on 11 styles equipped with electric em lb ul Hf I Ucdmm mu H 1 EC rem quarter windows the rear harness Umlmnet before installation ot rear quarter trim assemblies and motor lead mustnlso be separatel sealed Following ME the may quarter inner Dam Oper ings and hardware attaching locations that must be Insmllanun sealed to prevent water leakage and possible trim damage The numbers of the items refer to corres 1 Inspect water deilector and where necessary pgnding numbers in Figure 11 j 6 NOTE When body caulking compound is used WATER oEEI EctoR work material firmly to metal surfaces and teather edge out to assure good adhesion ree 7Ei j QA r EJ ii gfoi flrg 1 vi Il ersrs I 3 4 5 I Il fl K ig II SEALER Li or Illl 2 FII II M t I V A I i I I ll I J ilu It I NI k U I W 4 1II II I J I rf lm I V 7 n I i e g I eeees 5 7 l c In ss AIING www nm II Fig IEI5 Re r Quarter Inner Panel Se IIng 37 8 57 Slyles Fig IIEI6 Re Quarter Inner Panel Sealing 67 Styles