Jeep Parts Wiki | Ford Parts Wiki
Home | Search | Browse
Prev

 Next
Next
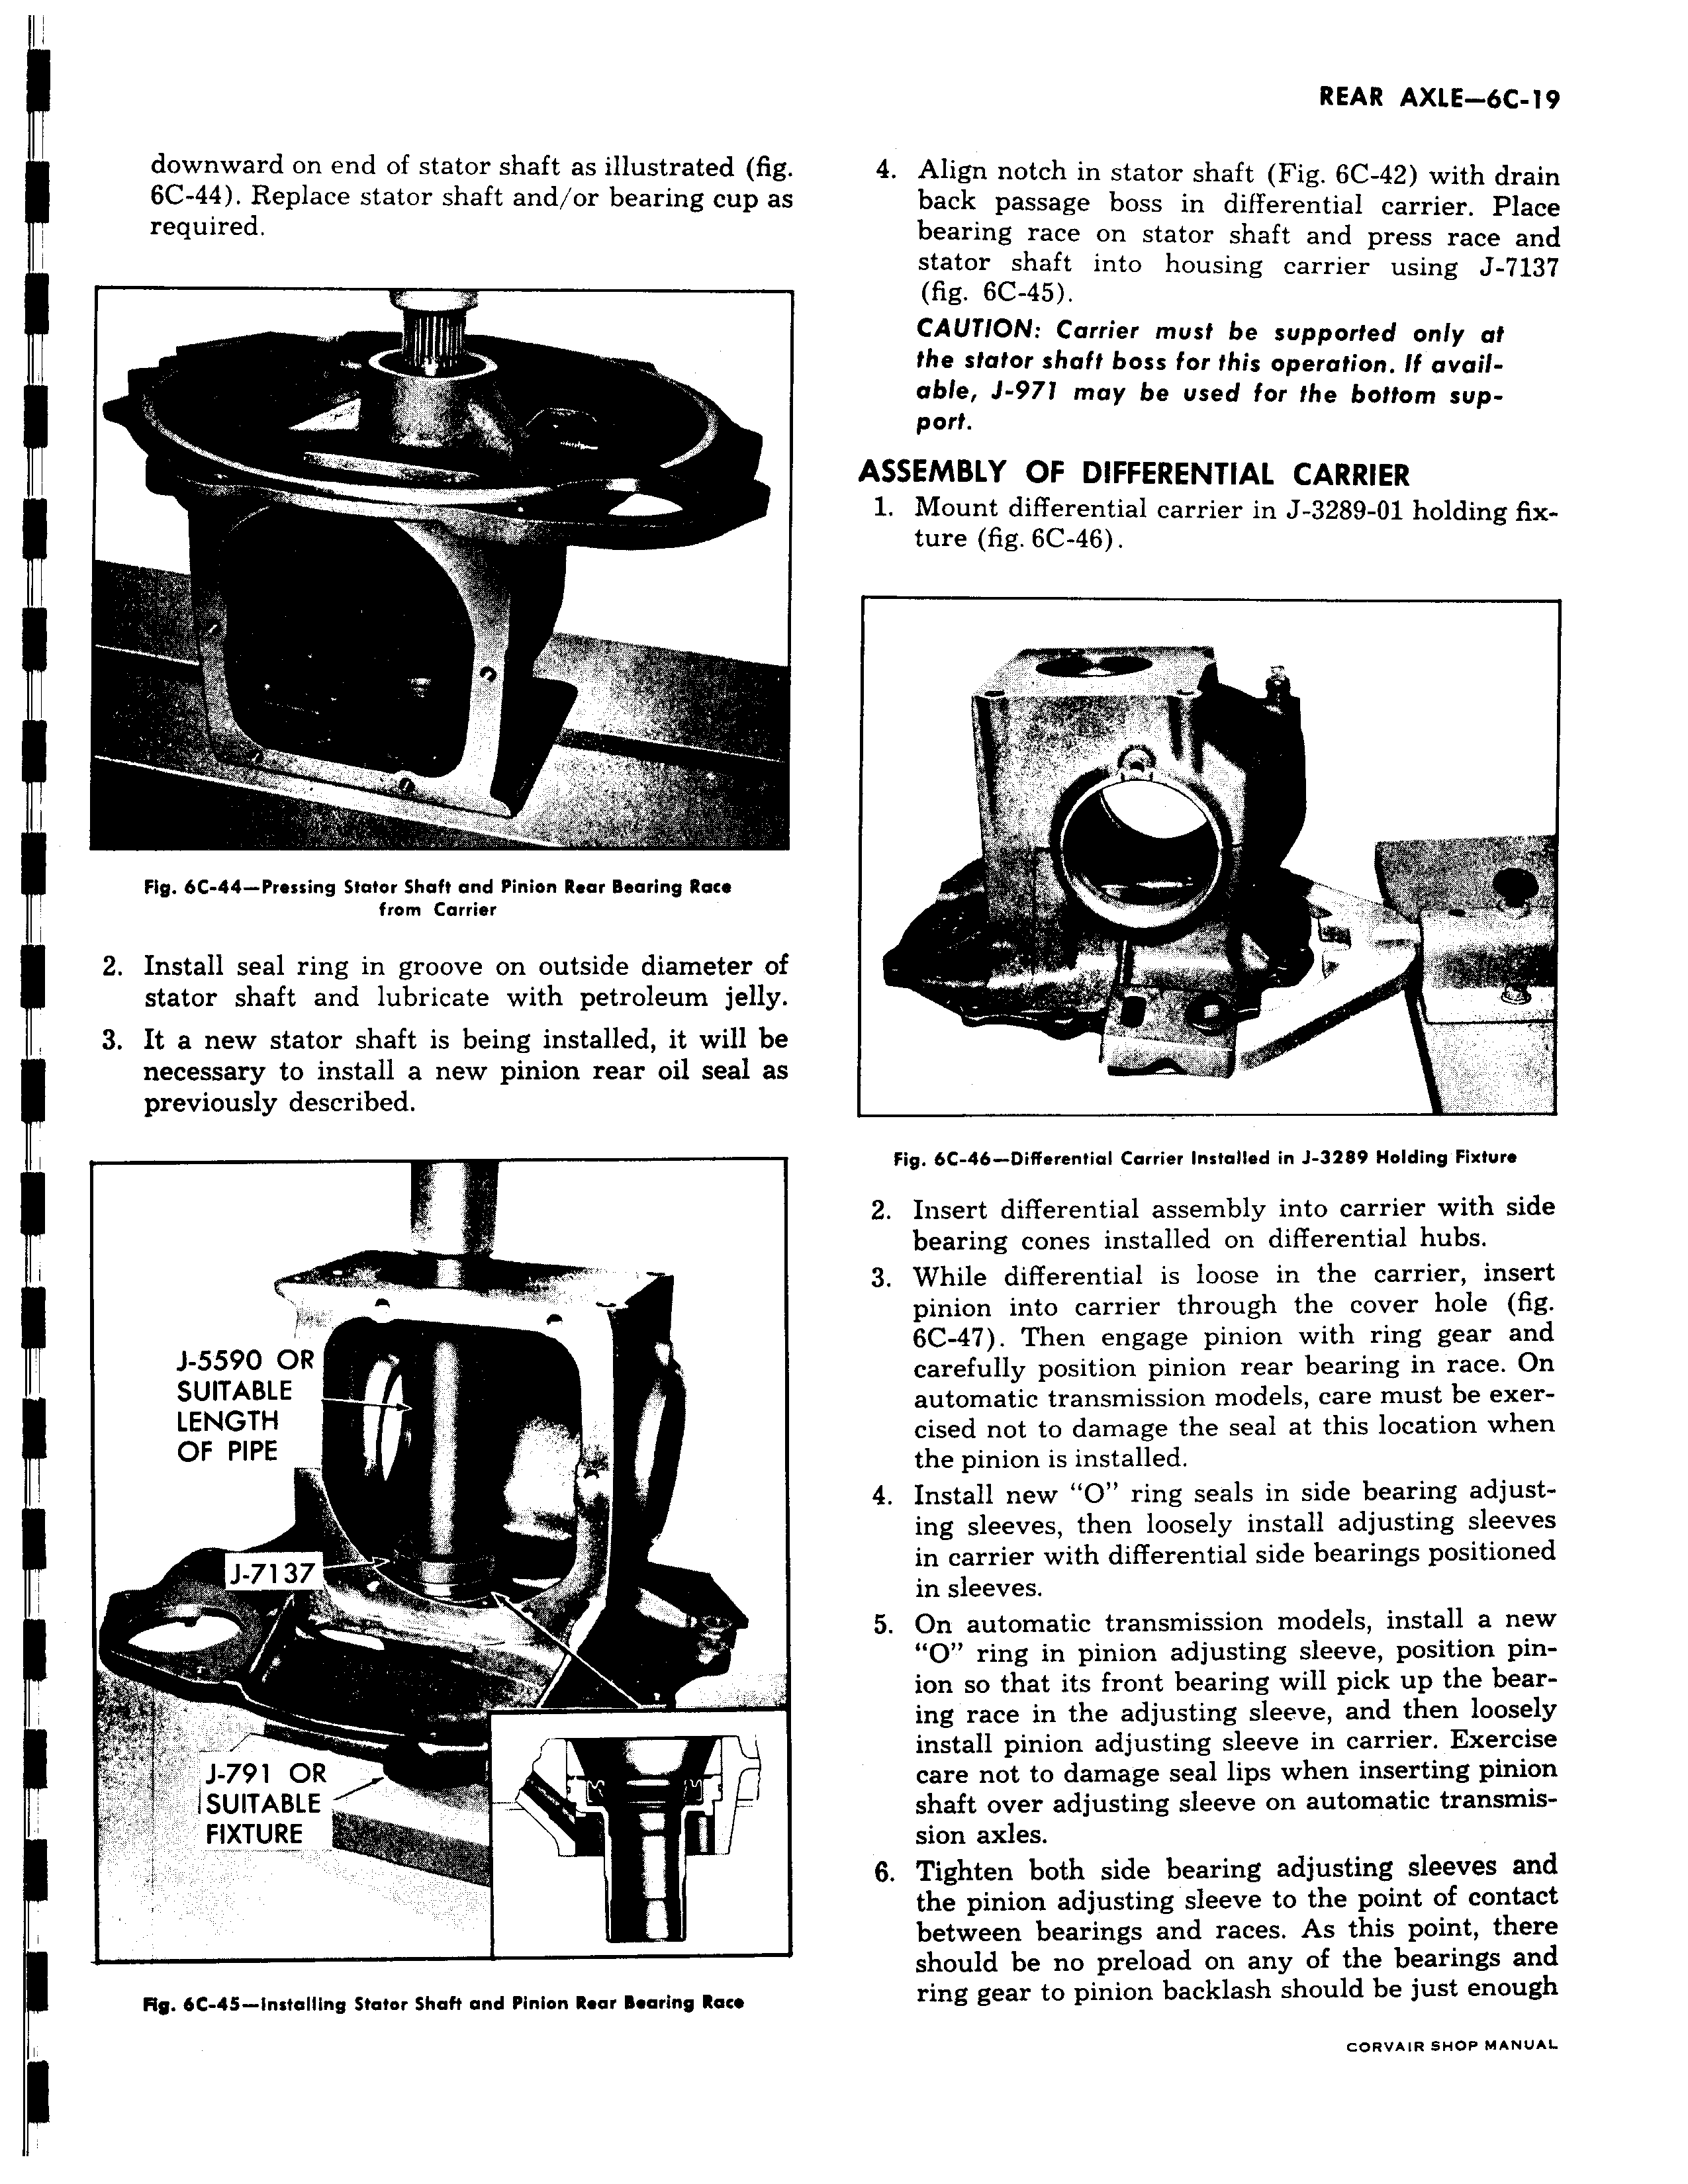
L w s Y p i J f I N A k a 4 t FIXTURE t 4 Align notch in stator shaft Fig 6C 42 with drain back passage boss in differential carrier Place bearing race on stator shaft and press race and stator shaft into housing carrier using J 7137 fig 6C 45 CAUTION Carrier must be supported only at the stator shaft boss for this operation If available J 971 may be used for the bottom support ASSEMBLY OF DIFFERENTIAL CARRIER 1 Mount differential carrier in J 3289 O1 holding fixture fig 6C 46 I 3 t I jyy J t F 1 1 L SF1 f 4 ha x i h Pa u 1 All Fig 6C 46 Differential Carrier Installed in J 3289 Holding Fixture 2 Insert differential assembly into carrier with side bearing cones installed on differential hubs 3 While differential is loose in the carrier insert pinion into carrier through the cover hole fig 6C 47 Then engage pinion with ring gear and carefully position pinion rear bearing in race On automatic transmission models care must be exercised not to damage the seal at this location when the pinion is installed 4 Install new O ring seals in side bearing adjusting sleeves then loosely install adjusting sleeves in carrier with differential side bearings positioned in sleeves 5 On automatic transmission models install a new O ring in pinion adjusting sleeve position pinion so that its front bearing will pick up the bear ing race in the adjusting sleeve and then loosely install pinion adjusting sleeve in carrier Exercise care not to damage seal lips when inserting pinion shaft over adjusting sleeve on automatic transmission axles 6 Tighten both side bearing adjusting sleeves and the pinion adjusting sleeve to the point of contact between bearings and races As this point there should be no preload on any of the bearings and ring gear to pinion backlash should be just enough CORVAIR SHOP MANUAL

 Next
Next