Jeep Parts Wiki | Ford Parts Wiki
Home | Search | Browse
|
Body Service Manual August 1964 |
|
Prev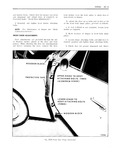
 Next
Next
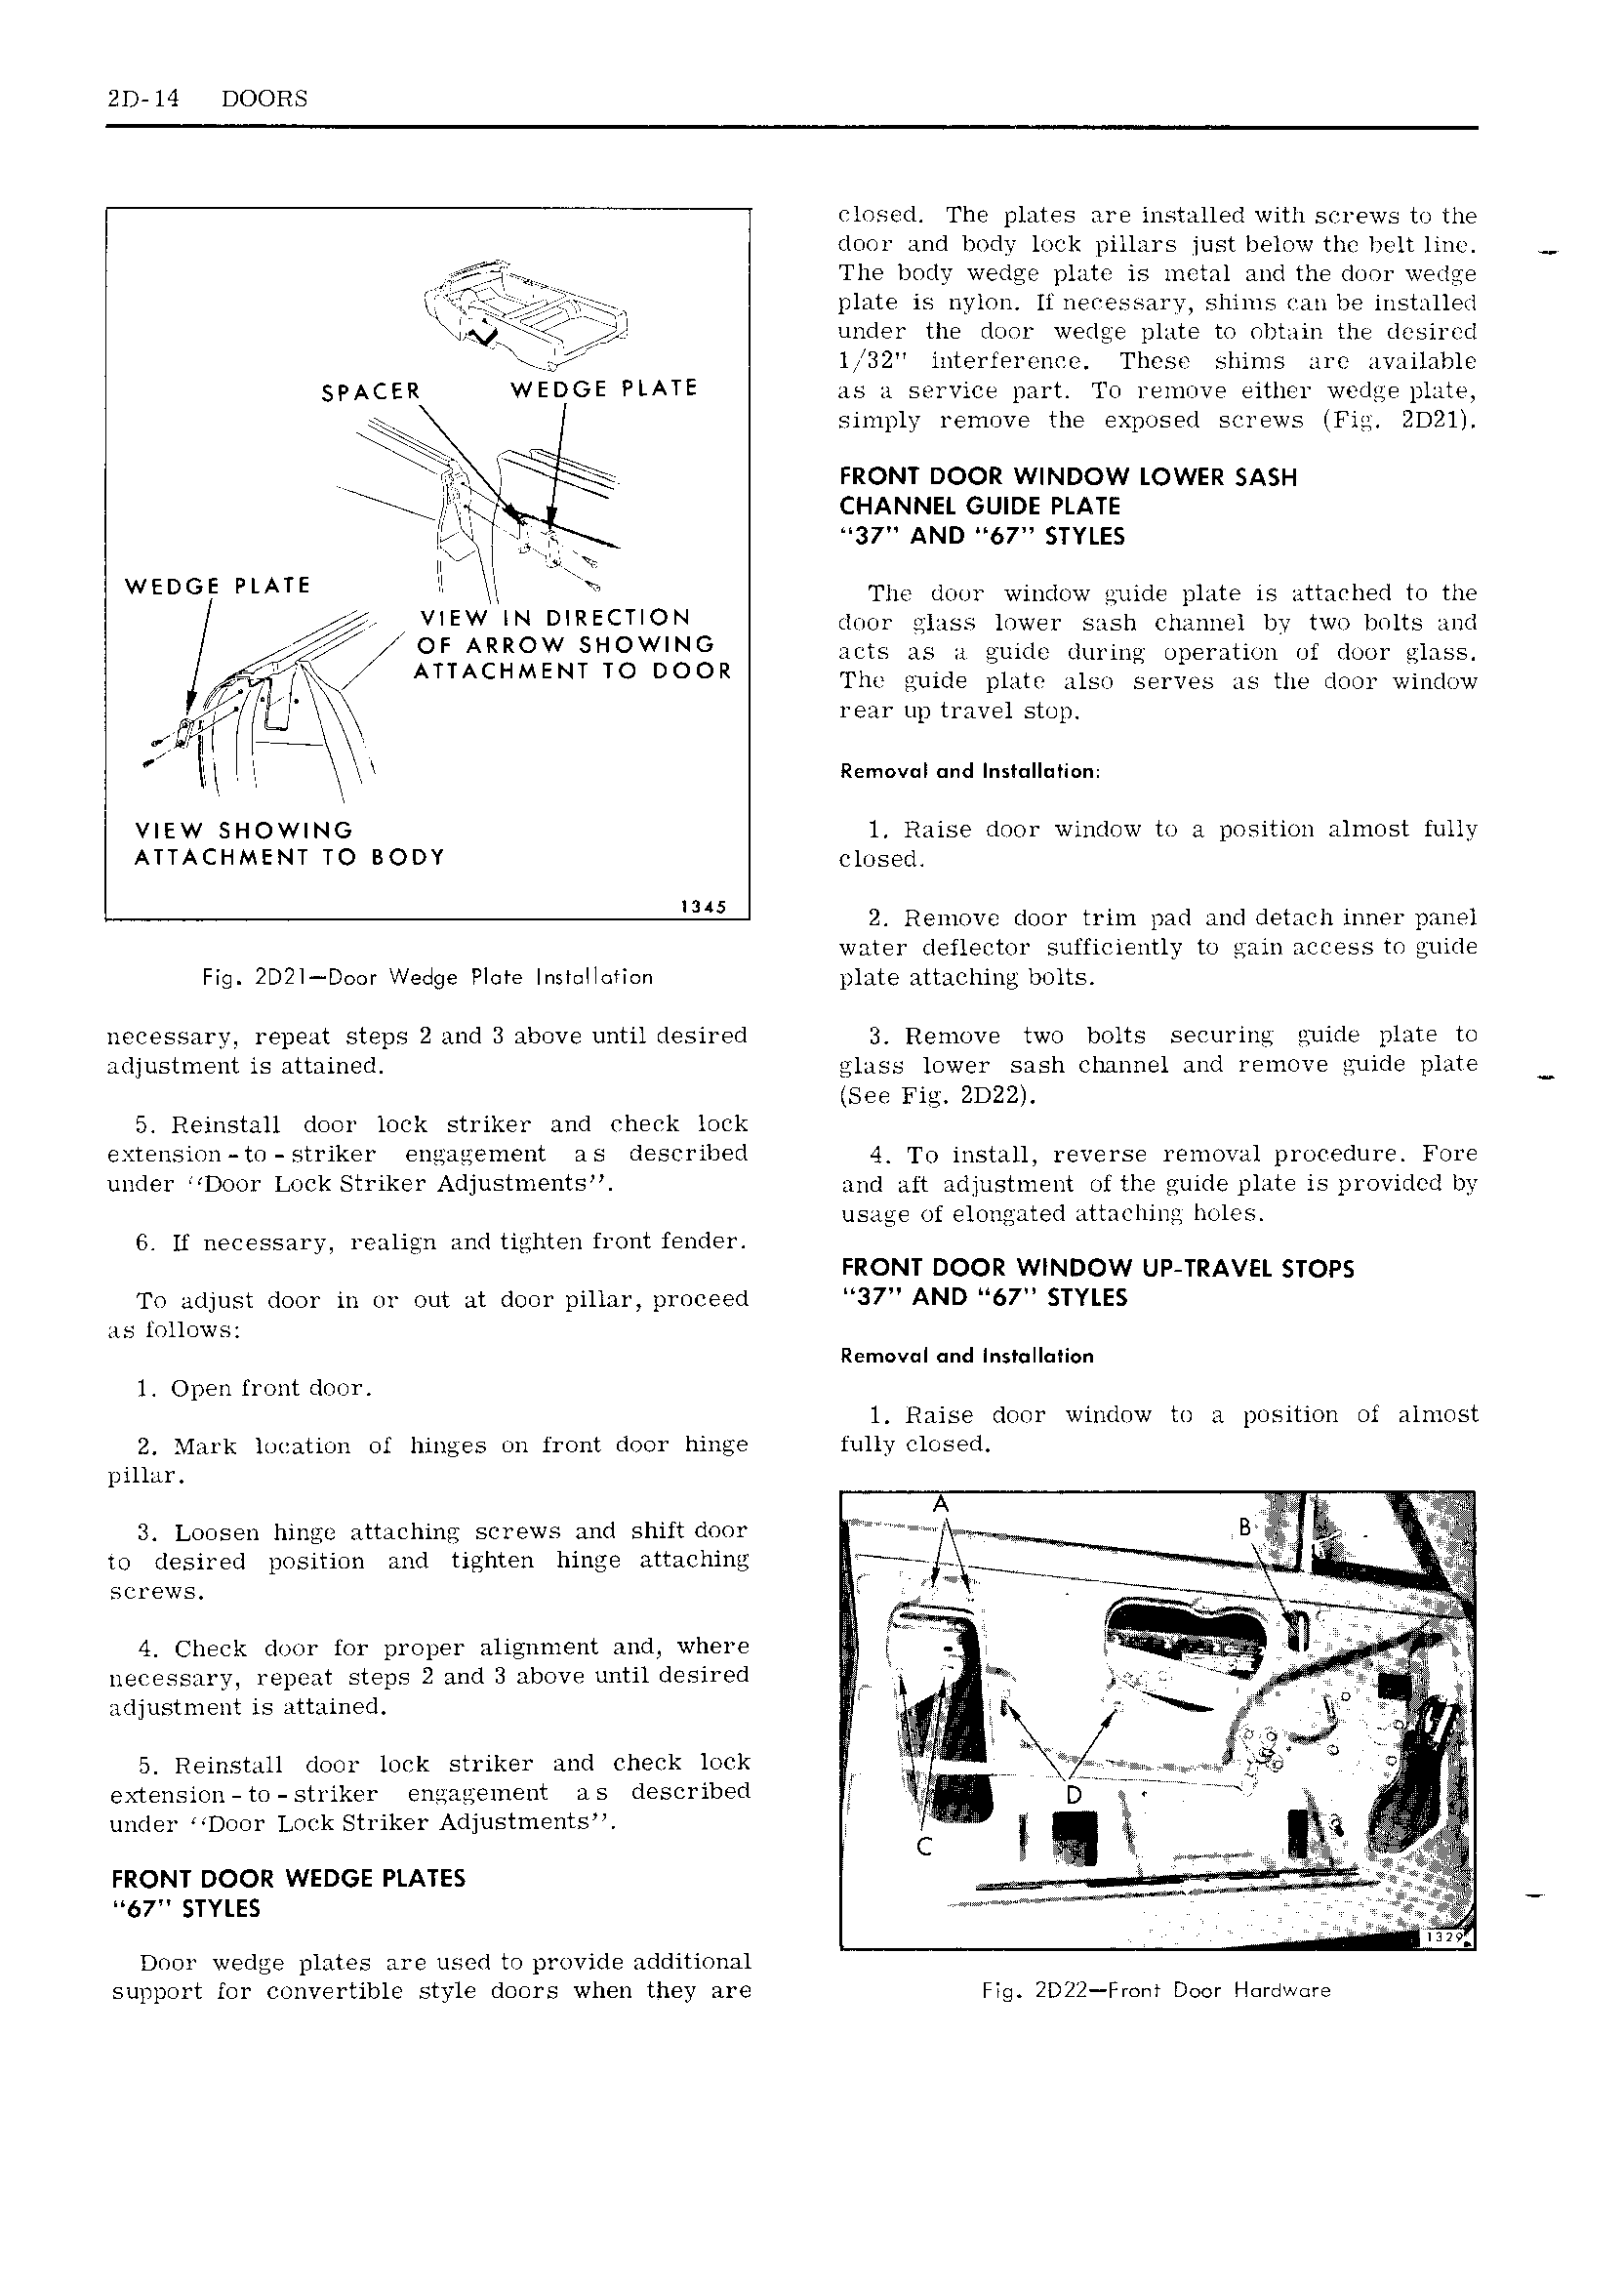
2D 14 DOORS elosed The plates are installed with serews to the door and body lock pillars just below the belt line The body wedge plate is inetal and the door wedge gr plate is nylon It neeessary shiins ran be installed LQ rrlr F QU under the door wedge plate to obtain the desired 1 32 interterenee These shinis are available SPACER WEDGE PLATE as a service part To remove either wedge plate simply remove the exposed screws IFig 2D2ll 1 I FRONT DOOR WINDOW LOWER SASH rr rr II y1 j CHANNEL GUIDE PLATE IQ tj s7 AND 67 srvuas H V I it WEDGE PLATE I The door window guide plate attaehed to the VIEW IN DIRECTION door glass lower sash channel by two bolts and 2 Q2 I I OF ARROW SHOWING acts as 1 guide during operation of door glass ATTACHMENT TQ DOOR The guide plate also serves as the door window i 1 Ij L lj rear up travel stop I I o I j N Rem v I und Inst II i n VIEW SHOWING l Raise door window to a position almost fully ATTACHMENT TO BODY closed IMS 2 Remove door trim pad and detaeh inner panel water defleetor sufficiently to gain aeeess to guide Fig 2D2I Door Wedge Plate InsI II tion plate attaching bolts necessary repeat steps 2 and 3 above until desired 3 Remove two bolts securing guide plate to adjustment is attained glass lower sash channel and remove guide plate See Fig ZD22 5 Reinstall door lock striker and eheek lock e tension to striker engagement as described 1 To install reverse removal procedure Fore under Door Loek Striker Adjustments and aft adjustment of the guide plate is provided by usage of elongated attaching holes 6 If necessary realign and tighten front fender FRONT DOOR WINDOW UP TRAVEL STOPS To adjust door in or out at door pillar proceed 37 AND 67 STYLES as follows Removal nd Insmllueion 1 Open front door 1 Raise door window to a position oi almost 2 Mark location of hinges on front door hinge fully closed pillar A M 3 Loosen hinge attaching screws and shift door B jjl to desired position and tighten hinge attaching screws I Q A i v fi I 4 Check door for proper alignment and where Q I I neeessary repeat steps 2 and 3 above until desired W adjustment is attained I j I j Y fI fx 5 Reinstall door loek striker and Cheek loek f 7 IlE f sj extension to striker engagement as described M D Ar IT jh under oor oek Striker Ad ustments 5 gl D L C I M t I Fkom 000R wsnce runes ZIE 67 STYLES M Door wedge plates are used to provide additional support for convertible style doors when they are Fig 2D22 Fm 1 Door Hardware