Jeep Parts Wiki | Ford Parts Wiki
Home | Search | Browse
|
Body Service Manual August 1964 |
|
Prev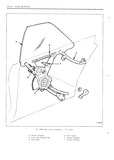
 Next
Next
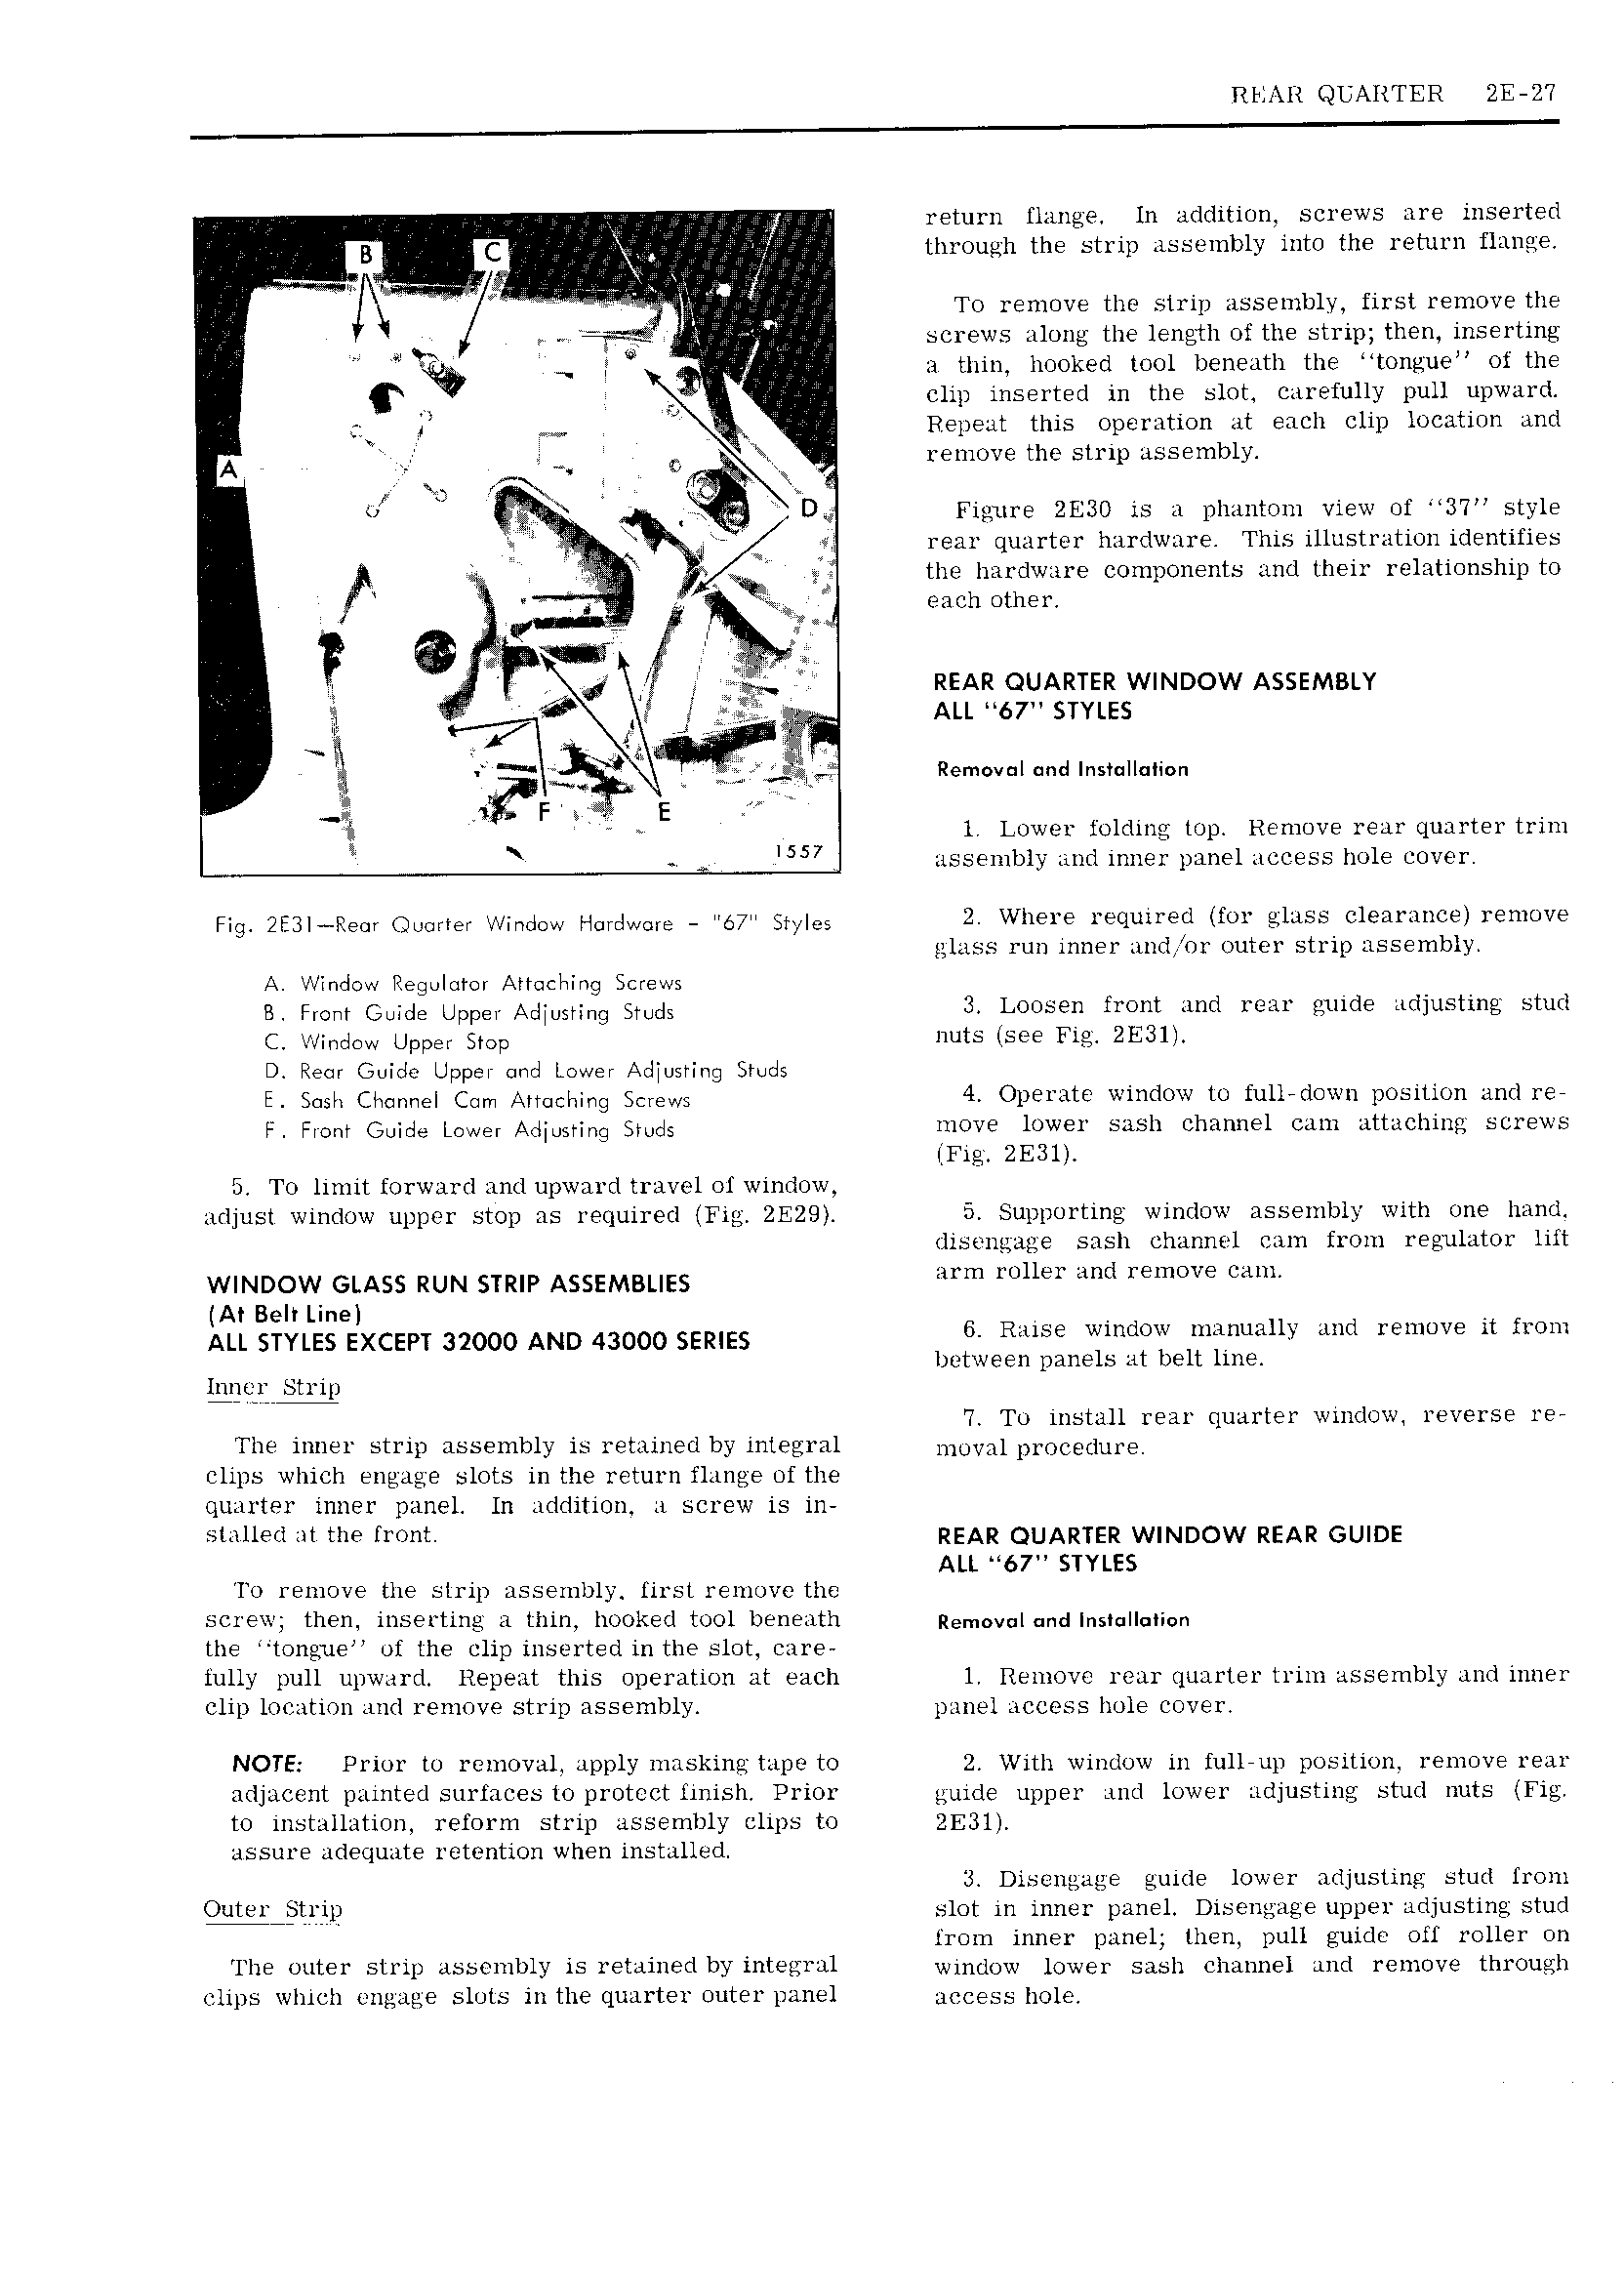
REAR QUARTER 2E 27 return flange In addition screws are inserted g lj through the strip assembly into the return flange I 3 xg A N pw To remove the strip assembly first remove the I it screws along the length ot the strip then inserting i a thin hooked tool beneath the tongue of the f V r clip inserted in the slot carefully pull upward V4 Repeat this operation at each clip location and J N isn A I M Ju X IGI I I iemoxe the sti ip issembly vt M D Figure 2EBO is a phantom view of 3 T style l 4 I e rear quarter hardware This illustration identifies ip I the hardware components and their relationship to each other venus I E t f j g F I ie REAR QUARTER WINDOW ASSEMBLY I I 7 pi ALL 67 STYLES e fi an I A Remoml und Installation F E 1 Lower folding top Remove rear quarter trim IH7 assembly and inner panel access hole cover Fig 2E31 ne I omits wanton RGIKTWOIE item styteg 2 Where require l fur skies Cl9 l llllC 1 l ll V i glass run inner and or outer strip assembly A w ind r Regulurm Armelwing Screws B Emmy Qujdg jI pE A 3IUSI Ig gmds 3 Loosen front and rear guide adjusting stud c wanaew upper step nuts See 2E31 D Rear Guide Upper cmd tower Adjusting Studs E Sl I w Cm Aqmclqing gc SW 4 Operate window to fullrdown position and re F FION Guida LONE A I Sy g 4 move lower sash channel cam attaching screws Fig 2E3l 5 To limit forward and upward travel of window adjust window upper stop as required Fig ZE29 5 Supporting window assembly with one hand disengage sash channel cam from regulator lift WINDOW GLASS RUN S I RIP ASSEMBLIES arm roller and remove cam At Belt Line ALL STYLES EXCEPT 32000 AND 43000 SERIES 6 Raise window manually and remove it from between panels at belt line gier Strip 7 To install rear quarter window reverse re The inner strip assembly is retained by integral movnt proqedtn e clips which engage slots in the return flange of the quarter inner panel In addition a screw is in stalled at the l l REAR QUARTER wmnow REAR cum ALL 67 STYLES To remove the strip assembly first remove the screw then inserting a thin hooked tool beneath Rsmoyut md lngtqllqiiqn the tongue of the clip inserted in the slot care fully pull upward Repeat this operation at each l Remove rear quarter trim assembly and inner clip location and remove strip assembly panel access hole cover NOTE Prior to removal apply masking tape to 2 With window in full up position remove rear adjacent painted surfaces to protect finish Prior guide upper and lower adjusting stud nuts Fig to installation reform strip assembly clips to 2E3l assure adequate retention when installed 3 Disengage guide lower adjusting stud from Oute1 i t1 ip slot in inner panel Disengage upper adjusting stud from inner panel then pull guide off roller on The outer strip assembly is retained by integral window lower sash channel and remove through clips which engage slots in the quarter outer panel access hole