Jeep Parts Wiki | Ford Parts Wiki
Home | Search | Browse
|
Body Service Manual August 1964 |
|
Prev
 Next
Next
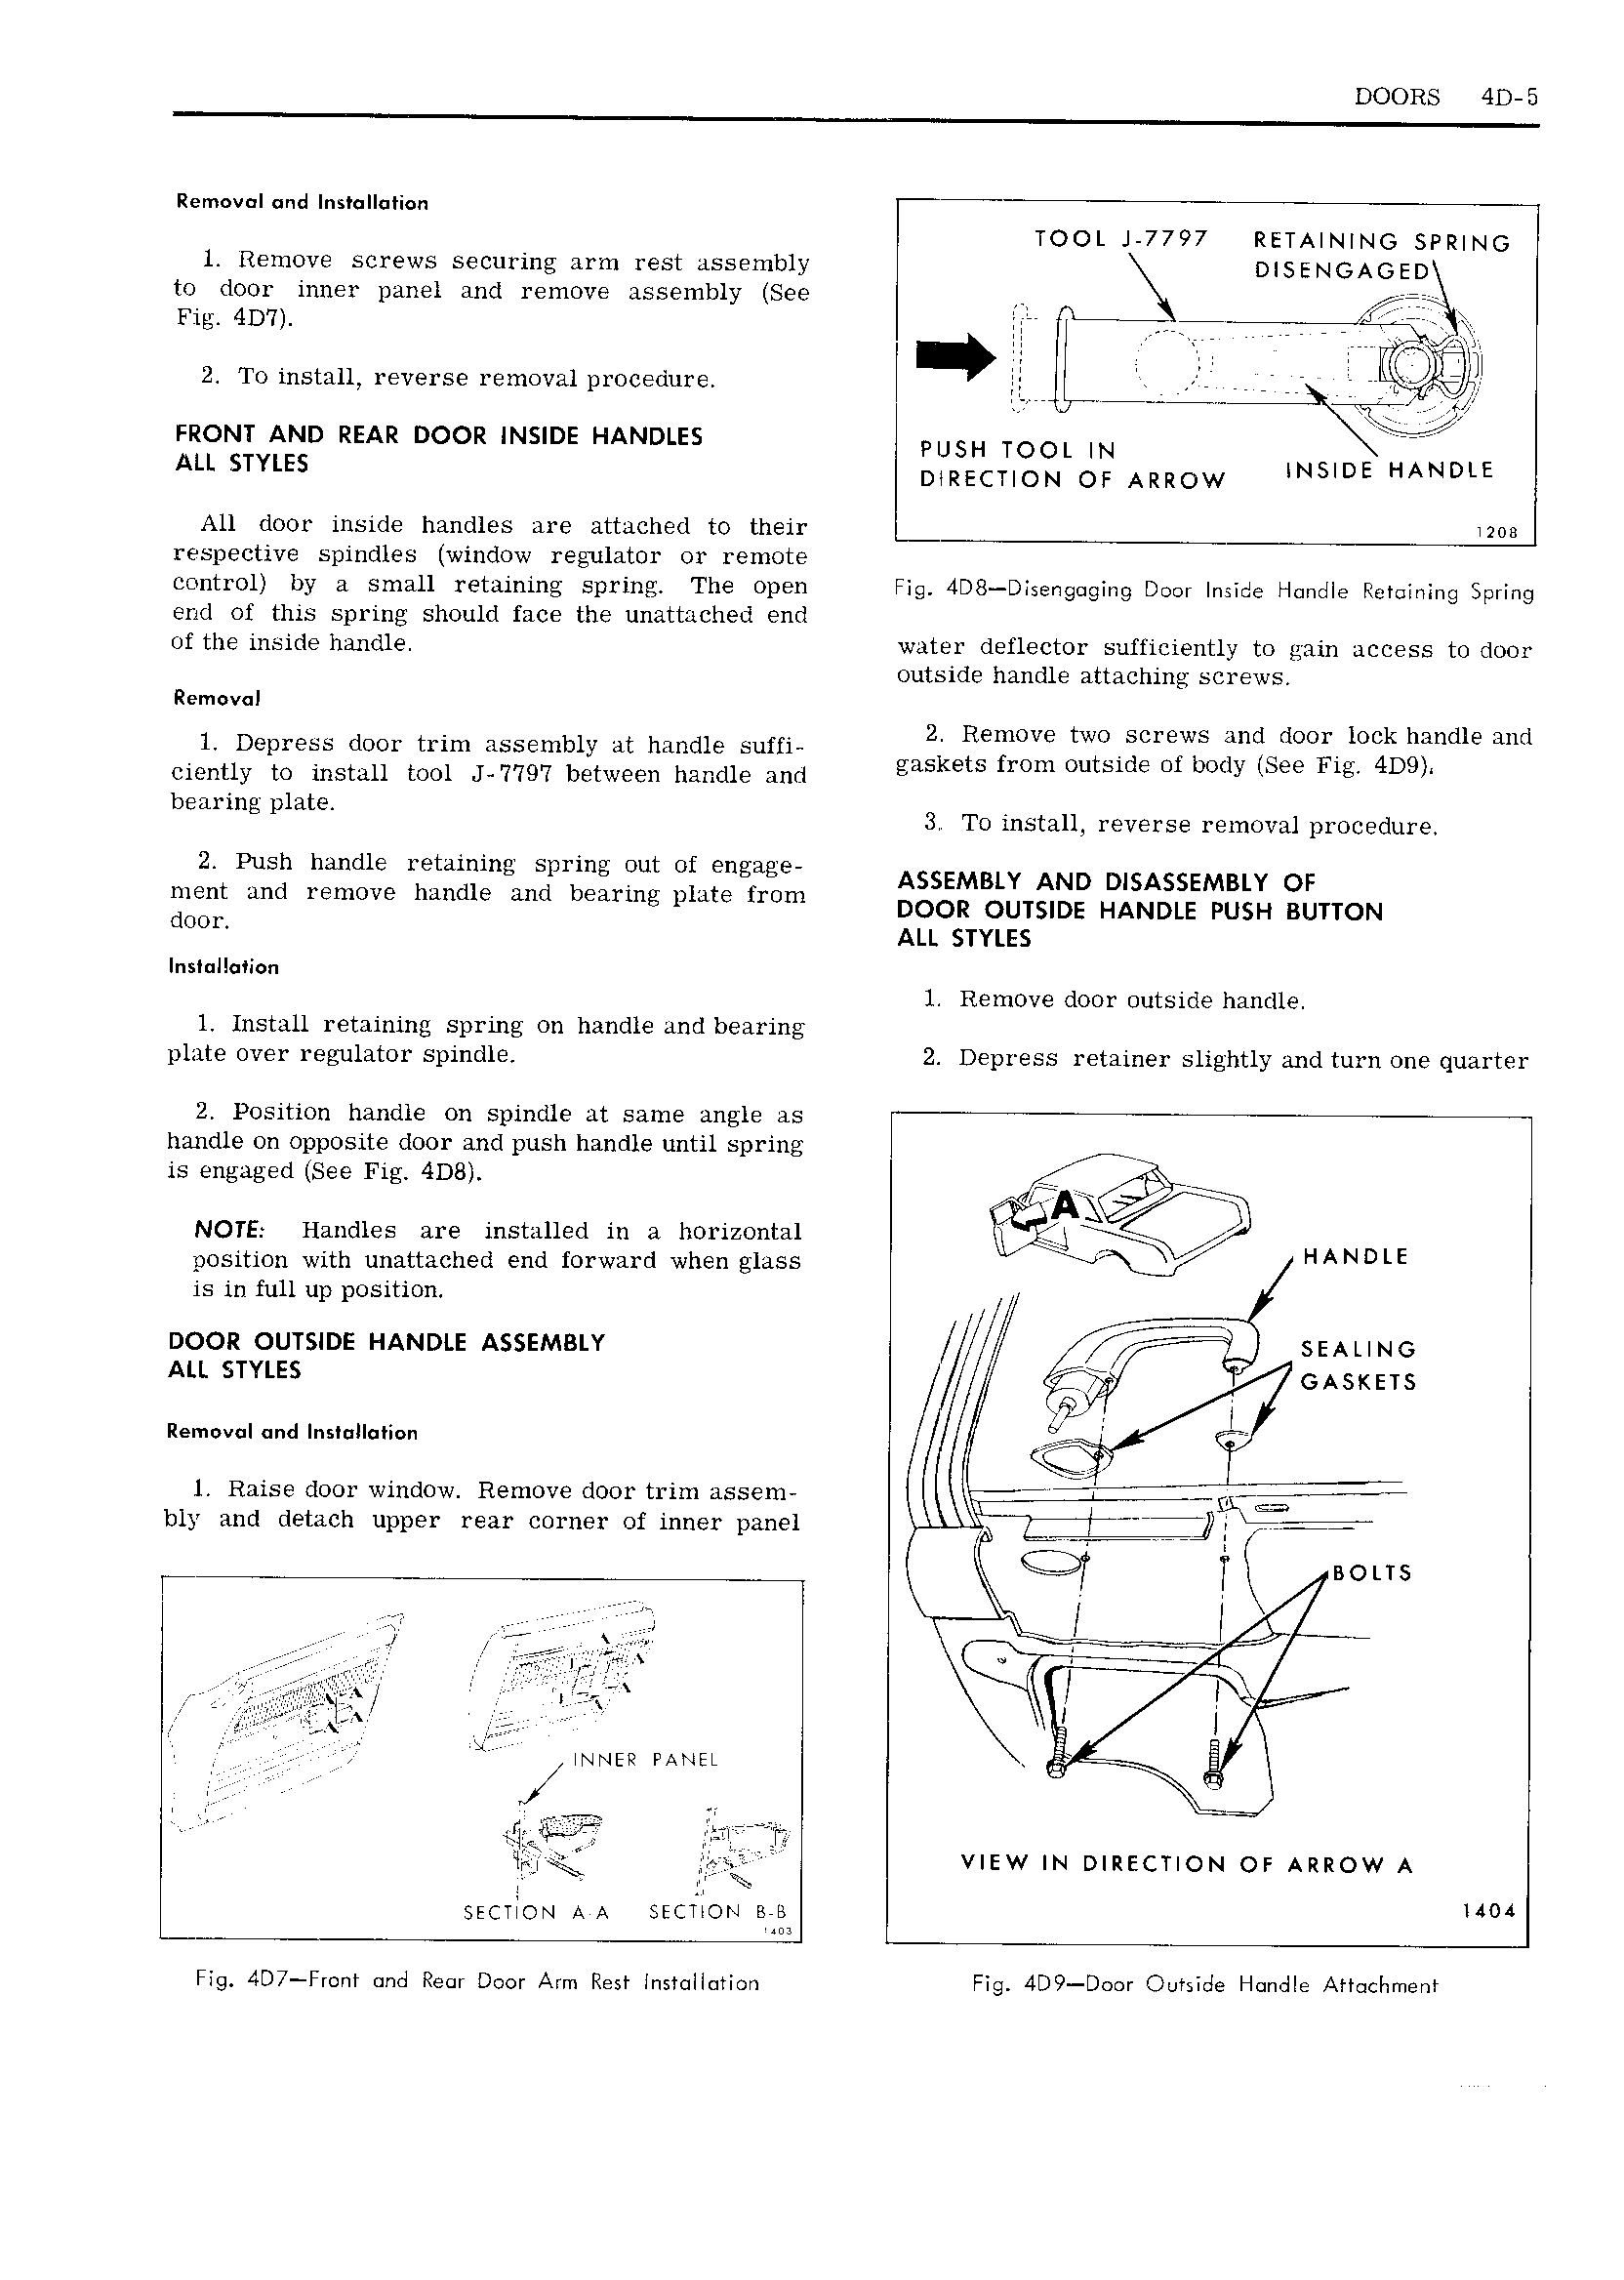
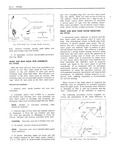
DOORS 4D 5 Rern v I and In II Ii n TOOL J 7797 RETAINING SPRING 1 Remove screws securing arm rest assembly DISENQAGED to door inner panel and remove assembly See Q I I I I 2 To install reverse removal procedure y jg L j FR ONT AND REAR DOOR INSIDE HANDLES PUSH TOOL IN LE A L STYLES DIRECTION OI ARROW INSIDE HAND All door inside handles are attached to their I20 respective spindles window regulator or remote control by a small retaining spring The open Fig 4D8 Disenguging Door Inside Hnndle Retoining Spring end of this spring should face the unattached end of the inside handle water deflector sufficiently to gain access to door outside handle attaching screws Removal 1 Depress door trim assembly at handle suffi U 21 ISETOVG mIO m i q O Oi1Bg 1lE and ciently to install tool J 7797 between handle and has 9 mm Ou M G X l l 2 lit Je U mg p 1 9 3 To install reverse removal procedure 2 PuhI d1 tf mir Zi iiIi i ii I i i1i i ASSEMBLY A SASSEM F door DOOR OUTSIDE HANDLE PUSH BUTTON ALL STYLES Instullciion 1 Remove door outside handle 1 Install retaining spring on handle and bearing plate over regulator spindle 2 Depress retainer slightly and turn one quarter 2 Position handle on spindle at same angle as handle on opposite door and push handle until spring I Vr Q is engaged See Fig 4D8 gf A4 ea 2i A Q NOTE Handles are installed in a horizontal Aff position with unattaclied end forward when glass Qj HANDLE is in full up position II 1 Y DOOR OUTSIDE HANDLE ASSEMBLY I I C f SEALING ALL STYLES GASKE15 Izernevei rind Ins II s n 1 Raise door window Remove door trim assem 7 l igK sm bly and detach upper rear corner of inner panel ji I i I f T L BOLTS J t eex e It T Fa l I V jj J g iliiq L tv I Ii L INNER PANEL I I I H E S T TE ig VIEW IN DIRECTION OF ARROW A section AA section are 0 Fig 4D7 Front and Rear Door Arm Rest installation Fig 4D9 Door Outside Handle Attachment