Jeep Parts Wiki | Ford Parts Wiki
Home | Search | Browse
|
Body Service Manual August 1964 |
|
Prev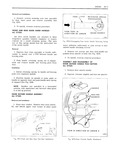
 Next
Next
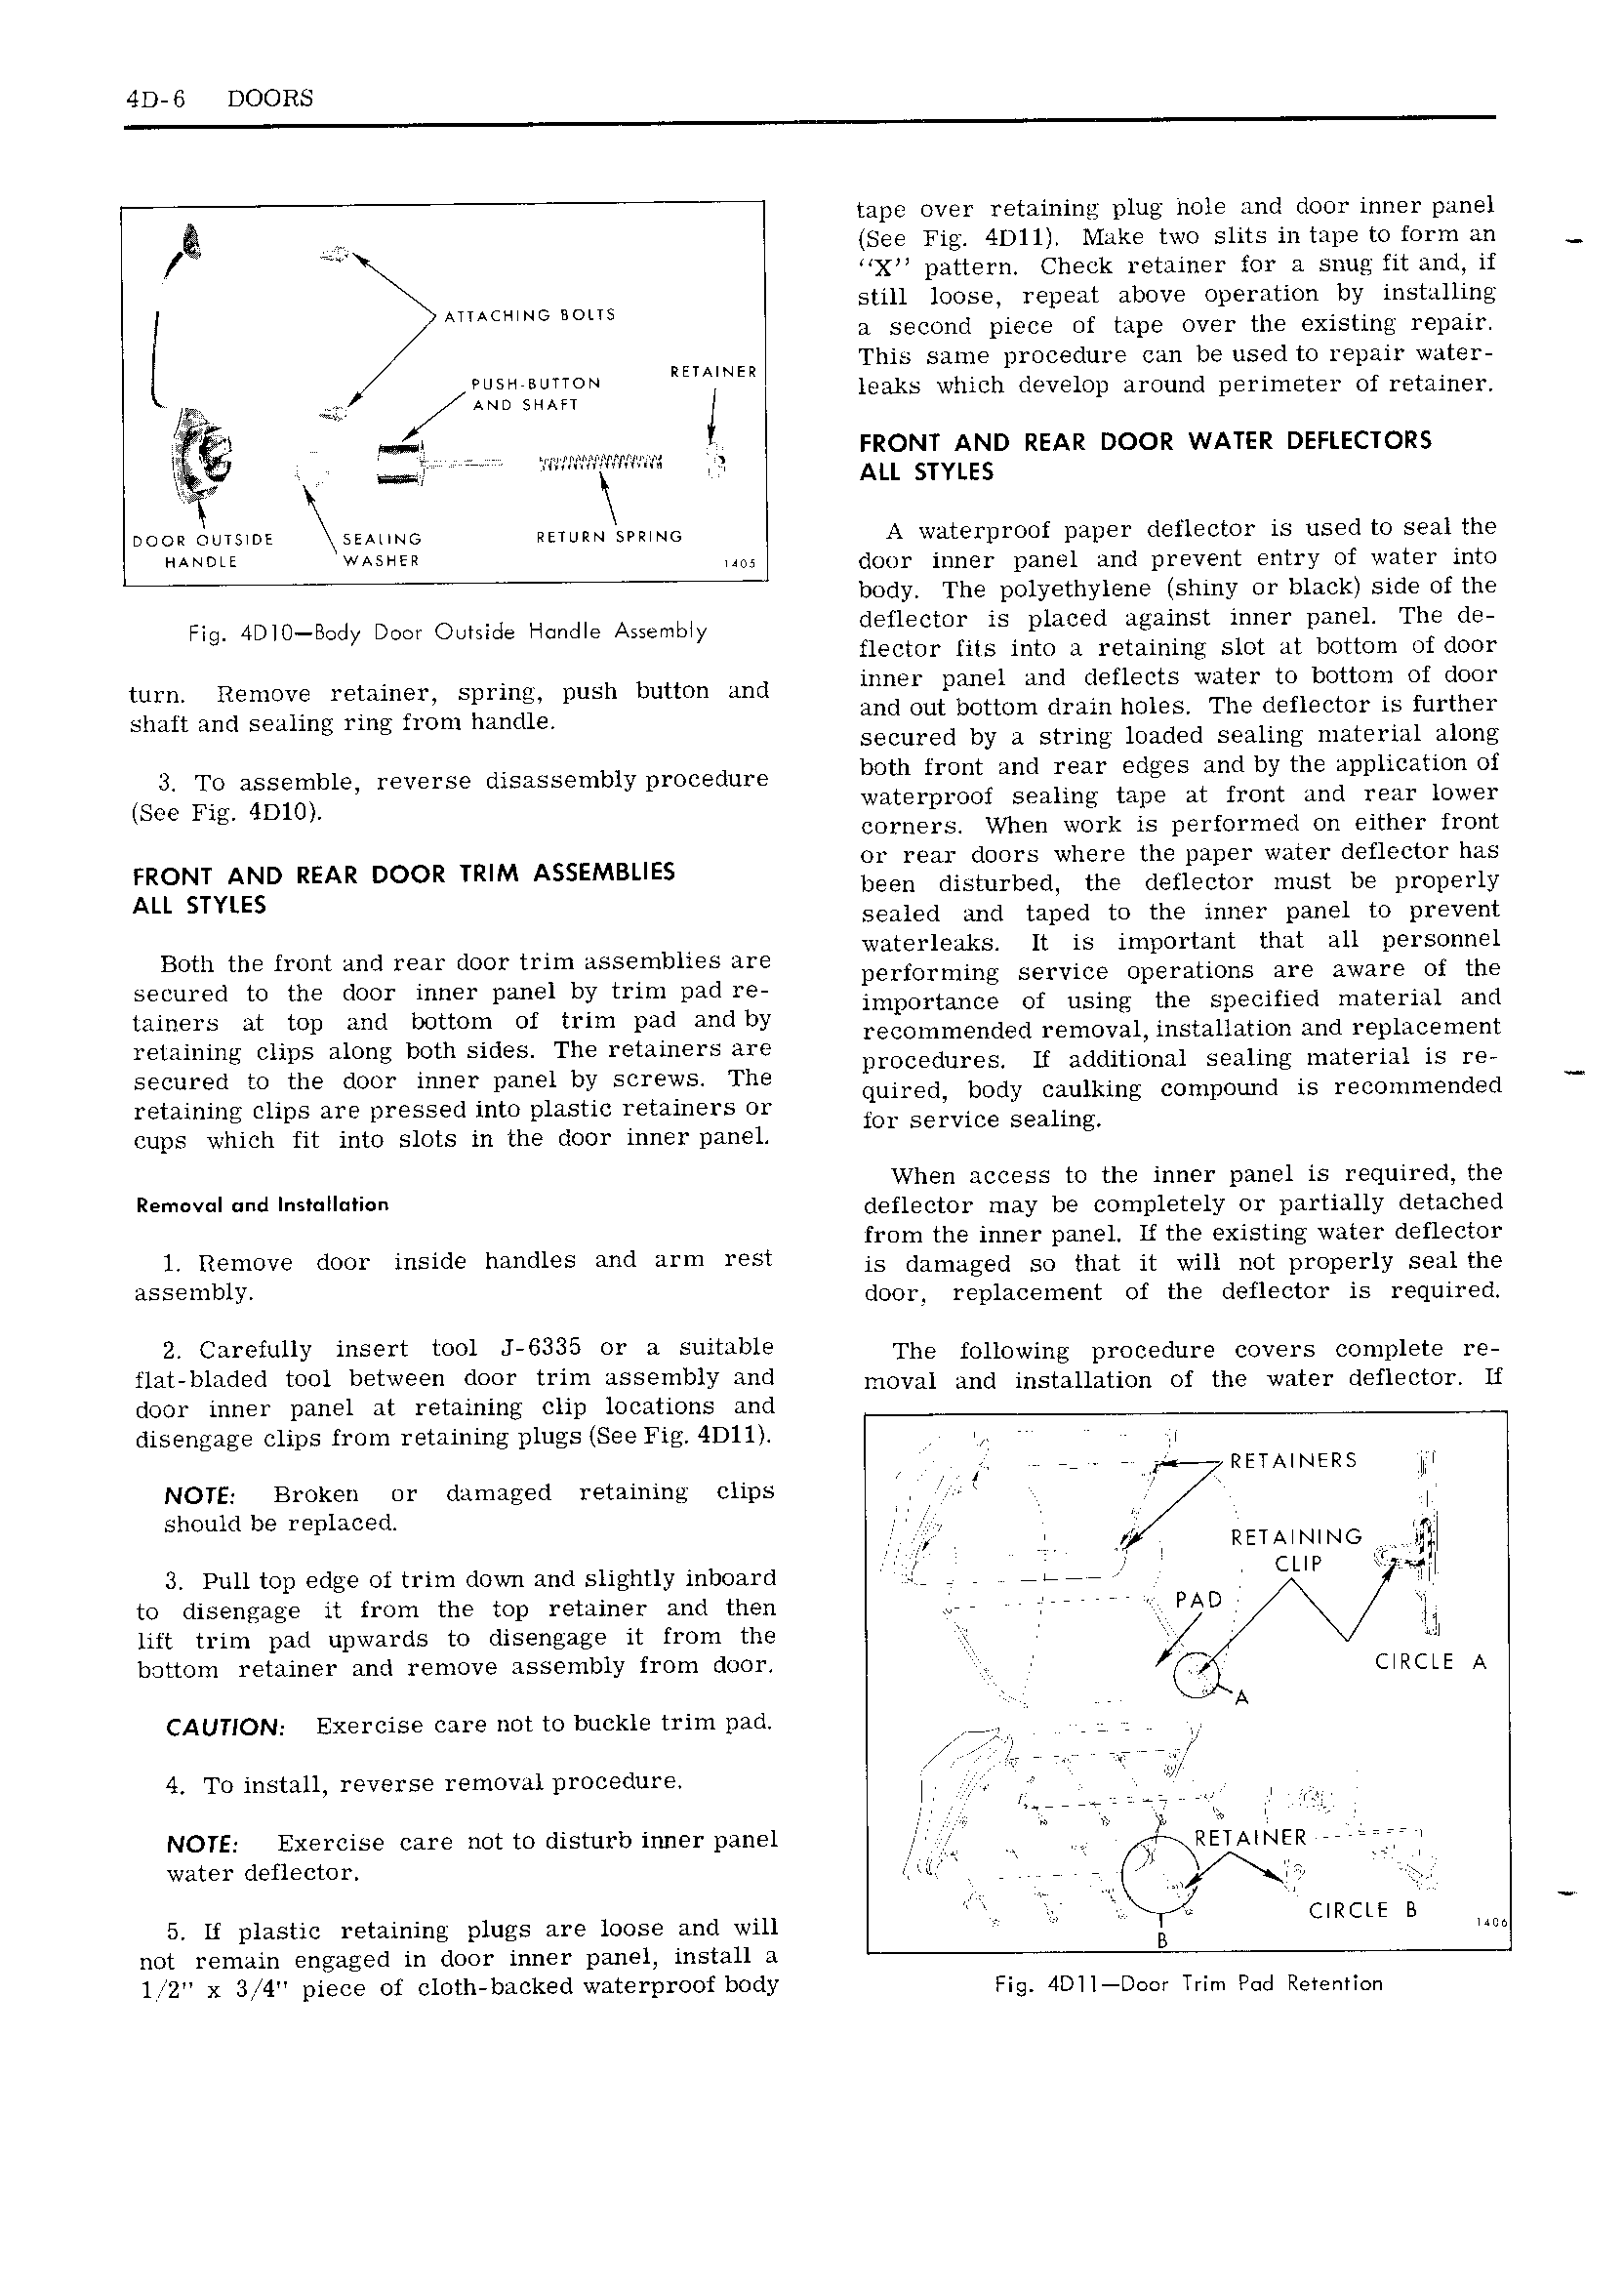
4D 6 DOORS ta e over retaining plug llOl9 and door inner nanel l l See Fig 4D11 Make two slits in tape to form an X pattern Check retainer for a snug fit and if T ATTACT TTNG wm still loose repeat above operation by installing a second piece of tape over the existing repair RETAINER This same procedure can be used to repair water PUSAVBUTTON leaks which develop around perimeter of retainer 2 Q ANo stun z Ti i V W FRONT AND REAR DOOR WATER Dmectons tl tas W t ALL STYLES mon momma szat No Raman spawn A waterproof paper deflector is used t0 seal the HANDLE W 5 im door inner panel and prevent entry of water into body The polyethylene shiny or black side of the Fig 4D O BOdy DOO Outside Handle Ammmy deflector is placed against inner panel The de tlector iits into a retaining slot at bottom of door mln Remove x mm 1 T Spring push button md inner panel and detlects water to bottom of door Shaft and Sealing ring from hgmueg and out bottom drain holes The deflectoz is fur thei secured by a string loaded sealing material along 3T TO assgmblg reverse disassembly procedure both front and rear edges and by the application of See Fig 4D10 waterproof sealing tape at front and rear lowei corners When work is performed on either front FRONT AND REAR DOOR TRIM ASSEMBUES pr l 11 iOi ESl ll9l E thepaper water dleilector his ALL STYLES Jeen is ur ec t e cet ectox must e proper y sealed and taped to the inner panel to prevent 1 t t txt zll l Both the front and rear door trim assemblies are Egggrimir Sgwie lg 3 uSt QTTHEEX n Secured to the bor inner panel by tum Padre imuortancg of using the s ecified material and tainers at top and bottom of trim pad and by ION Q MTE O 1 H Qt 1l uOn 1 dx E i r En Ent retaining clips along both sides The retainers are Ti C 1 CK glksgggnx S9i 1m T at9l L TT mb secuil d tO the door inner panel by Scr YS The quired body caulkine compoundbis recommended retaining clips are pressed into plastic retainers or Or Segvice eihn cups which fit into slots in the door inner panel g T When access to the inner panel is required the R v d aesieemr may be completely or pamaiiy demened from the inner panel If the existing water deflector 14 R nOV door inside nnnines and arm TEST is damaged so that it will not properly seal the nsselnlnlvn door replacement of the deflector is required 2 Cnrgiuuy insert mol J 6335 OY A Snninnn The following procedure covers complete re fmbblnded tmn l tW door trim uSS nnnY and moval and installation of the water deflector Lf door inner panel at retaining clip locations and disengage clips from retaining plugs See Fig 4D1l A T A A a 7 RETAINERS hTl NOTE Broken or damaged retaining clips T T should be replaced T TT TQT Tg T RETATNING TT wl 3 Pull top edge of trim down and slightly inboard ae 77 i CLIP Txl to disengage it from the top retainer and then x PAD lift trim pad upwards to disengage it from the dl bottom retainer and remove assembly from door C RCtE A V A CAUTION Exercise care not to buckle trim pad T T 4 To install reverse removal procedure T in r rv l T NOTE Exercise care not to disturb inner panel J TT T lv Tn E71A NgR water deflectoty TT p T 7 T T TT V TT F I 5 If plastic retaining plugs are loose and will E CIRCLE B on not remain engaged in door inner panel install a 1 2 x 3 i4 piece of cloth backed waterproof body F g 4o11 n O mm pq Retemton