Jeep Parts Wiki | Ford Parts Wiki
Home | Search | Browse
|
Body Service Manual August 1964 |
|
Prev
 Next
Next
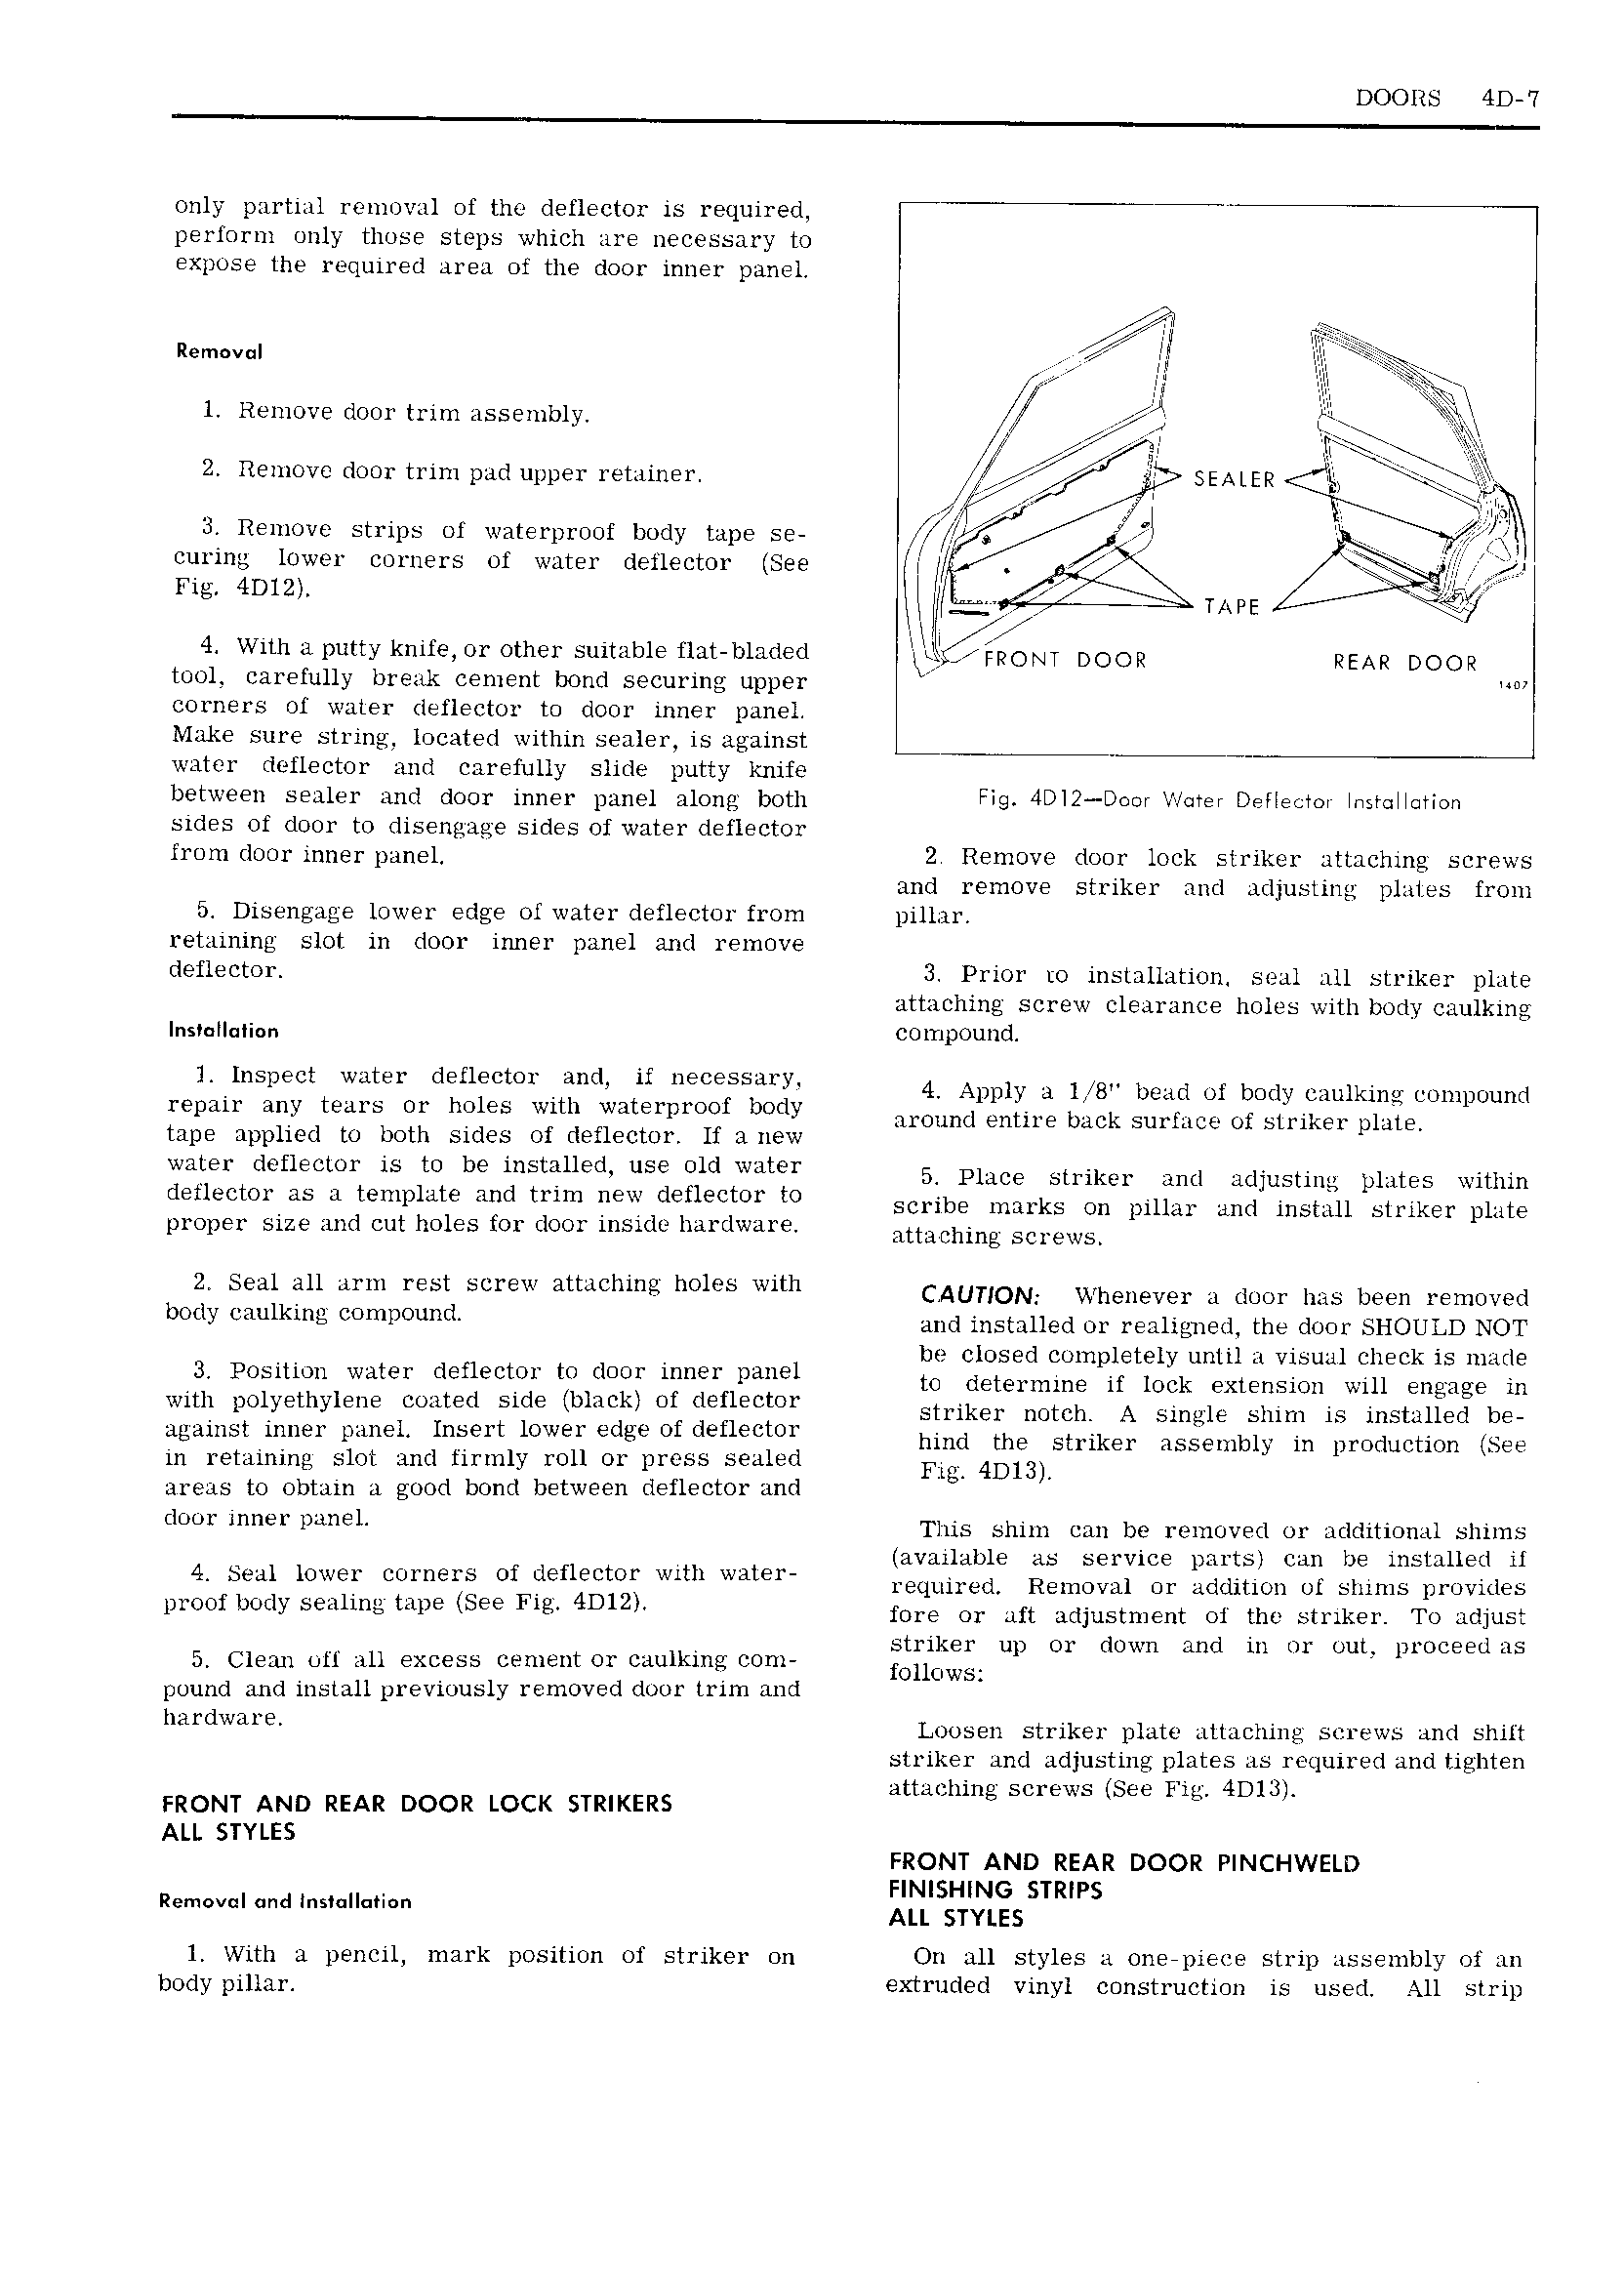
DOORS 4D 7 only partial removal of the deflector is required perform only those steps which are necessary to expose the required area of the door inner panel 2 Rem v l lg it ts v it in i 1 Remove door trim assembly V 7 wei t r n v so 2 R V el t V p ti emove iooi ti im p id uppei ietiinet Ah SEALER fi I e 1 T l lt 3 Reuiove strips of waterproof body M11 vtWi y J l J vit curing lower corners of water deflector See ft 1 Z wiz tl 1 TAPE 4 With a putty knife or other suitable flat bladed l l l jf FRONY DOOR REAR DOOR tool carefully break cement bond securing upper iw corners of water deflector to door inner panel Make sure string located within sealer is against water deilector and carefully slide putty knife lJ t V Il sealer and door inner panel along both Fig 4DlZ Door Water Detleutot lnstollotion sides of door to disengage sides of water deflector from door inner panel 2 Remove door lock striker attaching screws and remove striker and adjusting plates from 5 Disengage lower edge of water deflector from pillar retaining slot in door inner panel a nd remove deflector 3 Prior to installation seal all striker plate attaching screw clearance holes with body caulking Ins t Ii n compound lhqspect water defl CtO1 311Cl if C i U Y 4 Appjy D 3i bgud of body eanlking tgompound repmr any team Or holes wml Waterproof body around entire back surface of striker plate tape applied to both sides of tteflector lf anew water deflector is to be installed use old water 54 Place Striku and uuustmn plates Within deflector as a template and trim new deflector to Scribe marks On pmw and mstil Striker plug proper size and cut holes for door inside hardware attaching Screws 2 Sm im St C 3 t h 1 S h c Aur10N Whenever ti tieer nas been i emevea bOdY Cmukmg COmpOund and installed or realigned the door SHOULD NOT D be closed completely until a visual check is made 3 Position water deflect or to door innei panel tc dgt rmme if lock QXlE nSiOu will Engage in with polyethylene coated side black of deflector Striker notch A Single slum is installed b against inner panel Insert lower edge of detlector hind the Striker assembly in productmn SEE in retaining slot and firmly roll or press sealed Fw 4D13 areas to obtain a good bond between deflector and deor inner p m 1 This shim can be removed or additional shiins D if D 7 available as service parts can be installed if 4 heal lower Burner Of lleflectol with vane required Removal or addition of slums provides lnwofbody Seulmg mpg bee Fig 4D12 fore or aft adjustment oi the striker To adjust striker up or down and in or out proceed as 5 Clean off all excess cement or caulking com fOuOwS pound and install previously removed door trim and l ard Vm E Loosen striker plate attaching screws and shift striker and adjusting plates as required and tighten attaching screws See Fig 4D13 FRONT AND REAR DOOR LOCK STRIKERS ALL STYLES FRONT AND REAR DOOR PINCHWELD FINISHING STRIPS Removql and tns1 lI n ALL STYLES l With a pencil mark position of striker on On all styles a one piece strip assembly of an body pillar extruded vinyl construction is used All strip