Jeep Parts Wiki | Ford Parts Wiki
Home | Search | Browse | Marketplace | Messages | FAQ | Guest
|
Body Service Manual August 1964 |
|
Prev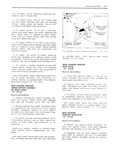
 Next
Next
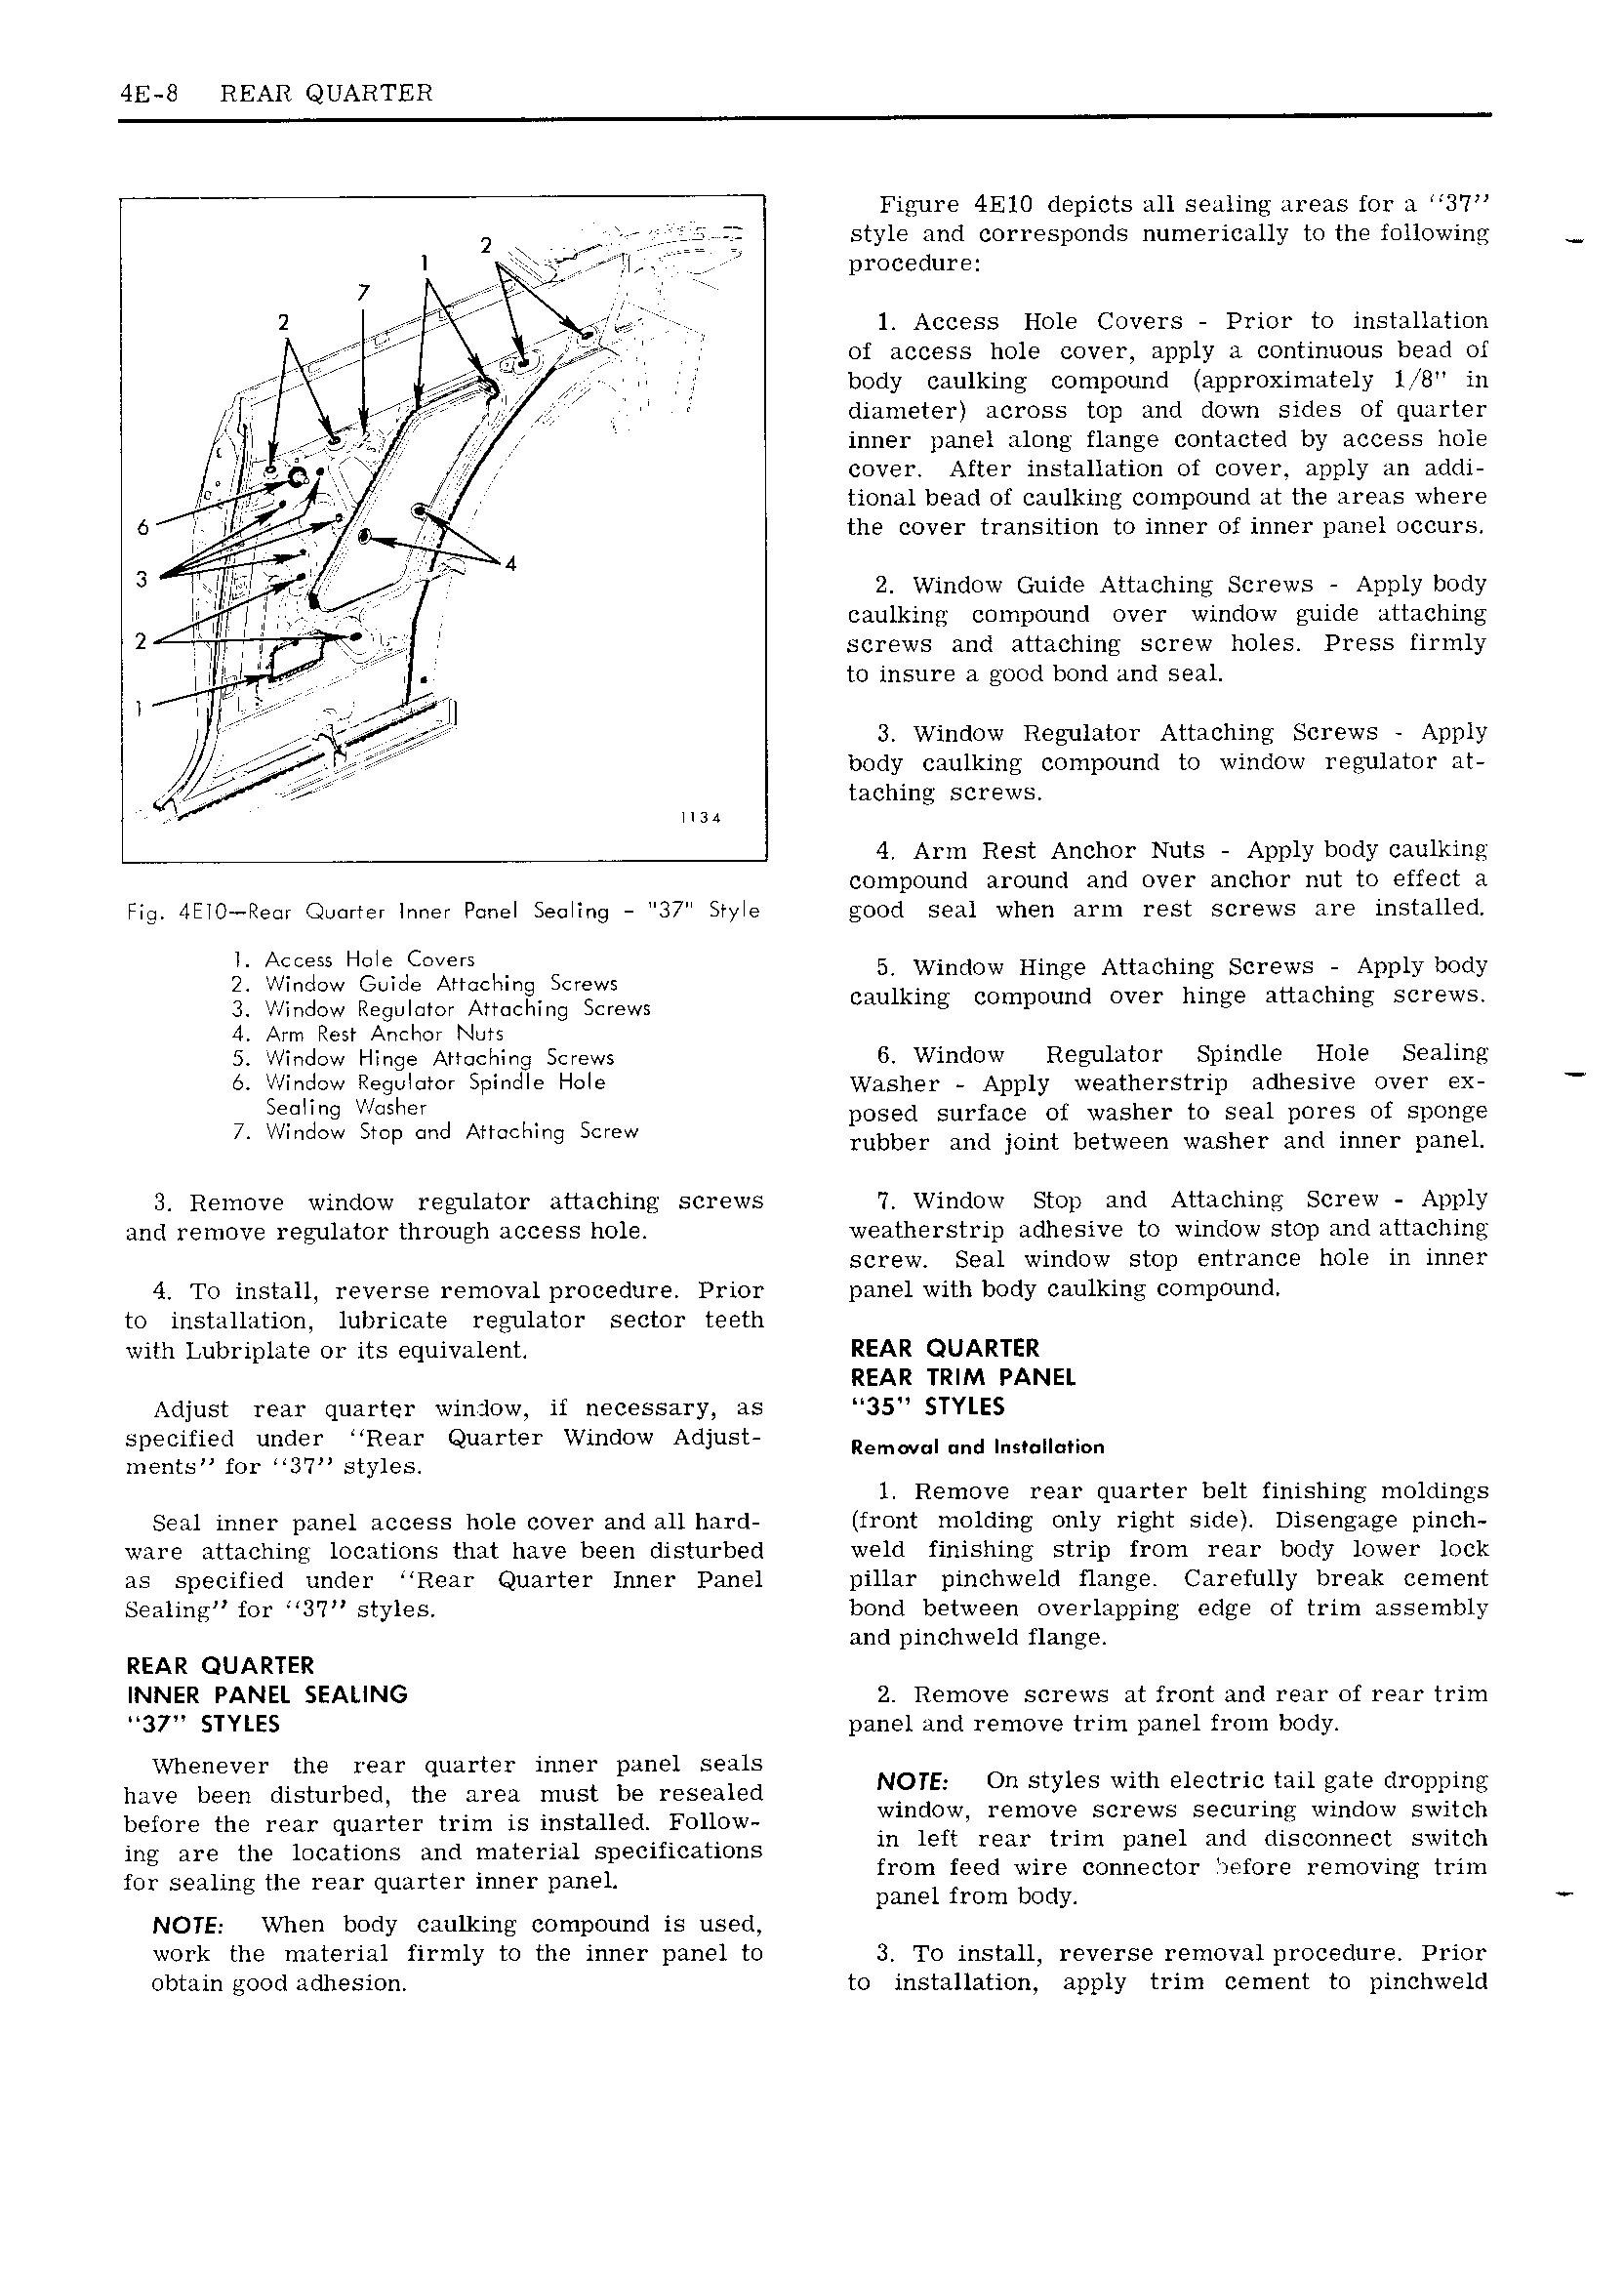
4E 8 REAR QUARTER Figure 4ElO depicts all sealing areas for a 3 7 2 VP r style and corresponds numerically to the following I YI VVV V procedure 2 ot p 4 1 Access Hole Covers Prior to installation Q V V VW 1 Q V5rri V of access hole cover apply a continuous bead of V g V body caulking compound approximately 1 V8 in V VV diameter across top and down sides of quarter VV E VV V inner panel along flange contacted by access hole A r V Vl V j J cover After installation of cover apply an addi rr J tional bead of caulking compound at the areas where 6 I V cr the cover transition to inner of inner panel occurs V al 4 3 I wil 5f V 2 Window Guide Attaching Screws Apply body il CQV I caulking compound over window guide attaching 2 V V V V VV VV iV screws and attaching screw holes Press firmly I iVI rI V V I to insure a good bond and seal 1 j ifi 7 ji 3 Window Regulator Attaching Screws Apply body caulking compound to window regulator at JQVVVV VV taching screws usa 4 Arm Rest Anchor Nuts Apply body caulking compound around and over anchor nut to effect a Fig 4EIO Re r Quarter Inner Panel Sealing 37 Sryie good seal when arm rest screws are installed L AQCESS Hel CMMS 5 Window Hinge Attaching Screws Apply body 2 Window Guide Attnchinn Screws V 3 Window Regulator Amlcping Screws caulking compound over hinge attaching screws 4 Arm Rest Anchor Nuts 5 r indow Hinge Attaching Screws 6 Window Regulator Spindle Hole Sealing 6 Window Regulutor Spindle Hole Washer Apply weatherstrip adhesive over ex iI 9 Vgasilm posed surface of washer to seal pores of sponge Nmd W p md Aimchmg Screw rubber and joint between washer and inner panel Remove window regulator attaching screws 7 Window Stop and Attaching Screw Apply and remove regulator through access hole weatherstrip adhesive to window stop and attaching screw Seal window stop entrance hole in inner 4 To install reverse removal procedure Prior panel with body caulking compound to installation lubricate regulator sector teeth with Lubriplate or its equivalent REAR QUARTER REAR TRIM PANEL Adjust rear quarter win Iow if necessary as 35 STYLES specified under Rear Quarter Window Adjust REmW ndInS l i n ments for 37 styles l Remove rear quarter belt finishing moldings Seal inner panel access hole cover and all hard front molding only right side Disengage pinch ware attaching locations that have been disturbed weld finishing strip from rear body lower lock as specified under Rear Quarter Inner Panel pillar pinchweld flange Carefully break cement Sealing for 3 7 styles bond between overlapping edge of trim assembly and pinchweld flange REAR QUARTER INNER PANEL SEALING 2 Remove screws at front and rear of rear trim 37 STYLES panel and remove trim panel from body Whenever the rear quarter inner panel seals have been disturbed the area must be resealed NpTE On Styles with 1 gate drcppmg bemre the mar quarter trim is installed FOuOW window remove screws securing window switch ing are the locations and material specifications left rea hm wml lf lfuscunngci SW1t h for sealing the rear quarter inner pg ne1 mm f d WIFE Connector ietore removing tum panel from body NOTE When body caulking compound is used work the material firmly to the inner panel to 3 To install reverse removal procedure Prior obtain good adhesion to installation apply trim cement to pinchweld