Jeep Parts Wiki | Ford Parts Wiki
Home | Search | Browse | Marketplace | Messages | FAQ | Guest
|
Body Service Manual August 1964 |
|
Prev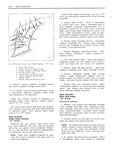
 Next
Next
REAR QUARTER 4E 9 flange surface contacted by overlapping forward working material down and outwards to remove edge of trim assembly to assure good retention wrinkles Install previously removed parts REAR QUARTER REAR QUARTER FRONT TRIM PANEL STATIONARY WINDOW 35 STYLES 35 STYLES Removal and Installation Removal l Remove front screw on rear quarter rear 1 Remove rear quarter garnish moldings and trim panel Disengage pinchweld finishing strip rear quarter reveal moldings see Molding section from rear body lower lock pillar pinchweld flange of Body Service Manual Remove rear door sill plate extension 2 Remove quarter window upper and lower re 2 Carefully break cement bond between over tainer and belt finishing molding supports lapping edge of front trim panel and pinchweld flange Remove front trim panel attaching screws 3 Using a suitable tool carefully break seal and remove trim panel from body between window rubber channel and body opening With the aid of a helper carefully push glass and To install reverse removalprocedure Prior rubber channel assembly inboard and remove as to installation apply trim cement to pinchweld sembly from opening flange surface contacted by overlapping edge of trim assembly to assure good retention CAUTION Ugg nap SO that glggg does not strike body metal Edge chips can cause solid REAR QUARTER tempered safety plate glass to shatter Do not WHEELHOUSE TRIM COVER attempt to grind glass 35 STYLES Installation Removal und Installation l Clean off old sealer from rubber channel and 1 Remove second folding seat back filler panel body opening to assure a smooth sealing surface Remove the rear quarter front and rear trim panels 2 Apply a bead of black weatherstrip adhesive into glass cavity in rubber channel and install 2 Remove screws securing second folding sent rubber channel to glass back retainer and support and remove retainer and support from xvheelhouse 3 Apply a ribbon of inedium bodied sealer com pletely around window opening 3 Carefully break cement bond between wheel house trim cover and wheelhouse panel and remove 4 Insert window assembly into opening and in trim cover from body stall upper and lower window retainers 4 To install reverse removal procedure Prior 5 Using a pressure type applicator apply weath to installing wheelhouse trim cover apply neoprene erstrip adhesive black between glass and lip of type weatherstrip adhesive 2 wide completely rubber channel completely around outside of around inside perimeter of wheelhouse trim cover windowl Also apply weatherstrip adhesive to area around cut out for second seat back support on wheelhouse 6 Clean off excess sealer and replace previously Position trim assembly to wheelhouse and apply removed parts